Kamaloha
-
Posts
9 -
Joined
-
Last visited
About Kamaloha

Recent Profile Visitors
655 profile views


Kamaloha's Achievements
")
Newbie (1/14)
-

-

-
 Rare
Rare
Recent Badges
-
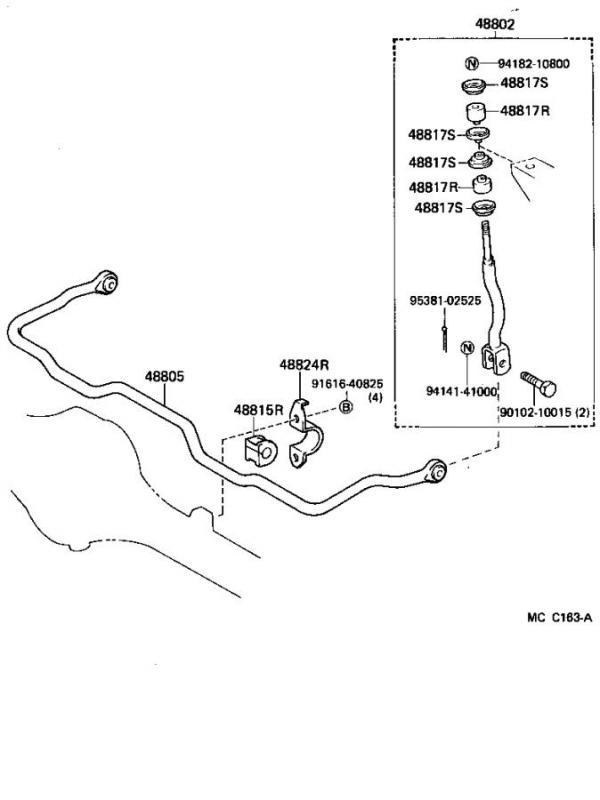
I gave the right search term for the parts.toyota.com web site, but if you want specifics, the sway bar link bushings are 48817-30010 (4 required), bushing washers are 90948-02015 (8 required) and cotter pins are 95381-02525 (two required).

-
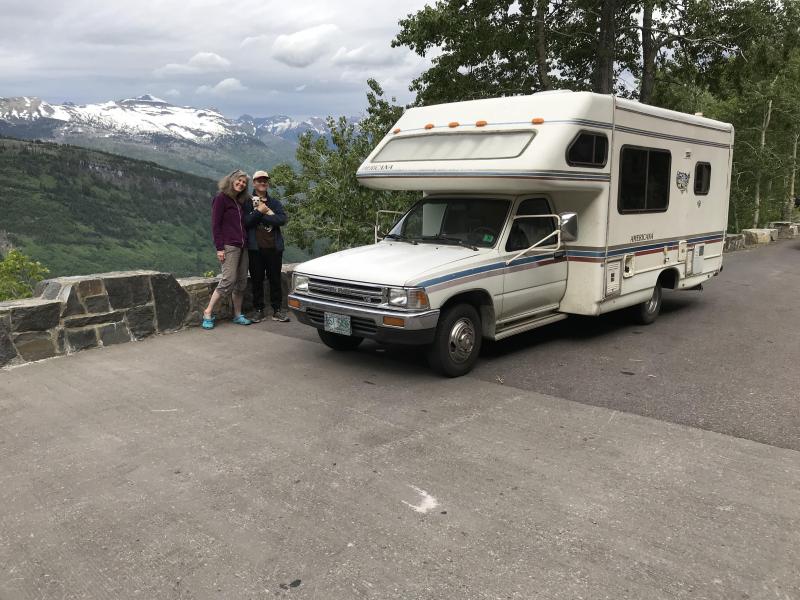
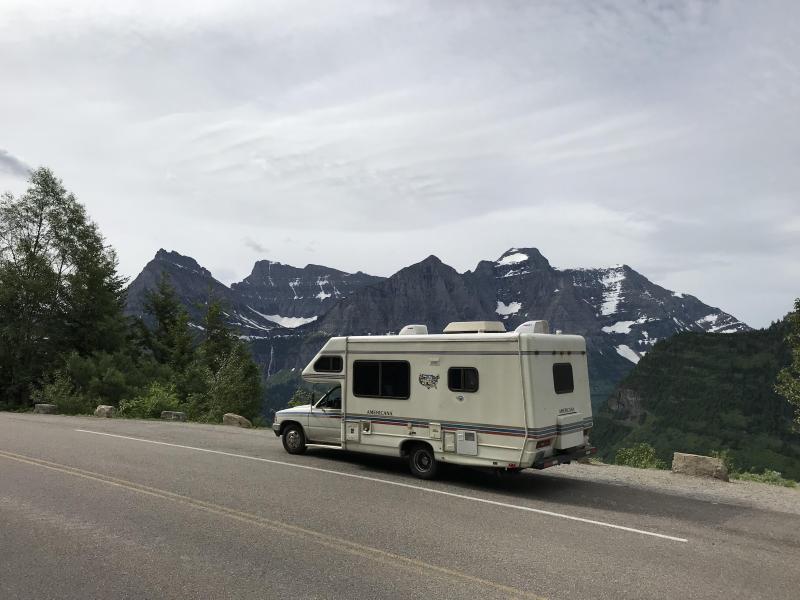
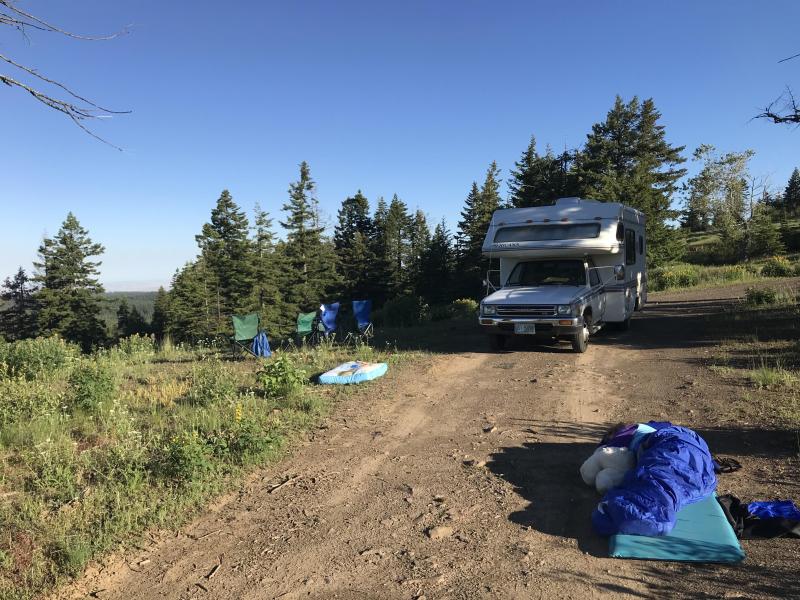
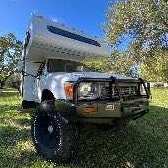
I've never posted here except when I originally joined, and I think I was in low-bandwidth Guatemala at the time so no pix. We have a 1989 Leisure Odyssey Fargo Americana. The layout is just like the brochure in a post above. I bought it in 2013 with 49K miles on it for a one-way trip from NH to Guatemala, where we (two adults, two teenagers, and two dogs) lived in it while fixing up a boat. We intended to abandon it there (give it to a worthy Guatemalan helper) and sail home. However the boat took longer than the nine months we were there, and meanwhile we had fallen in love with it, so we drove it back home the long way. We've since done a second round-the-USA tour. I now have an itinerant job so I live in it about six months a year. It just turned over 100K miles. I don't suppose we'll ever get rid of it. Besides having been through five countries (USA, Canada, Mexico, Guatemala, Honduras) it probably has notoriety as the strongest Toyota RV in existence. The Mexican "Tumelos" (Speed bumps) are evil and tore the heck out of the lightly built extended frame of our "Casa Movil", which was so bent by the time we arrived in Guatemala that the floor separated from the box by five inches at the stern (our dogs could get in and out without opening the door!). To straighten the bent frame and reinforce it for the trip home, first we tried jacking it up from the rear bumper (not enough weight) then filling the interior with four 55 gal drums of water (yep, that bent it back). Then we sliced off all the rear undercarriage, added 3" steel I-beams fore and aft and 2" crossbeams, and welded the undercarriage back on. Meanwhile, while the box was up off the frame I replaced the aft six feet of floor that was rotting out. (Of course we were still living in it while the work was done!!!) The last picture shows the extra frame member aft of the rear wheels. Other than this and the fiascos with the fuel system described in other posts, it's been a good companion. It's still just right for four people and two dogs, although the teenagers are full-grown now so squish a bit in the cabin berths.
-
Call off the dogs, I found the part numbers. FYI, to get the right parts for our RV's go to parts.toyota.com and select 1989 Toyota Truck Truck DLX V 3.0L MT .
-
Two more places I forgot to mention: The fill access to the black and grey water tanks where it penetrates the floor was a favorite door for them.
-
Just to offer an alternative point of view, steel wool is extremely flammable (plus it rusts); as a Boy Scout I used to carry a wad of steel wool and a 9V battery, it's a fool-proof fire starter. The high-expansion foam intended for home insulation is fire retardant and, well, designed for living spaces. Once it has cured there is no more off-gassing. I just had my house insulation replaced and they used gallons of it to seal all the air leaks. Now onto the mice. My RV has served as home to many. I have had to go fairly nuts with the foam. There are dozens of places they can get in, mostly around the joint between sides and floor; the shower drain trap holes, gas plumbing holes, etc. For the most part access is from below, just roll around on a mechanic's scooter and plug everything you see. Then add window screen over the engine air intake and cabin air intake, because they love to build cozy nests in the cabin and engine air filters. I've finally got them banned from the interior, but they still love to sit atop the engine and eat seeds, I find piles of empty shells on the engine every time I lift the hood.
-
My two cents... don't EVER replace the original high-quality OEM tank. Here's my story... my RV had sat with an empty tank for like twenty years before I bought it. Luckily it was in a barn so not completely rotted away, but the fuel tank had rust inside which kept clogging the injectors. Like an idiot I bought a new aftermarket tank (along with every other part of the fuel system eventually - new hoses, lines, filter, injectors...) Well the tank failed after six months. Spot welds on the bottom tore out and it started leaking. Got it replaced under warranty. Replacement leaked after six months, same story. Searched for OEM tank. None available. Searched for junkyard tank. None available. Bought much more expensive after-market tank. Failed after six months. It would appear there is only one actual manufacturer of after-market tanks because they are all the same no matter how much you pay, and all have the same design flaw of spot welds in the bottom that fatigue and tear out. I'm on my sixth replacement tank in four years. This one is holding, because when I bought it I immediately encased it in a heavy layer of marine epoxy and fiberglass, so when the welds tear through (they probably already have) there is a solid fiberglass shell outside to hold the gas.
-
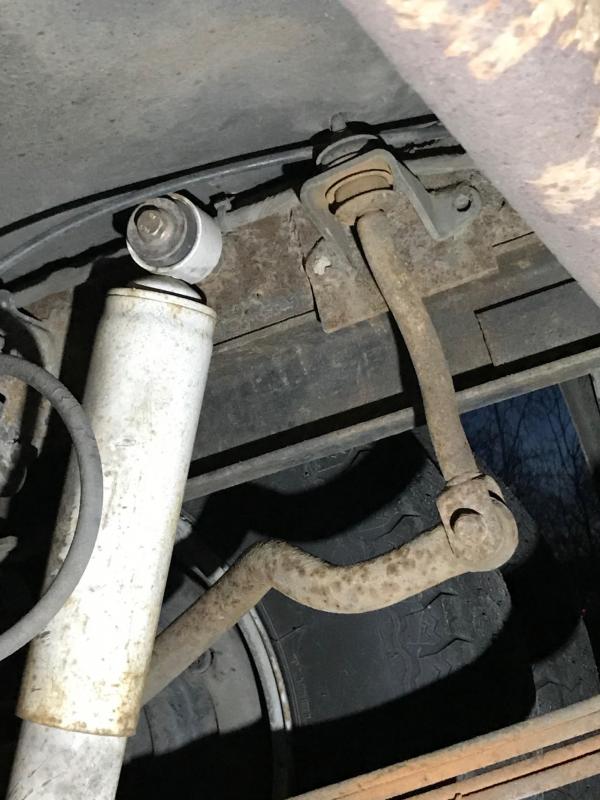
Hi, I have a Leisure Odyssey Americana Fargo. It just failed state inspection; the mechanic tells me the rear sway bar links are "loose", although they feel fine to me. I'm having trouble finding them on the web. Any ideas? (The links in the above thread to 4Runner Truck parts aren't at all the same suspension, since they show coil springs instead of the leaf springs we actually have back there).
-
I have a 1989 Leisure Odyssey Americana with the 3VZE engine. Two years ago I was diagnosing a power/performance issue and it came down to two injectors totally blocked with rust dust. I eventually cleaned the fuel rails and replaced all injectors, filters, fuel lines, and tank to rid myself of rust. (The tank had sat empty for fifteen years by PO and was lined in rust, the root cause of the problem). All is well and the RV has no power problems. However, the one big mistake I made was replacing the fuel tank. Being naive I purchased a nice inexpensive new non-OEM tank from an online site for about $90. This tank was the same shape as the original; the only difference was the original had a drain plug and this did not. No big deal. Then the replacement tank started leaking in six months. I got a warranty replacement, but had to ship back the leaking one which was almost as much as I paid for it. The replacement failed in six months too, and no warranty this time. Bought s third online. It failed too. The fourth one I got from Advance Auto for over twice the price and received THE SAME TANK. Yep, you guessed it; that one just failed, seven months later. This time though all I had to do was return it to a store near me (no shipping) but the warranty replacement still took a week to arrive, stranding me in Seattle on a long road trip. So now I am on my FIFTH replacement fuel tank in two years. All the tanks have had the identical failure mechanism. They are much thinner steel than the OEM tank, and there is a slosh basket spot-welded to the inside bottom of the tank in which the fuel pump sits. Those spot welds create a stress riser in the steel tank skin, and since the bottom is flat and oil cans as you drive, the welds eventually crack through at the edges and leak. In the last failure all eight welds had broken and the basket was flailing around loose in the tank. This time when I installed the new tank (same lousy design) I coated the outside bottom in two layers of fiberglass and epoxy first. When these welds break, as they undoubtedly will, hopefully the fiberglass and epoxy will prevent a leak and the show will go on. Bottom line: Stay as far away as possible from replacement fuel tanks. If yours is rusty, find a way to line it with epoxy. I've inquired around from a dozen different sources and every one sells the identical crap tank. AFAIK there is only ONE aftermarket manufacturer and their product is garbage. On a positive note, I highly recommend the Fuel Tank Patch Kit made by PermaTex and sold at O'Rielly's. There seem to be two types: A cold-mix solid epoxy stick and a liquid epoxy that comes with a fiberglass patch and a mastic plug to stop the leak while you patch it. The first is useless as it can't patch a leaking hole. However the second is great; the mastic stuff they include really stops the leak so you can then clean and dry the surface to apply the patch. Just be aware the epoxy fires off VERY quickly so be ready to work fast. I am attaching a video showing the leaking spot welds. IMG_4815.MOV
-
RV: 1989 Leisure Odyssey Fargo Americana. All, Can I pick your brain? I am trying to decide how to fix what is collapsing in the structure of the RV box. It would appear that some plywood floor on the left side beneath the shower, sink, stove is not original. Have any of you you replaced that? What was the sequence required to do it? What did you discover about how it was put together? I can't figure out what actually supports the sides and roof of the box, ie how it is attached to the floor. Right now what I am seeing is plywood that appears to be in excellent condition under the stove, but it does not go all the way forward and sit on the lateral steel frame member behind the wheels; it is cut about five inches behind the frame member, and it has displaced downward about three inches behind that cut, causing the entire side of the box to also be displaced downward. On the right side under the fridge, as well as under the bathroom cabinets across the back, the floor plywood is delaminating and unable to bear weight, obviously from long term water intrusion. I will need to figure out how to support the box so I can replace that plywood. Any tricks you figured out would be appreciated. If it is indeed the damaged floor that supports the box, as it would appear, it's going to be pretty tricky to figure out how to replace that plywood.