Bob the Builder
-
Posts
85 -
Joined
-
Last visited
Content Type
Events
Profiles
Forums
Gallery
Everything posted by Bob the Builder
-
We are on the same page for a lot of this stuff, Doug. Lowe's has a stain blocker type flat white, with bonding agents mixed in that help it to bond with other paint, glue, etc. $29 a gallon and I probably won't use the whole thing even with two coats. Covers really good and is pretty thick to fill smaller imperfections. The jack knife sofa sits probably 8" out from the wall at the base of the seat back. I'm thinking of a shelf at that level to the wall for the full length to roll up the bedding lengthwise and stow it behind the seat back when up. Underneath has about 18" of height from the floor. Although the water tank sits for the first half at the foot leaving 36W+ x 24D x 18H, I'm considering perhaps two small carry-on style roller bags slid under the remaining space with a short rail at the back to roll over and simple cord style net across the front until I decide what to build in under there. We want to use this thing for a while before entirely done to see what suits our travel style. I have one of those hot knives, just haven't used it for anything yet and the ac is 15+ degrees tilt when trl is level. You know what they say, great minds think alike! (as long as I ignore "Bob" for the most part.) All I need is a whole lot more of your energy. Started on rebuilding the windows today. How far has anyone taken these apart. Have samples for the rubber seals coming but I think I'm deeper into them than that already. Just not sure where/when to put any sealant btwn plexiglass and frame etc?
-
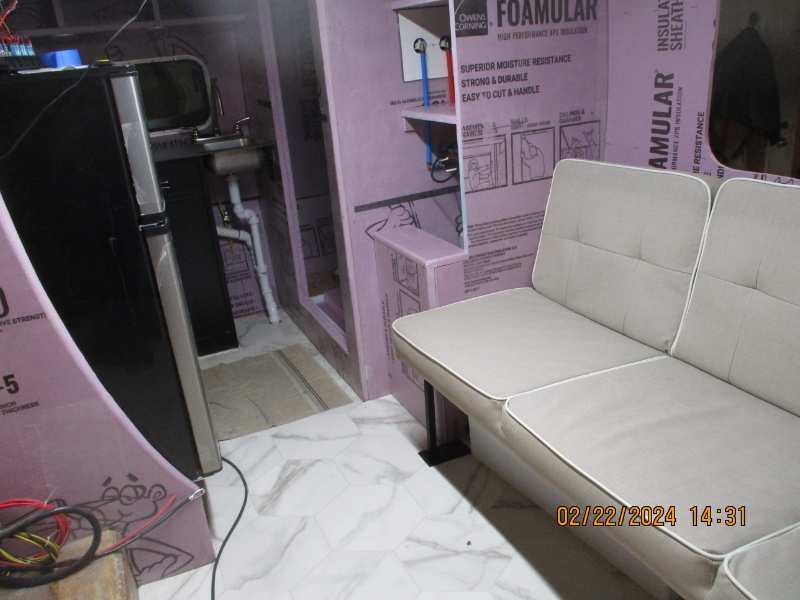
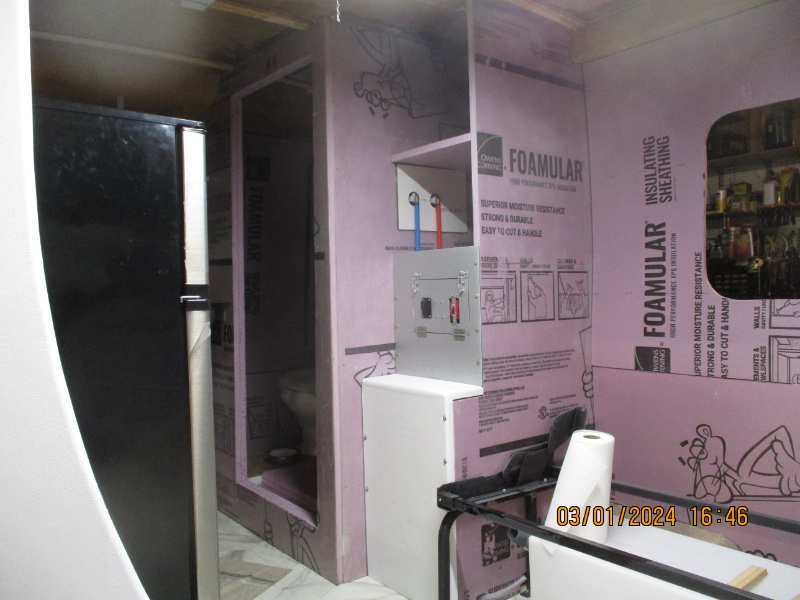
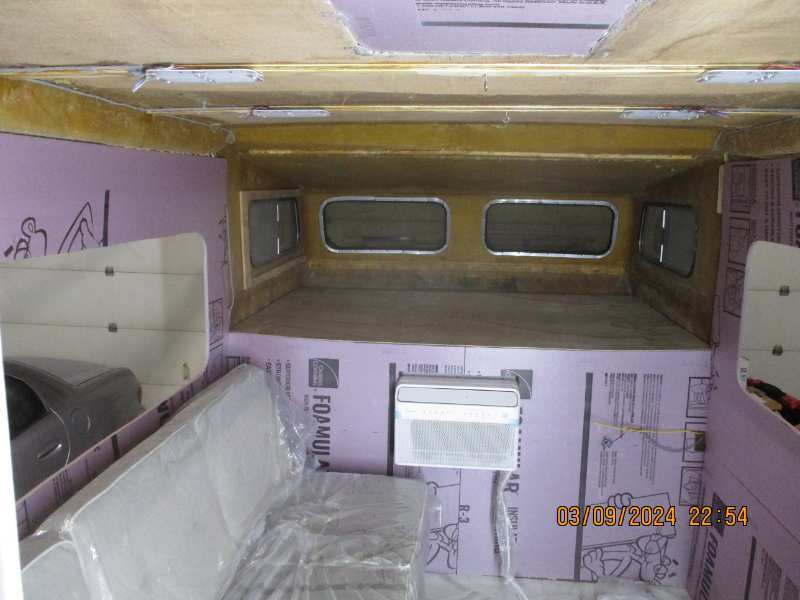
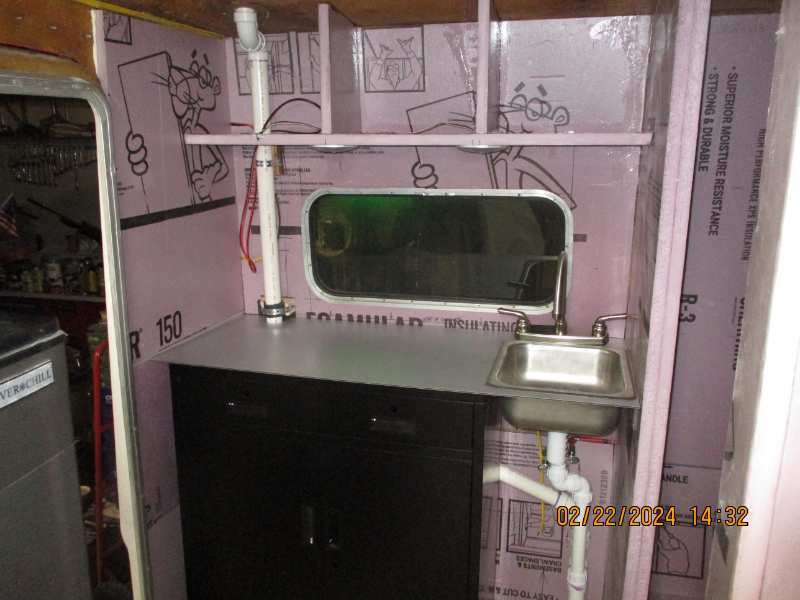
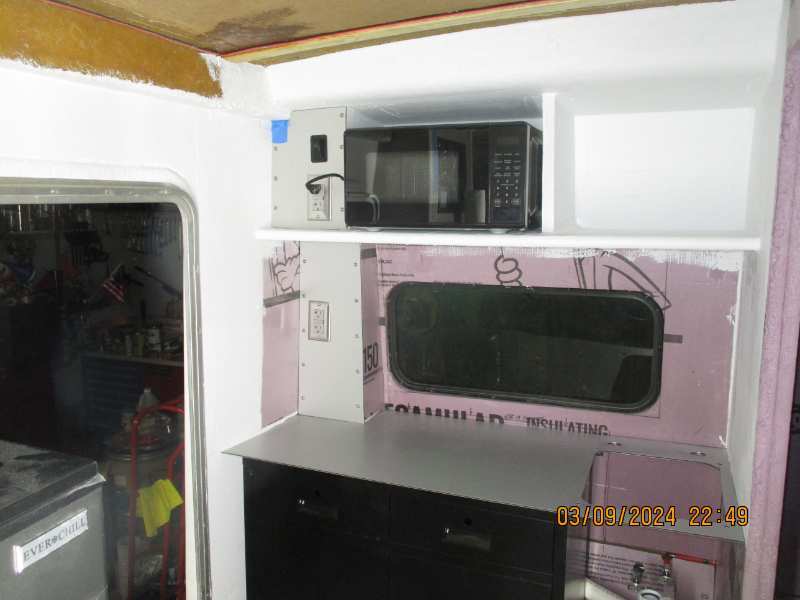
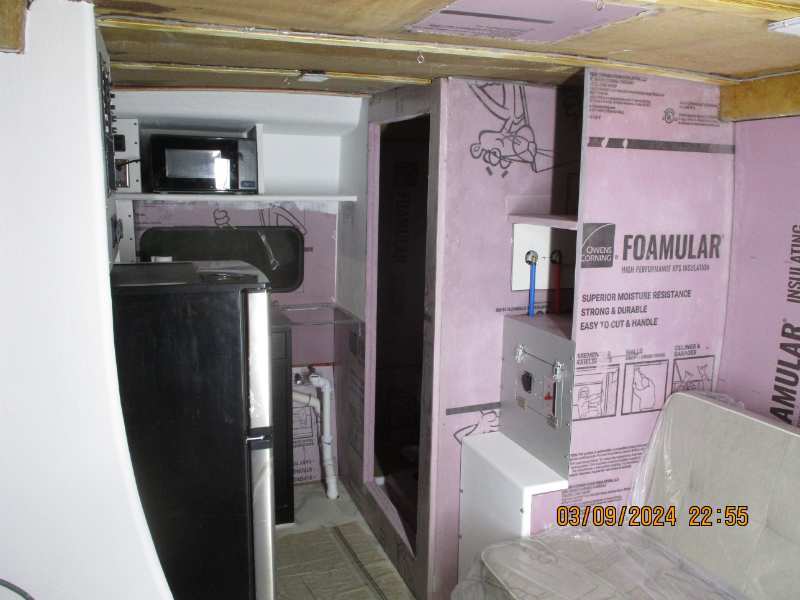
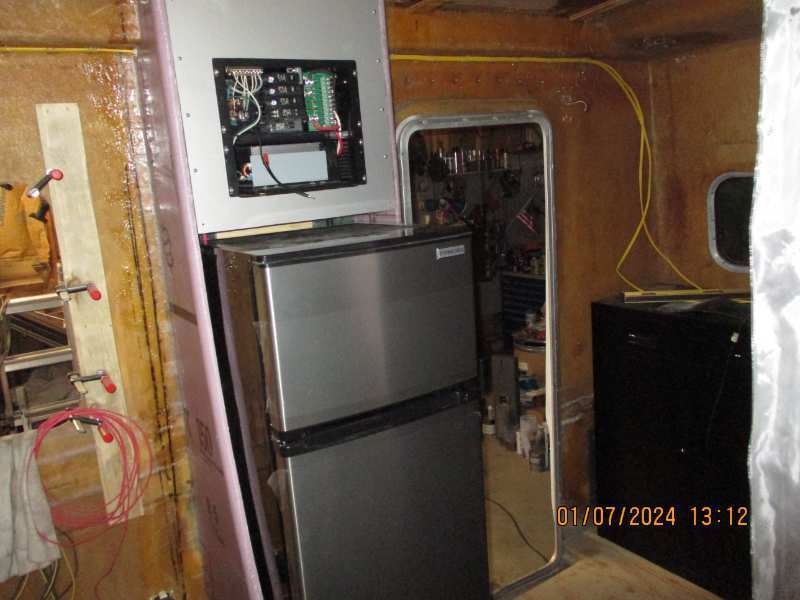
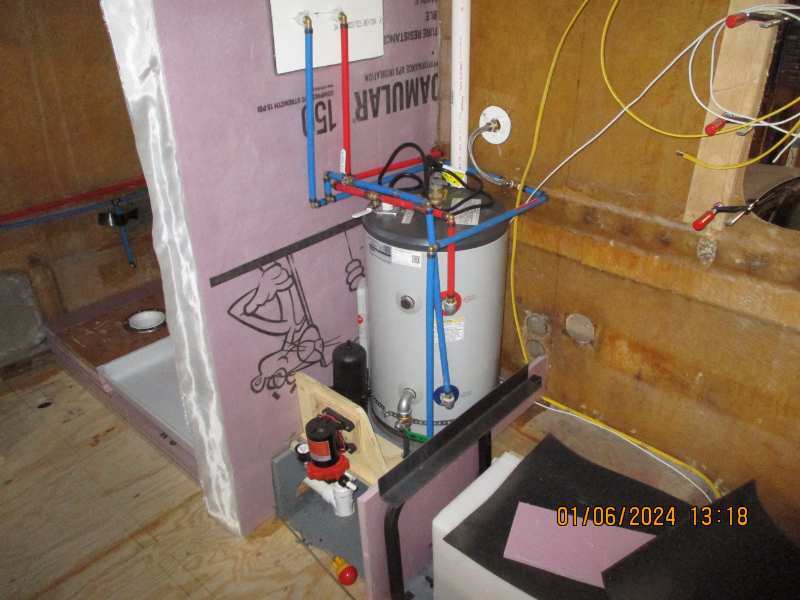
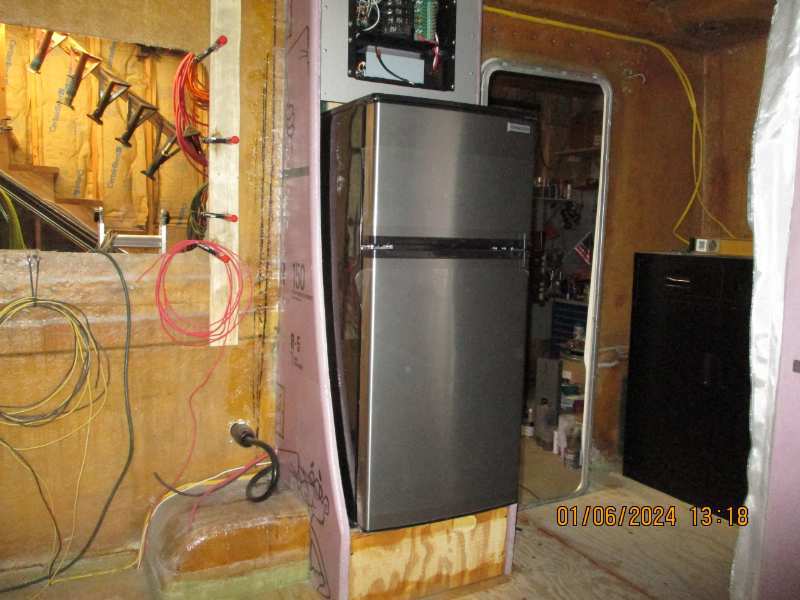
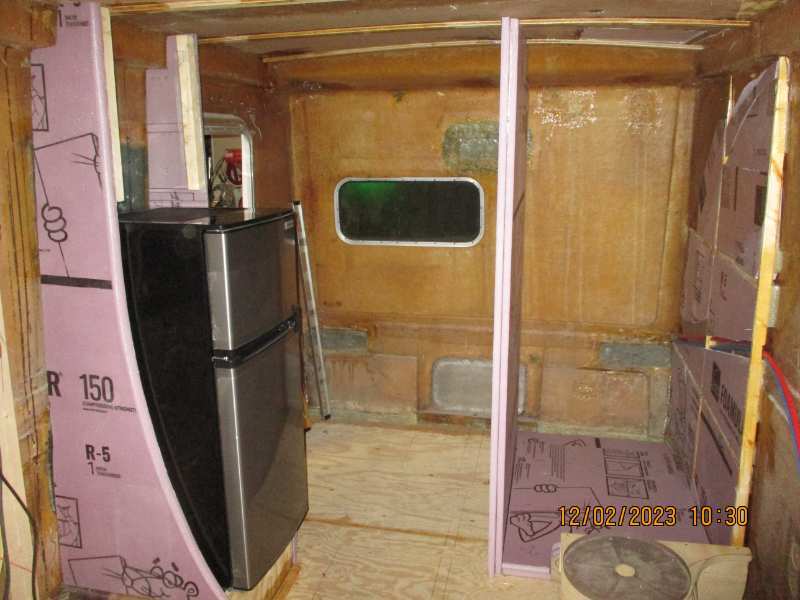
I figure I should probably update my progress as it has been quite a while since posting. I have been staying busy on the project and checking in almost daily on the forum. Doug, your pace on the build puts me to shame. I do accomplish something every day though, and even if I can't say that I see a light at the end of the tunnel, I can see a light! I thought I had found some new windows for the sides, but they were for 1 1/2" walls so I'm now at the point of rebuilding mine. I'll go back and read all the posts about doing the windows and I do have where to get the rubber seals from before. The power center and refrigerator are in place although I still need to make the bottom mount face plate that will hold it from walking out, (the base frame slides under brackets at the back). I have pretty much finished up this week on the kitchen counter area except for the backsplash and some little items like trim, etc. Have mounted the jack knife sofa/(wife's bed), and much to my delight, it opens past the front mounted ac. "Bob" told me it would, but we know about "Bob's" eyesight and wandering mind! It's been quite a while since he engineered that part of the build. Ran a pressure test on the shore plumbing supply and all fittings except the water tank and 12 volt pump. I was sweating that one; "Bob" again! Pretty much buttoned up the hot water heater cabinet and installed the electrical panel for the water heater and 12 volt pump switch. I made the panel fold out with the plug in for the water heater on the back side and it also gives me access to the valves for the water heater/ hot/cold water supply. I am still amazed at the strength of the styrofoam and fiberglass laminates and I will super pumped if the weight of the build comes in anywhere close to my plans. Enough carrying on, just wanted to show some progress. I'll post a few pics. Let me know what you think, all input is useful.

-
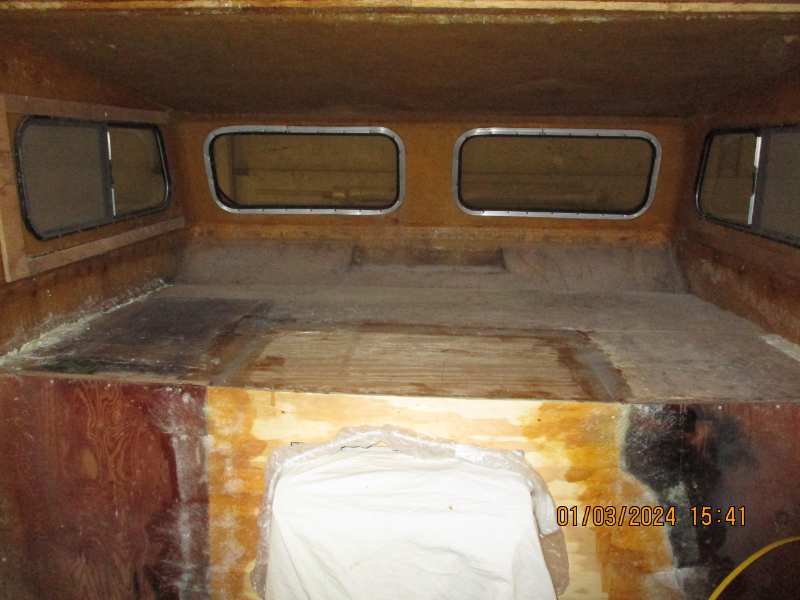
I have an 82 Sunrader shell I'm working on and I just measured the bare dimensions this morning for the over cab area. I came up with a rv "full" size for the mattress off of a chart of rv size mattresses.. 53" by 75" is the full size mattress that best fills the area in mine. I don't know if the years, etc. would make yours different or how the bare walls vs finished might affect the area compared to yours.
-
Bathroom wall covering question for the group. Has anyone considered or heard off anyone gluing roll linoleum on the bathroom walls? Totally insane or what? It's waterproof, doesn't weigh very much considering how small the pieces will be for each wall. Remember I will be gluing it to the fiberglassed styrofoam so my bathroom is already pretty much waterproofed. Just wondering if anybody has done it, has thoughts about how to, or has seen it done. After all, they do accent walls and such with it.
-
Doug, I hope you haven't already name your sunrader like some of the folks on here. I think with the way you are going with all of the fancy appointmens, etc. we'll have to call it "The Sunrader Hilton!". Sure is going to look spiffy. Keep er up.
-
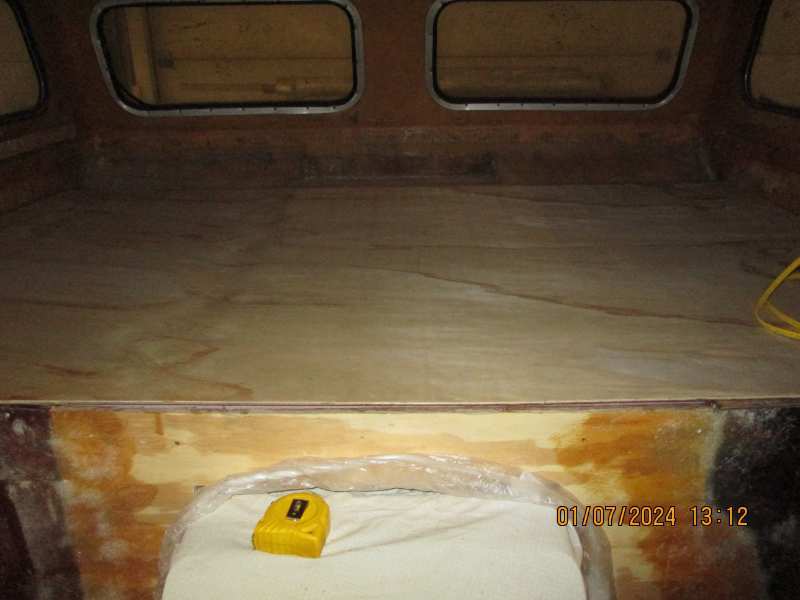
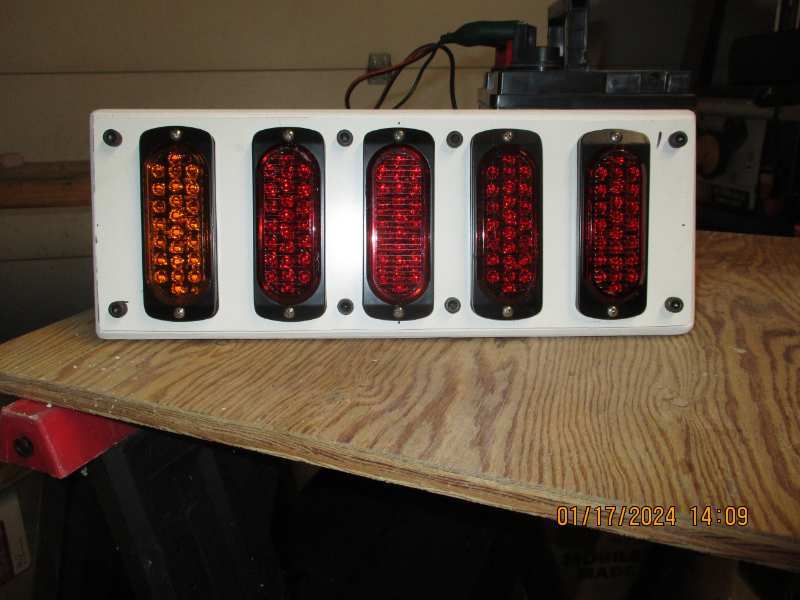
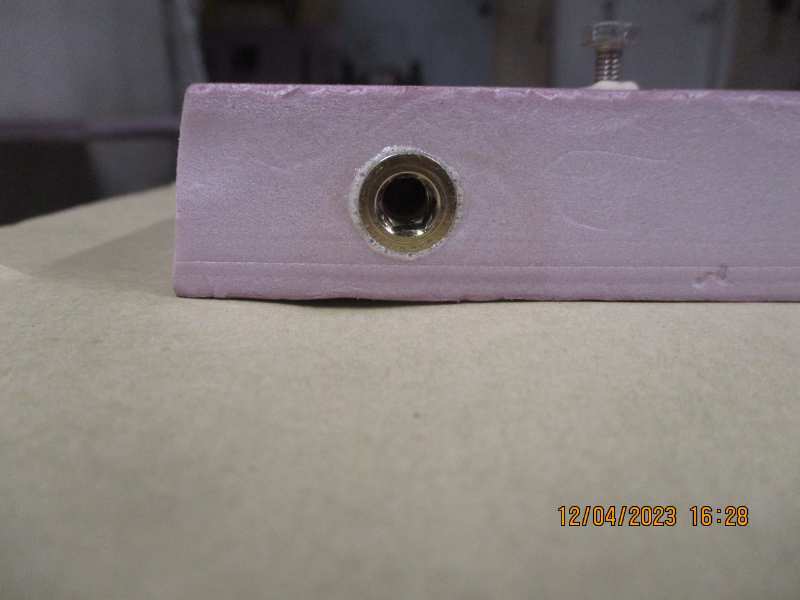
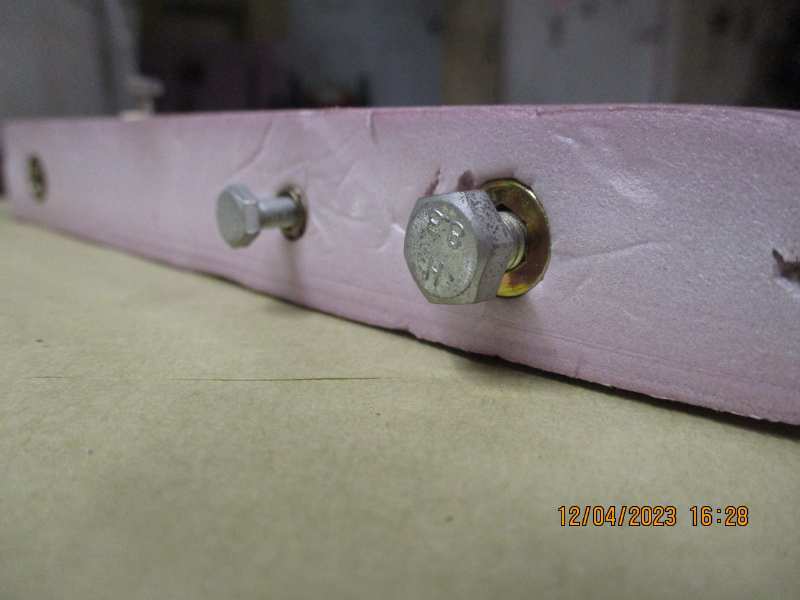
Well, I got the Great Stuff hd construction foam in and it does like they say. Only thing is they say you can leave a can on the gun as long as you shut it off, and start it again whenever. Almost didn't get the $54 gun going again after maybe four days. Ran the cleaner through it and managed to get it back to operating as it should, only I don't leave product in the gun anymore. Clean it after each use now, so I try to get several things ready before I fire it up. Got the styrofoam and plywood in the bunk glued down and it feels very solid. I'm trying to pick and choose what I work on in the colder weather as my garage stays about 50-55 degrees. I had gone through the many types and styles of camper tail light modules and decide I would make my own. Happy with how the first one turned out. Glued a plate on the inside with nuts JB welded to it and wired in a weatherpak connector so I can remove the light module from the outside only in the future. Now that the left side light is in, I will finish enclosing the shower walls which I have already constructed. Building the right side light module now and soon I will be able to mock up the counter and finish up the drain and venting behind it.
-
Not that I know anything about sewing, but my wife has been doing it all of her life. I agree with extech about the stitch length and also, try using a bigger needle and heavier thread for more strength. Not meant to criticize, I think it's neat that you are willing to tackle this part or your build. I'm lucky, I would let my wife do it.
-
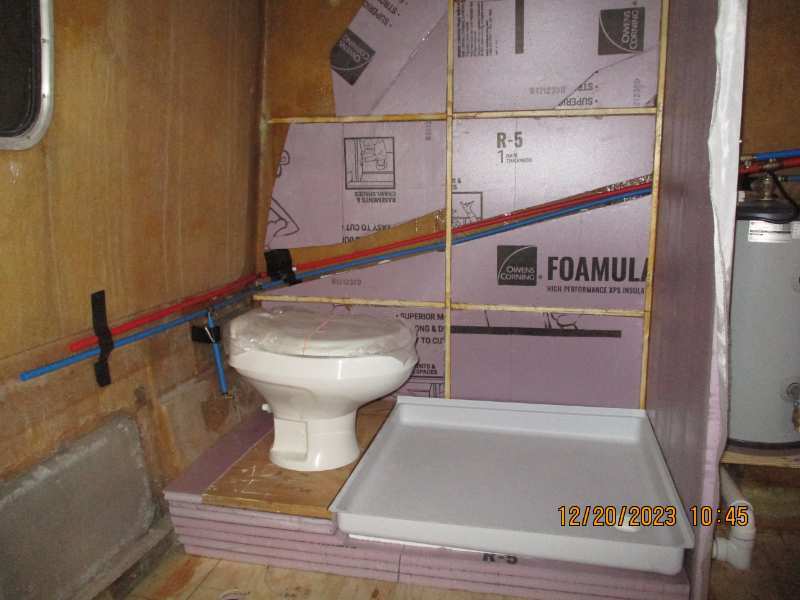
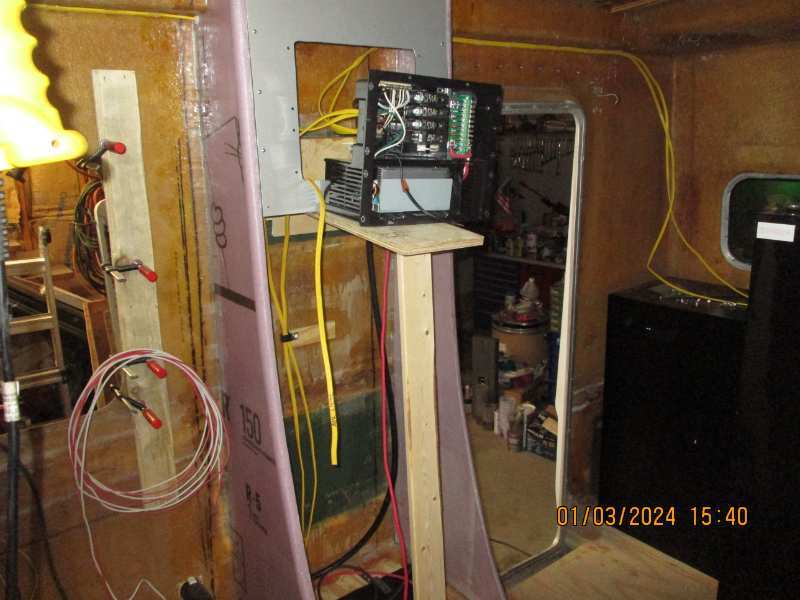
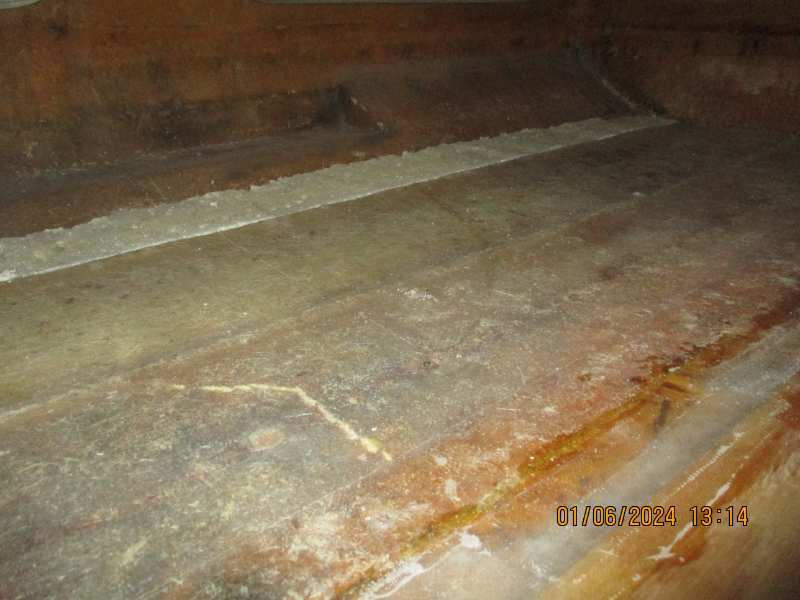
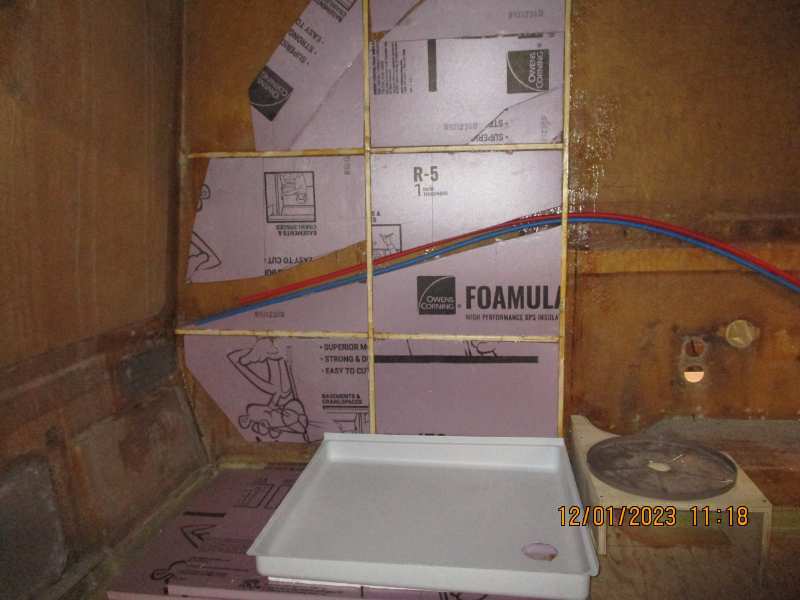
Another update. Have been working in several different areas, jumping around while waiting on different parts, etc to arrive. Seems like everything I start can only go so far until I move something else forward. Started wiring the power center and decided I needed a workbench right there. Worked out well and I kept the pieces because I will use it again when I wire up the 12 volt stuff. The plumbing is just about done except for the supply lines from the tank, etc, because I am putting down the vinyl floor before I mount the water tank. I have the shower pan in and all the holes through the floor to the tanks. I used some Great Stuff sealing foam to level off the sleeper floor and I think it worked out real well. I ended up using a bare hacksaw blade to cut the foam off level after it cured and I have the foamular and the plywood trimmed and ready to glue down. (waiting on Great Stuff construction foam for that).
-
Yes, Doug, the side windows. My sleeper side windows and the big cabin side windows appear to be the same thickness inside the trim flanges when screwed together bare, 7/8". The inside aluminum flange is exactly 3/8" and my sleeper side windows, (still mounted and sealed) have a hair less than 3/8" showing. I've been testing with a piece of 1/2" foamular @ different spots, including the back window,( mounted yet with flange installed), and if I put any kind of paneling 1/8 minimum, should be tight and close to seating the middle frame. Not to belabor the point, just more info.
-
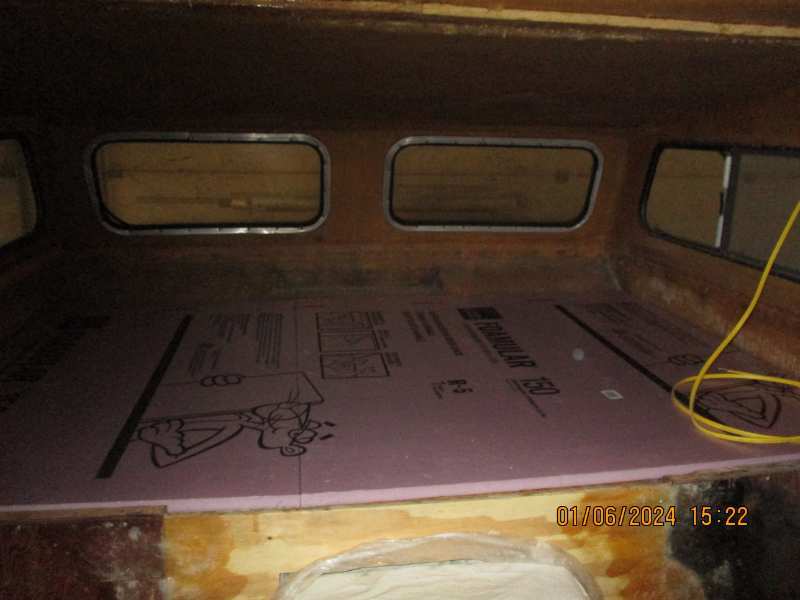
Looking good Doug! I'm still amazed at how much stuff you are getting done in a short amount of time. I finally filled in my front "pass thru" hole and am getting ready to lay down a 1" piece of pink on the bottom then a thin sheet of plywood. I'm going to explore the Great Stuff foam construction adhesive for the glue on this and the wall foam. What kind of space did you end up with on your windows? Just curious.
-
You go, Doug! Looking good. Can some of that energy and send it my way. At least you are doing the part I'm not ready for yet. That will give me a leg up when I get there. Still plumbing and such on mine.
-
dondiego, I have peened the knurled part around studs with a center punch in several positions along the length of the knurl, effectively creating an exaggerated "knurl" which worked successfully for me in several instances. Not too scientific but effective.
-
Looks absolutely terrific, now you can do mine! Seriously, it looks great. I'm thinking about how much cooler it would be in the summer for us cause "Bob " don't do cold. I'm doing the foil backed instead of the foamular, but I understand your need for the strength.
-
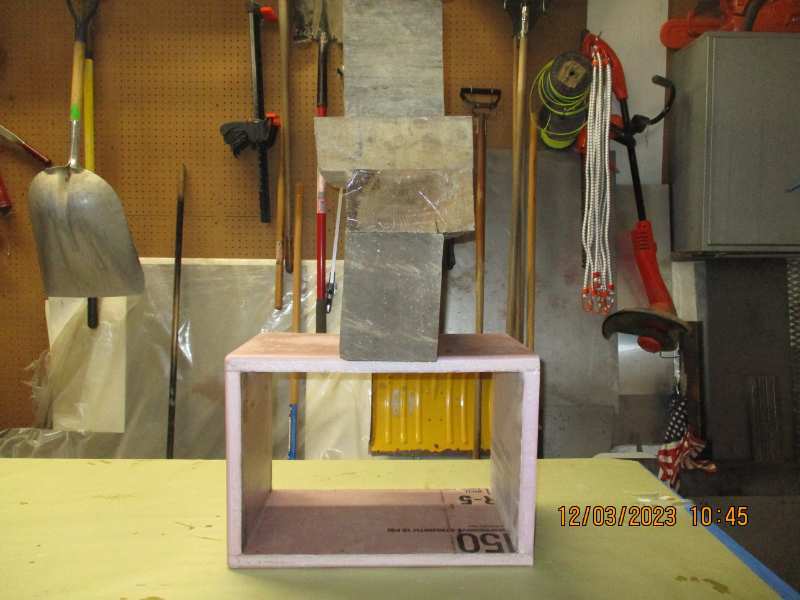
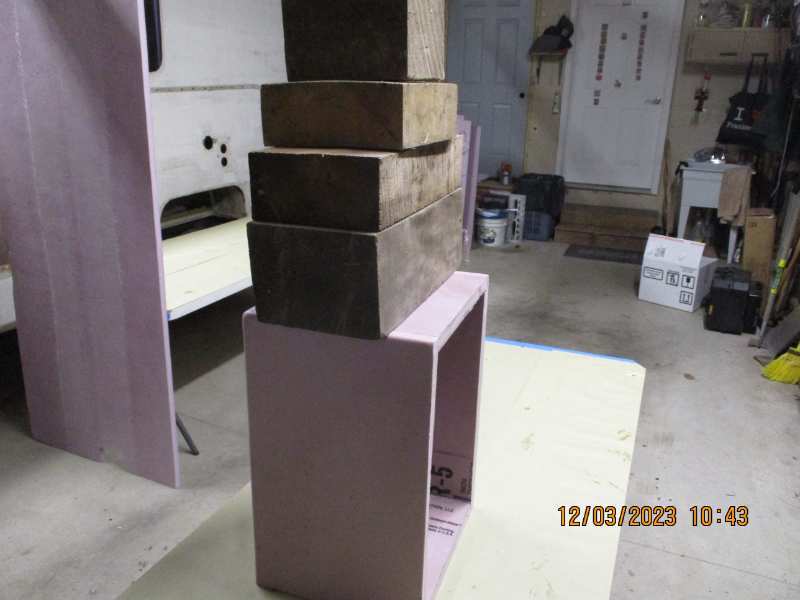
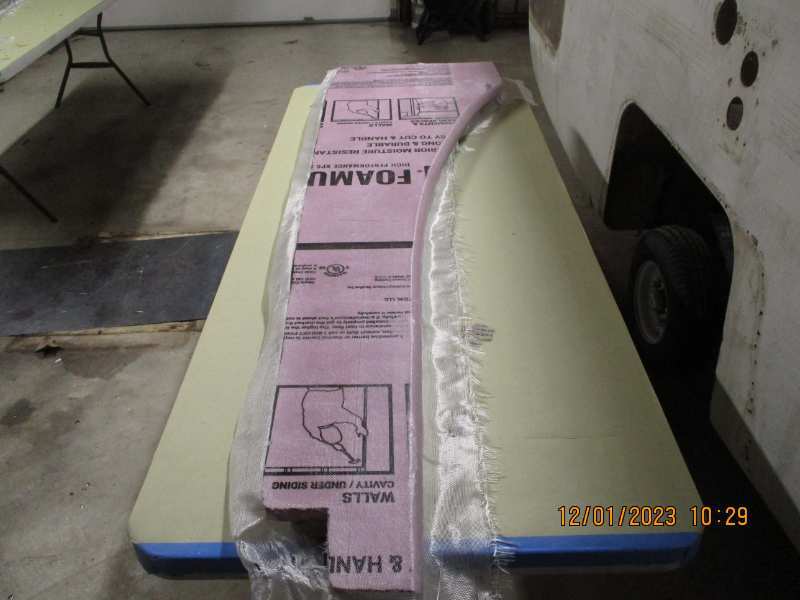
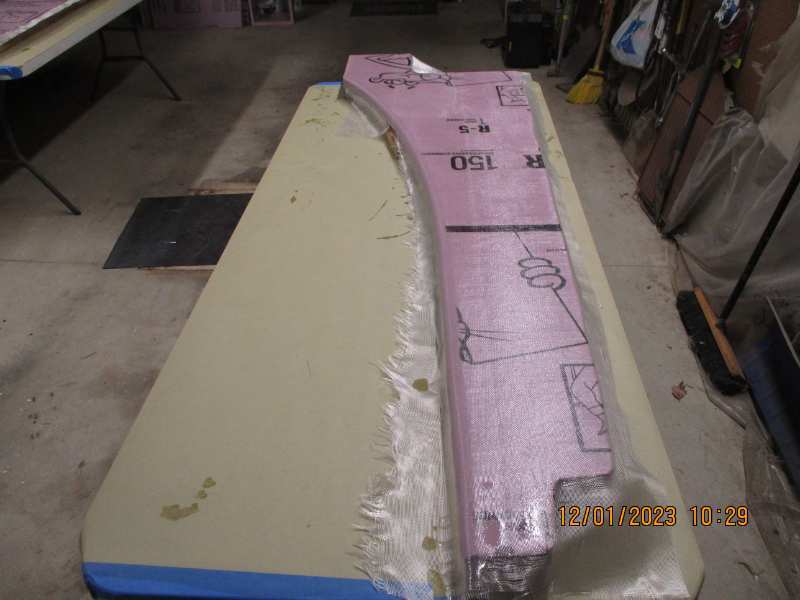
Doug, your interior layout is different than mine, and I believe some of your window sizes are different also. Don't know if different windows translates into different thickness. I measured again the existing wood still in the frames that haven't been removed yet and it is 1/2". To be sure, you have to find out for sure what your are, but just sayin'. On gluing the foamular together, I'm using Gorilla Glue heavy duty construction adhesive and if gluing an insert into the foamular, using Gorilla Glue itself. The Gorilla Glue expands in case there is voids created in the holes, the construction adhesive doesn't. A lot of testing on the net on what works best with this method of construction. I'll expand on the cloth and resin as I go along. You can see in the pics, how strong an open sided sample "box" is and that is one layer of 2.5oz cloth and epoxy inside and out. Imagine if it was a cabinet with a shelf or two and the back side foam also. I have sat upon that "box" many times with my feet up to demonstrate and I'm 185+/-.
-
Looking good, Doug. I'm sure that's how I will have to proceed on mine.
-
Had an Astro way back when. Ran forever. This one looks to be really shortened. Wonder who was modifying the chassis.. I would imagine it would be a challenge to keep it from swapping ends in the rain.
-
Correct, ID. Inside of outer wall to flange has 1/2" wood strips still in it on the windows still mounted in the shell. Just measured one of the big side window frames again, (sometimes "Bob" makes mistakes). Flange to flange inside is 7/8". I've put in an awful lot of these style windows, sunroofs, etc. in my day, Mine is an '82' model, same yr as yours and that is the spacing. No way will I get the outer wall thickness, 3/4" styrofoam, sealant and any inner panel thickness without severely warping the inner flange.
-
Excellent WME! Good thing I can refer back to these tidbits as I go along. My memory is not so sharp any more. (neither is "Bob's", but he won't admit it). Doug, thanks very much for thinking about me but I won't be needing the 3/4" foam, My windows have only 1/2" wood stripping between the frames on the inside. I'm going with the 1/2" foam and by the time I finalize the interior trim panels, (1/16 - 1/8), there should be enough clamping tension in the frame.
-
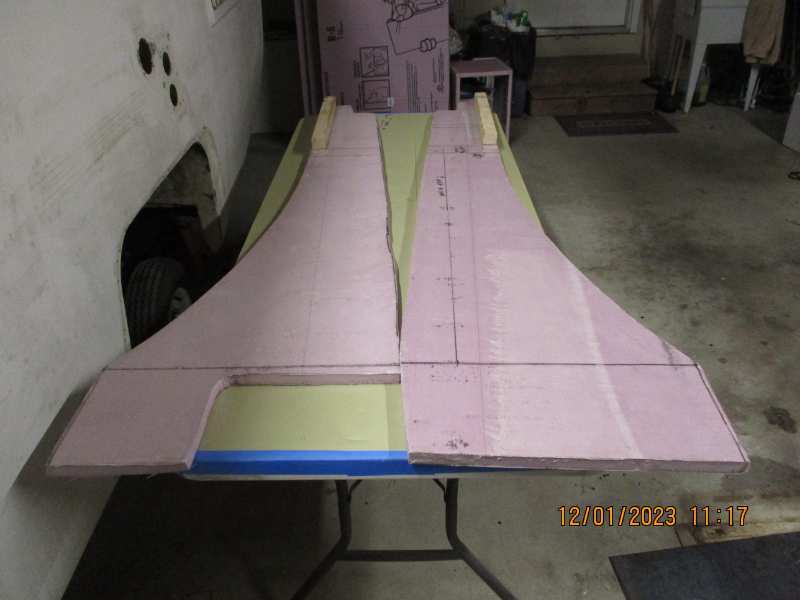
I'm going to preface this next post with a little bit of history and the main reasons behind the build. My wife and I are in our seventies and have been going to car shows for a very long time. Most have been close enough to do in a day or over a weekend, and we stayed in motels. When we retired, we wanted to branch out and see some of the USA and attend car shows around the country. I built a little Hi-Lo style camper that I could pull behind our 36 Ford and we branched out a bit. (My wife has a hard time being comfortable in motels if you know what I mean). The little camper was easy to tow, and suited us well for a while. A couple of my wife's girl friends showed her a picture of a 60's Chevy pu pulling an old "canned ham" style camper, and knowing "Bob's" hobby, told her: "this is what you guys should build". Sounded like a challenge to "Bob" and I told my wife we could do something like that. As we are both starting to feel old age, I told her we wanted something we could just stop for the night without setting up and it had to be really light so that our hot rod, (whatever it might be at the time) could pull fairly easily. I immediately started researching for where to start and because of the water leakage problems with a lot of the conventional built campers I settled on the fiberglass shell style. Looked at Scamp, etc. for a while then saw a picture of a Sunrader. Bingo! "Bob's" mind instantly turned that shell with the cab overhang into a gooseneck trailer. Now I know here is where I get a little crossways with the purists, and believe me I understand wanting to restore something just because of what it is. But I needed something I could pull, park it, and then drive to the shows. We also wanted something self-contained to a degree so we could stop anywhere and stay for the night or for a week, whatever. So my mind was basically made up except for finding the truck. I lucked out finding the 1938 Diamond T pu in Pennsylvania. "Bob" kept telling my wife that it had "the look". The package was now complete. All I had to do was find a Sunrader shell and build both. Went to southern Indiana to look at two different Sunraders on the same day. They were also located in the same little town! Fate maybe? Made a deal and the rest is or will be history hopefully. So now to the meat of it. I liked everything about the Sunrader shell. The shape was a natural for a gooseneck. Pretty much waterproof if built right. Plenty of room for what we wanted. But in reading about them, wow the weight! How much of that is the stuff inside, and can any of it be made lighter. After a lot, and I really mean a LOT of research and chasing down rabbit holes, I decided the course I would take. With a careful eye on everything we would put inside, I would build the bulk of the interior out of, (wait for it), Fiberglass reinforced styrofoam! I know, I just opened a can of worms. I searched through everything I could find about it. Foamies, painted screen on styrofoam, canvas and Elmers Glue, etc. I am convinced I can build most of the walls and cabinets out of this medium and have it structurally sound, practical, look decent, and all of it weigh less than 50lbs. I'm sure plenty of discussion will follow and I've rambled enough. I will post some pics to start this stage in the build.
-
I can't find any 3/4 either, Doug. You probably won't believe what all I'm doing with it. I'll post some hints. Your build is moving along rapidly. I'm now into the tedious stuff.
-
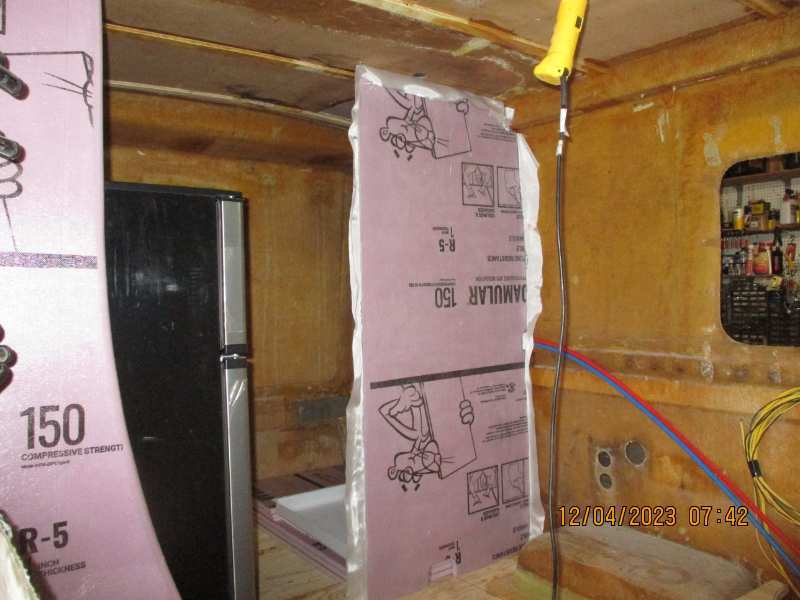
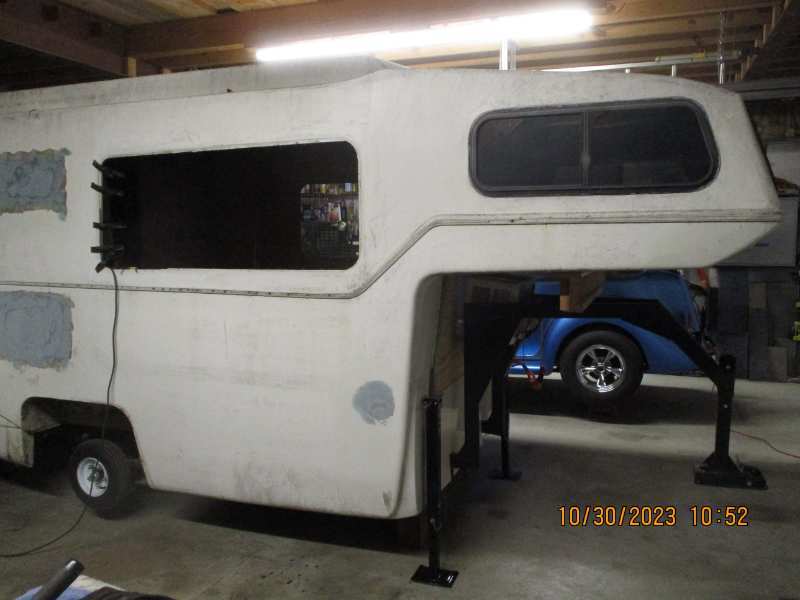
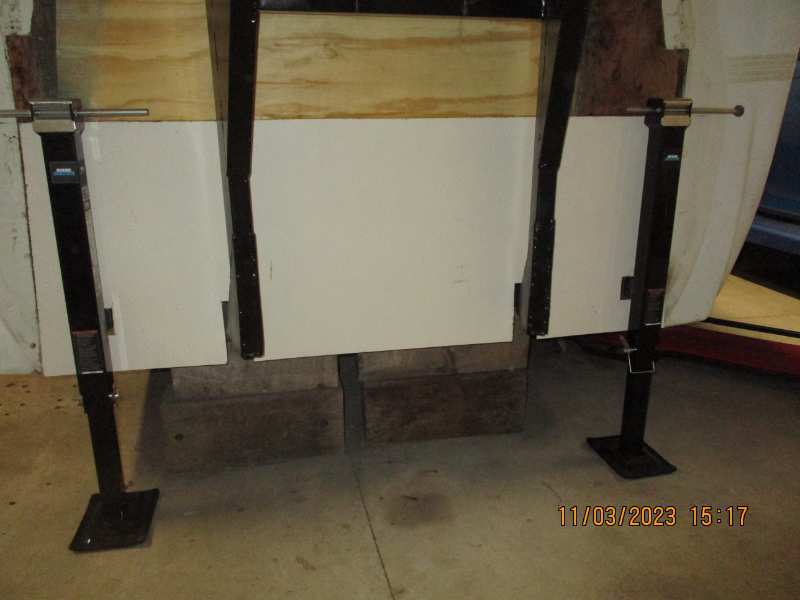
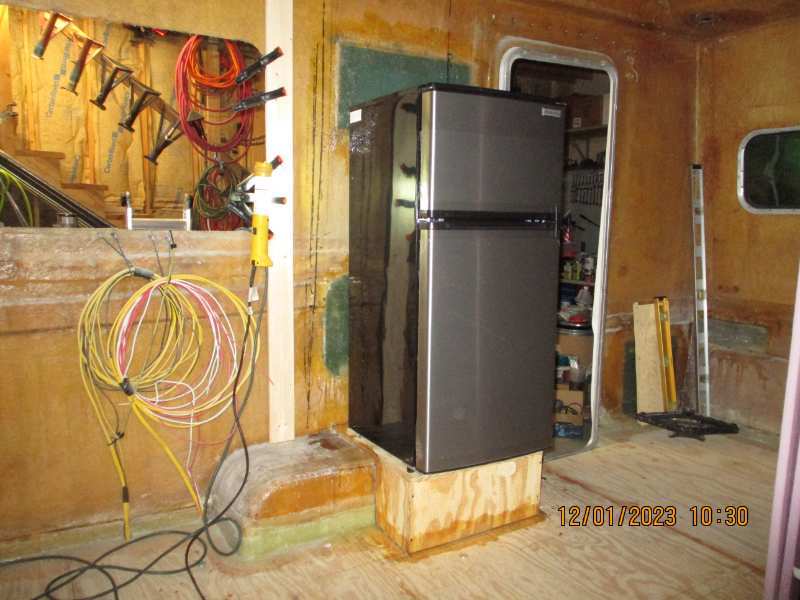
OK. So it's been quite some time since posting any progress on the build. Other things to do and a recent trip to "Turkey Run" in Daytona for a week have kept me away from the computer except just checking in now & then. With the "baby wheels" on the camper, I was able to skinny it into my garage for the winter. I blocked it up high enough to be able to work under it easily and have installed the black and grey water tanks. They sit between the frame rails, pretty much in the center. The black water tank (10 gal) between the rear and the first cross member and the larger (14 gal) grey water tank sits between the second and third cross member right behind the axle. Due to my layout inside for the commode, shower and such, my dumps will be on the right or rear facing. I do not plan on being hooked up at a camp site, just doing a "drive by" when needed. I have marked the locations of all cross members, frame rails, etc. on the floor above so that I know what I have to clear for my commode, shower, sink and vent holes. I have made a wood mount for my hot water heater which will sit just forward of the shower wall and on top of the rear part of the wheel well. My 43" refrigerator will sit on another wooden mount on the other wheel well in front of the door. Since I mounted my a/c between the trailer uprights at the front bulkhead, the space above the fridge will house the power supply. The battery will sit on the front of the r/side wheel well and that will help balance out the fresh water tank just inside the l/side wheel well. My rationale is that the 10gal water heater and refrigerator weigh almost exactly the same, the black & grey tanks are in the middle, and the battery (AGM)/electrical is opposite the fresh water and will help balance also. I know that the water will still weigh quite a bit more, but it is on the high side of the road. All of this weight, is placed from a point 1 ft in front of the axle going toward the rear. I also mounted two matching #5000 jacks (one each side) on the front of the frame with a common crossbar that I can pull the pin on to raise or lower each side independently for leveling the front after they are cranked down. I will post some pics of the progress so far, and in them you will see some pink styrofoam which I am going to use for walls, etc. I think that this could possibly open a "can of worms" in build philosophy, but I'll get into that later.
-
Doug, I've been using quite a bit of epoxy and polyester resin fiber glassing on my project and it is great! Depends on what you are fiber glassing for your resin choice. Each has its uses. You can poly to poly and epoxy to poly, but not poly to epoxy for best results. I'll be posting some pics later, but just wanted to chime in with WME. If you are overlapping layers on the epoxy, just scuff down each layer with wet 3M pads and wipe it clean. Epoxy resin can develop an amine coating that affects adherence. Have been following your project closely. Quite an operation with those roof bows. I wish I had your energy. It should be really nice when you are done.
-
IdahoDoug! Watching your deconstruction very intently. You are wasting no time getting down to business. I still feel very lucky that my Sunrader was cleaned pretty much to the walls, although I would have probably benefited from seeing how everything was put together. I too am installing a larger fridge. I was fortunate & found a new Everchill 4.3cu/ft 12 volt "damaged in the carton" for $220. The only damage happened to be a small dent down on the bottom of the rear vent shield. Pulled it off and straightened with my body hammer. My brother has been running one of these for the last year in his toy hauler, so he was the guinea pig. I'm not running any propane so that's what I went with. I have the rear door so it will go right in. Just curious. Are you removing the paneling and other stuff all the way to the fiberglass walls? If so, a word of caution when you are pushing your roof up for your arches. Be aware of what shape your walls might take while doing this process. My side windows were removed, so of course I was missing that stability, but the walls change and can warp/bow/pull in or out with each roof arch or bow. You obviously need the same shape down the sides when you re-install the bath,etc. Just saying be aware of the possibilities. Thoroughly enjoying your posts. Keep it up.
-
Gotta start somewhere. I was lucky on mine, someone already cleaned it pretty much to the walls. On another note, I've been thinking about your mystery vehicle in your starting post. At first I was thinking a Lancer, but I'm thinking more like an 80's Dodge Daytona? The problem with getting old is so many pages in the mind to file through. Let me know if I'm close so it doesn't bug me for a week.
-
Welcome IdahoDoug. Looks like you scored a really nice piece. Pls post plenty of pics as you go along. Projects are great to follow and you never know when you might inspire someone.