Andrewups
-
Posts
45 -
Joined
-
Last visited
Content Type
Events
Profiles
Forums
Gallery
Everything posted by Andrewups
-
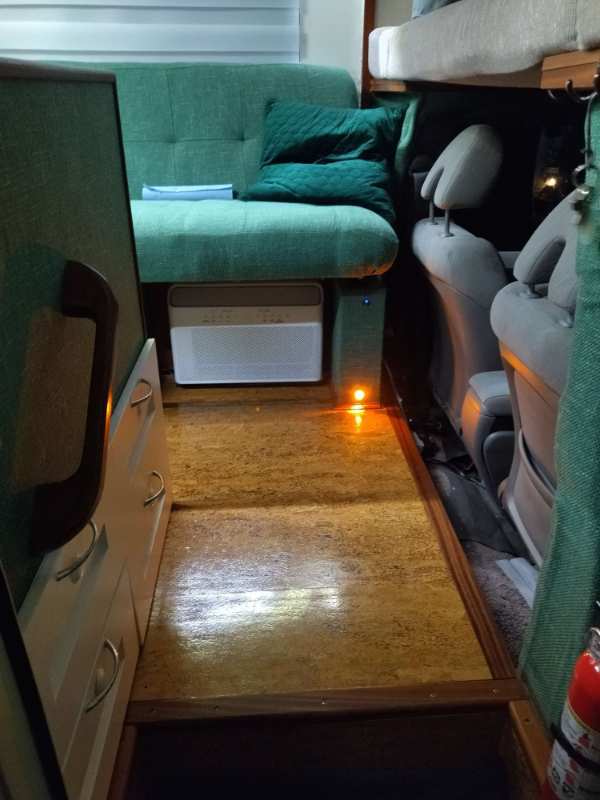
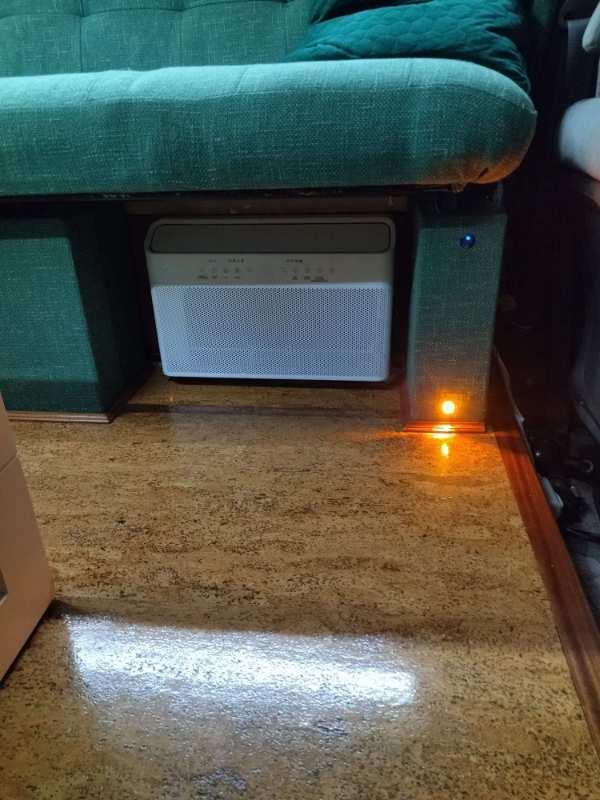
Hi, yes it's a AC under sofa, I can use it on the road also (plugged in to Honda 2200 gen)
-
Nice job!!!
-
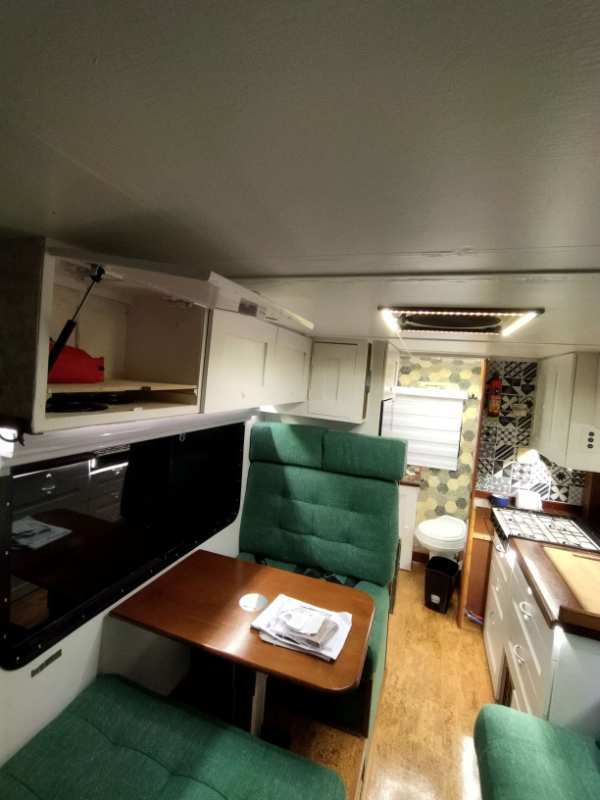
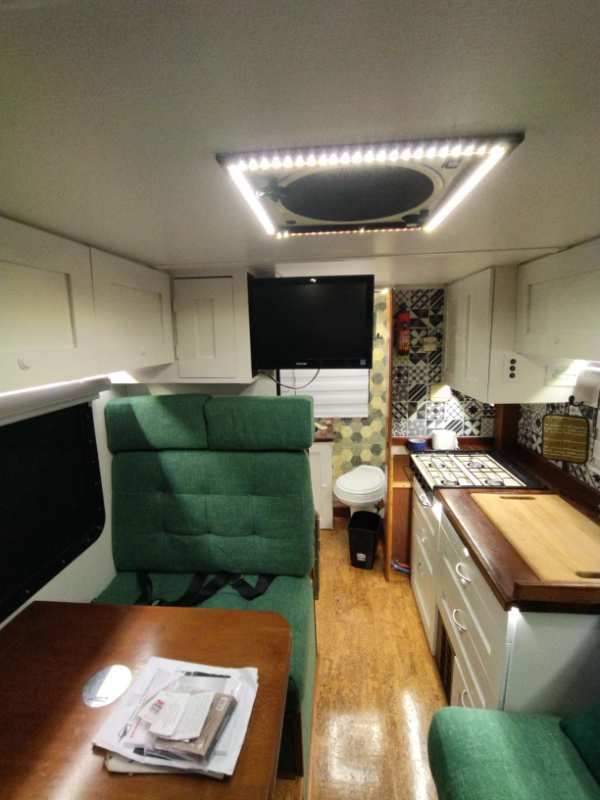
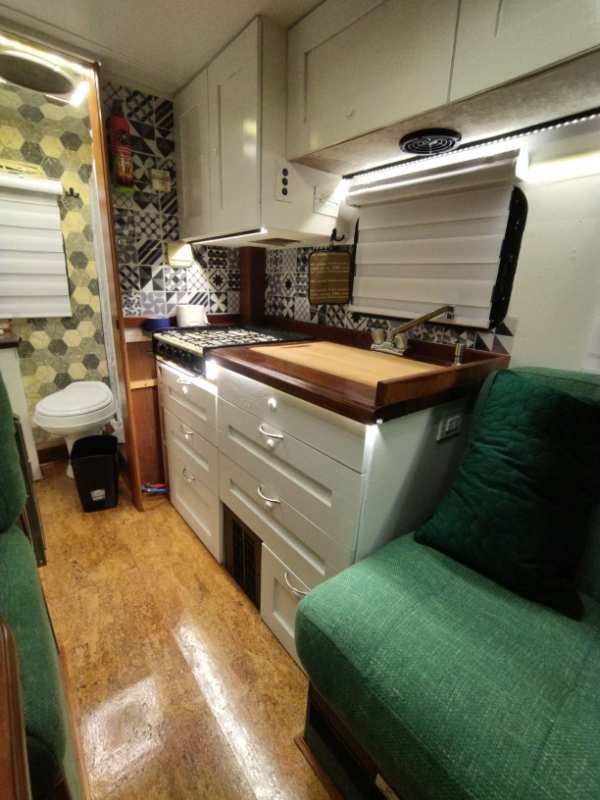
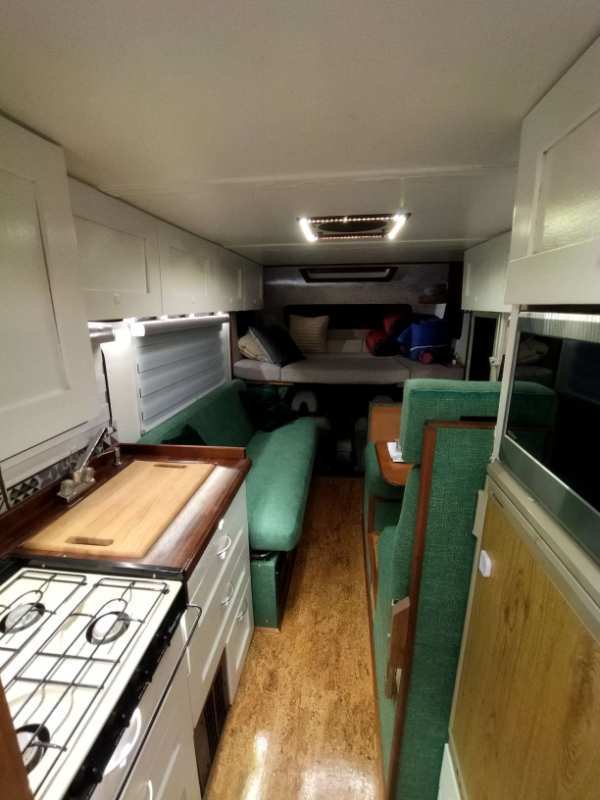
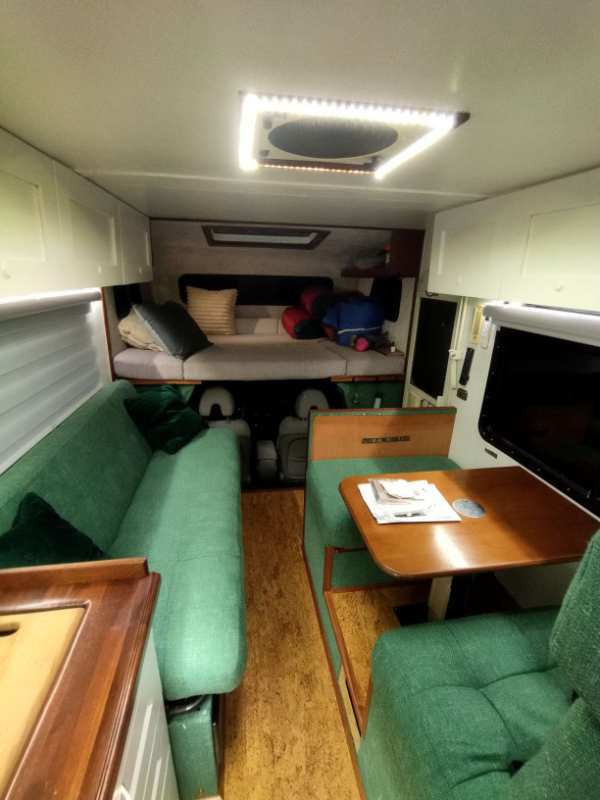
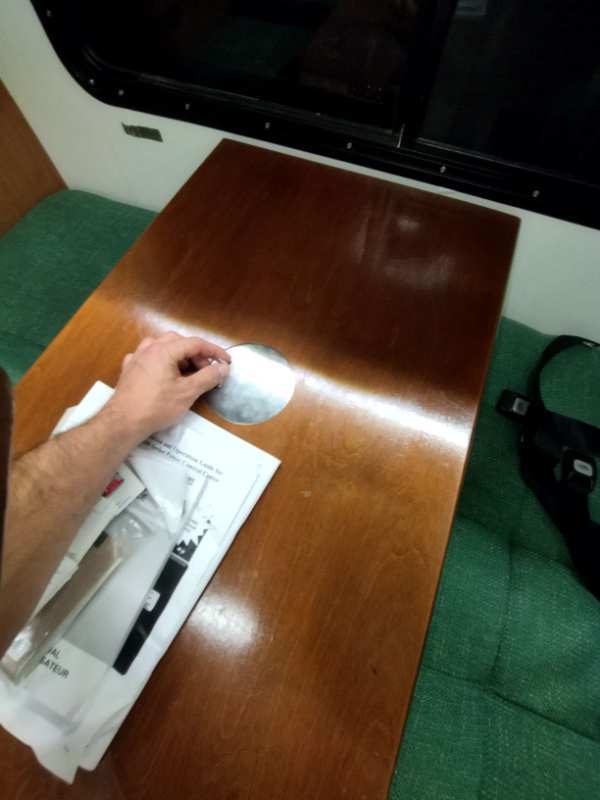
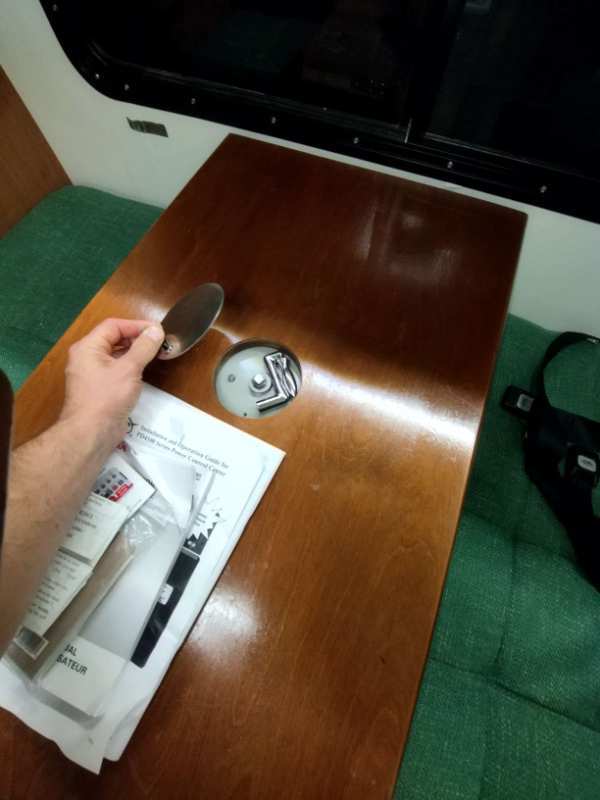
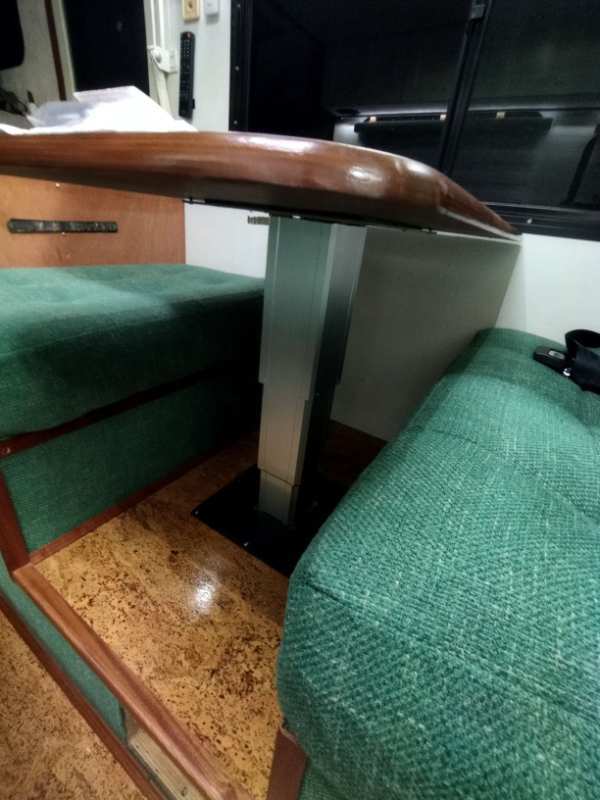
So there I'm now, no more work to do on my rig... The life has no sense anymore... 🙂 Just a joke, I had another big project on the way (valves adjustment), also the exterior need to be sanded and repainted, and of course after each trip I will have a ton of little improvement to do. I'm paranoic and a perfectionist too...😜😜😜 Check the nice table that I have, after our first 2 weeks trip I got rid of the original table pedestal - what a pain to transform the dinette into a bed every evening, and start in the morning for vice versa. So now it's a pleasure doing that just by turning a little knob, and my kid enjoy that also 😊.

-
...
-
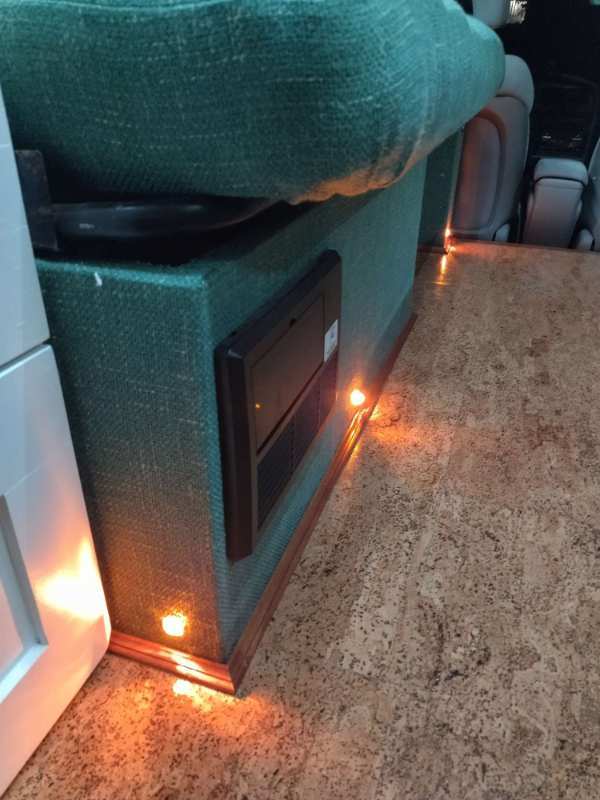
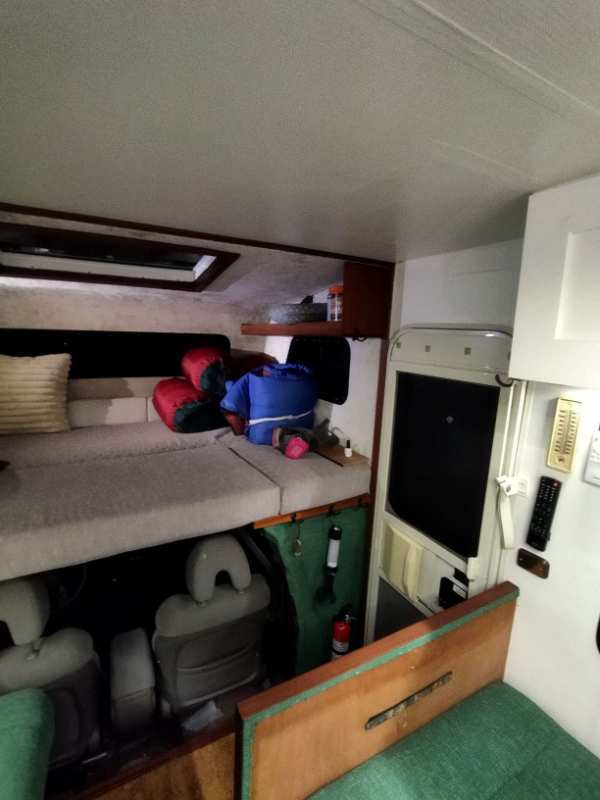
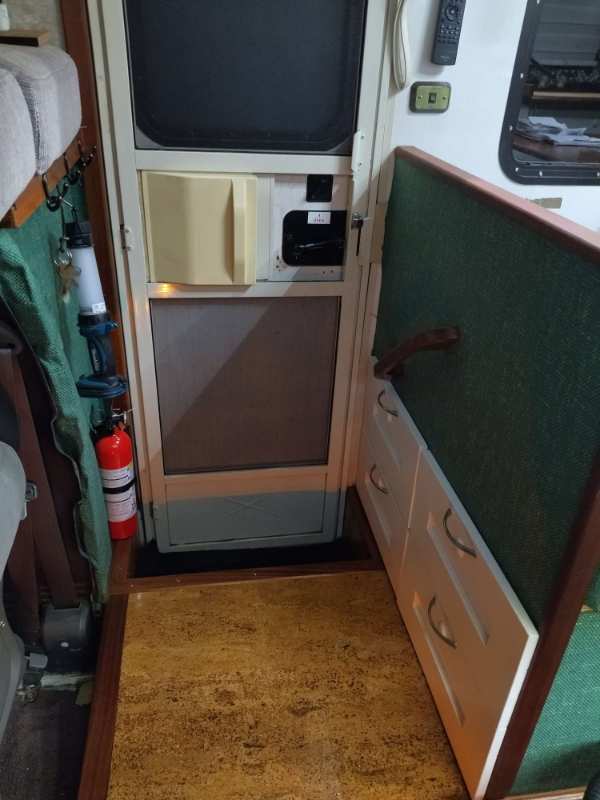
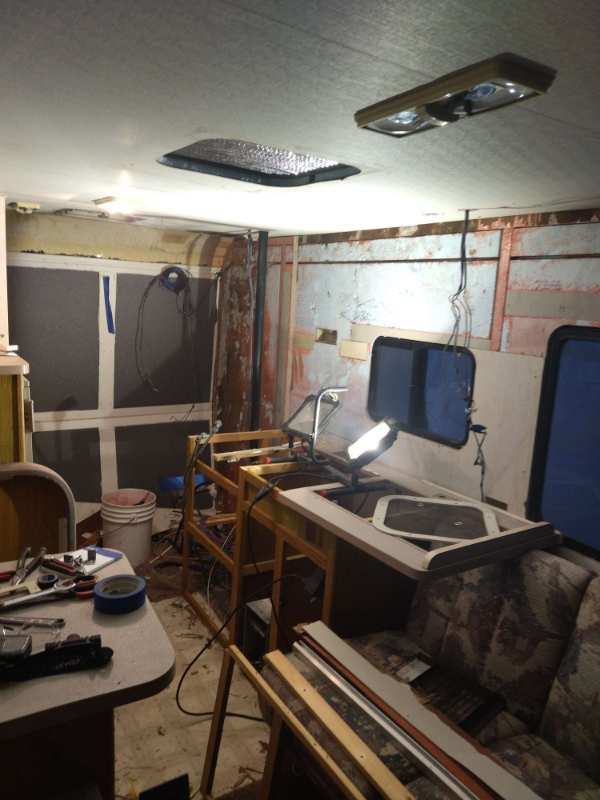
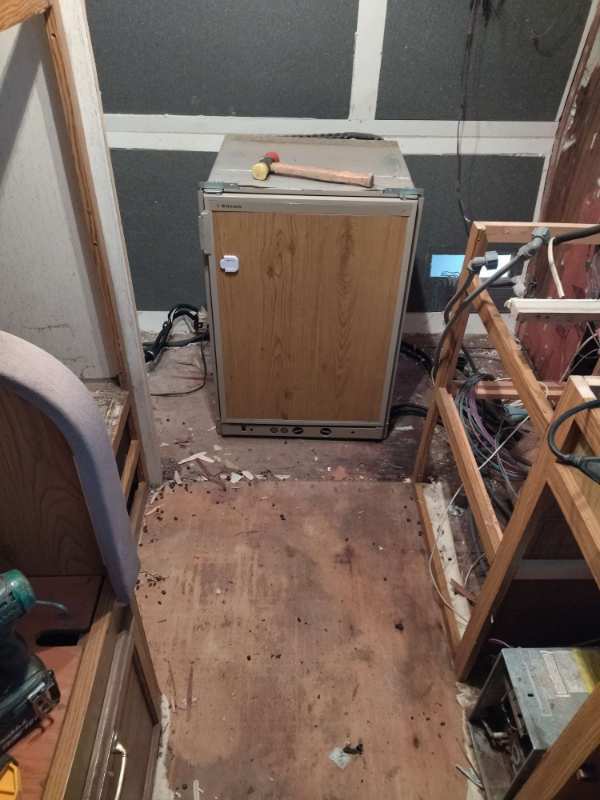
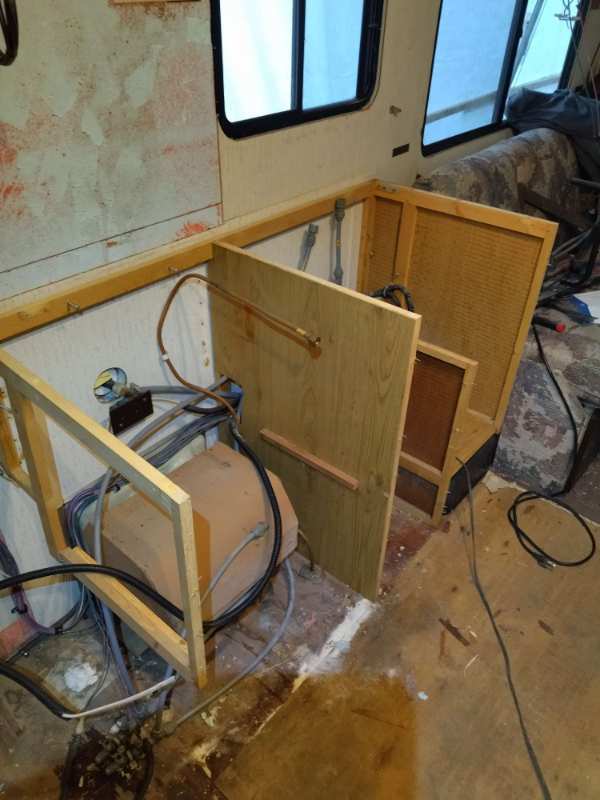
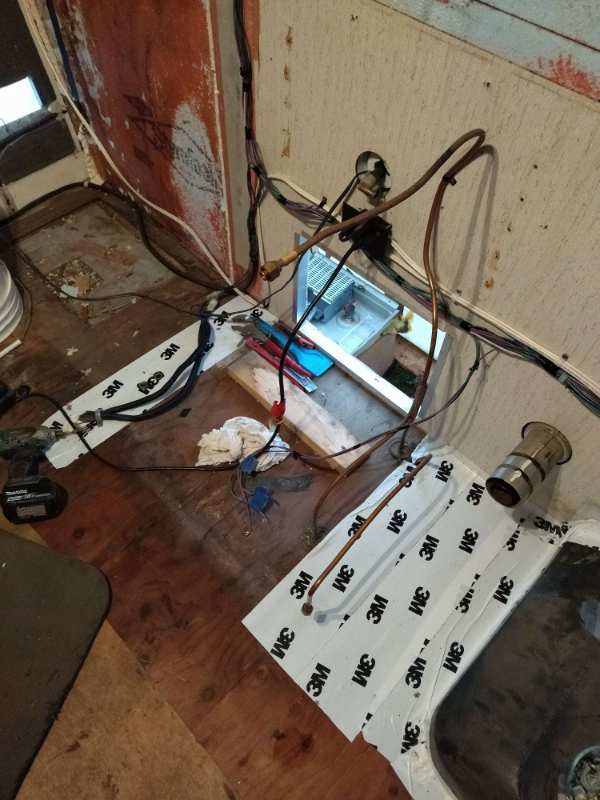
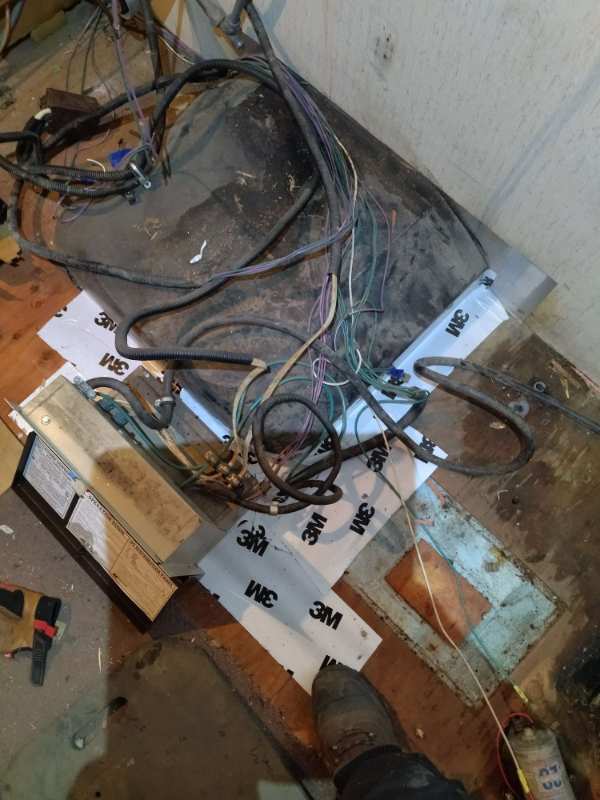
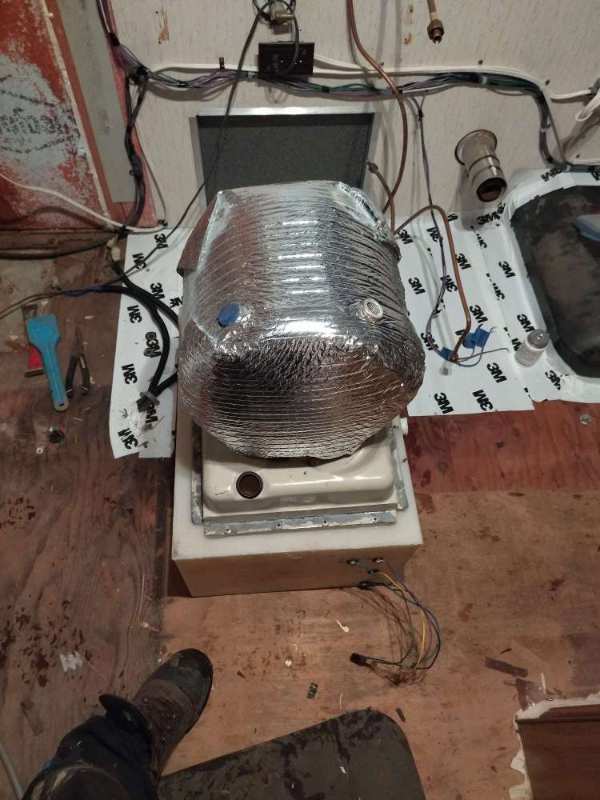
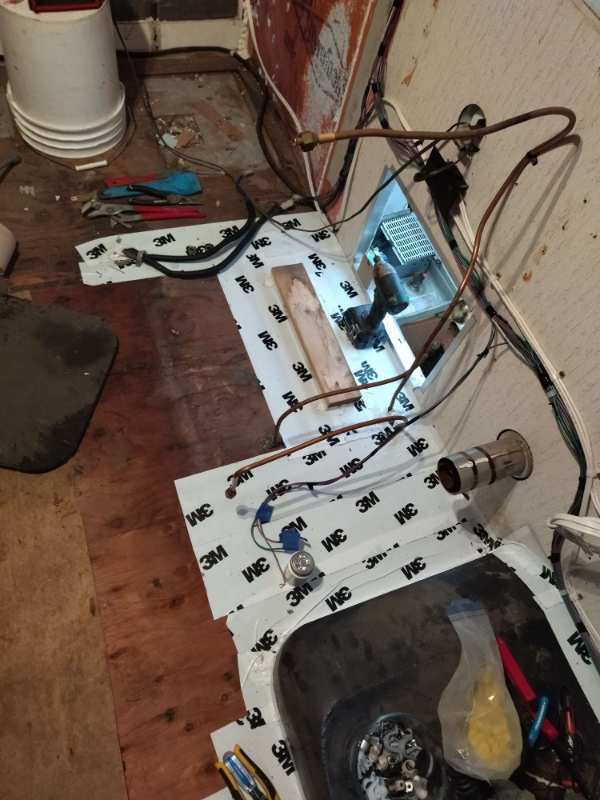
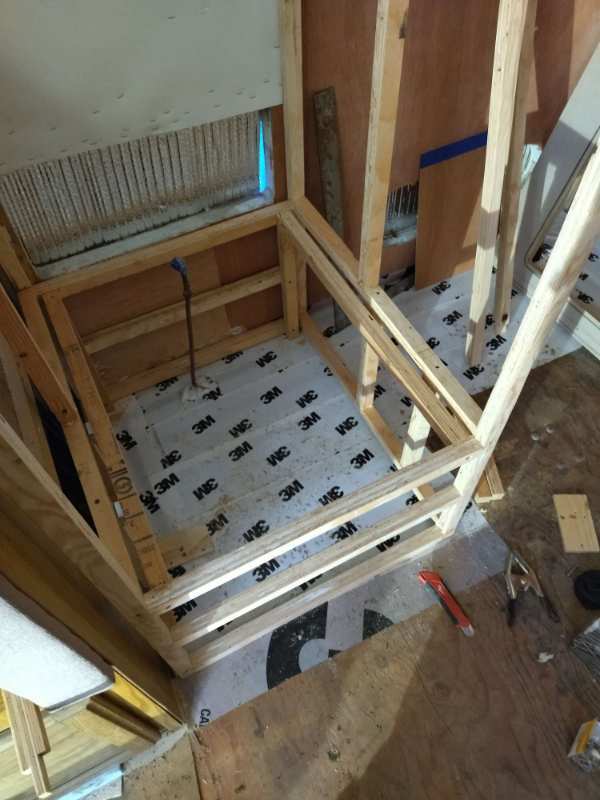
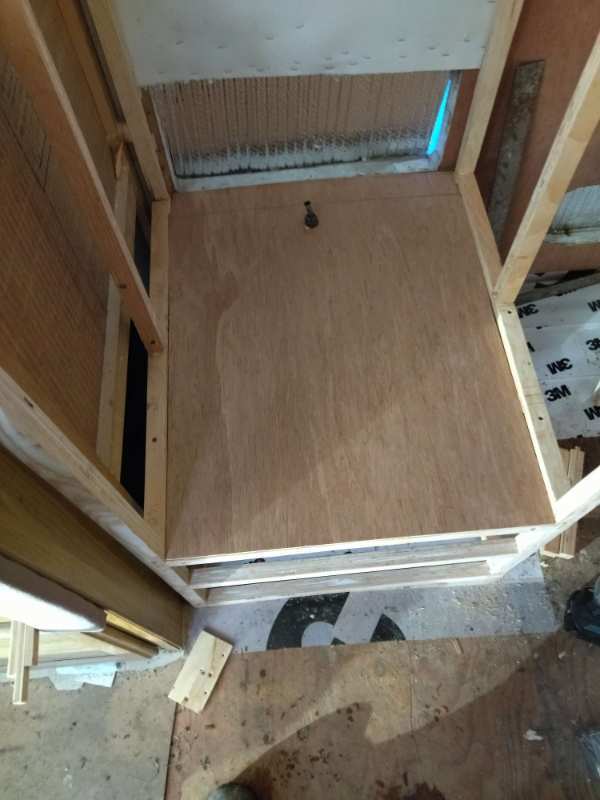
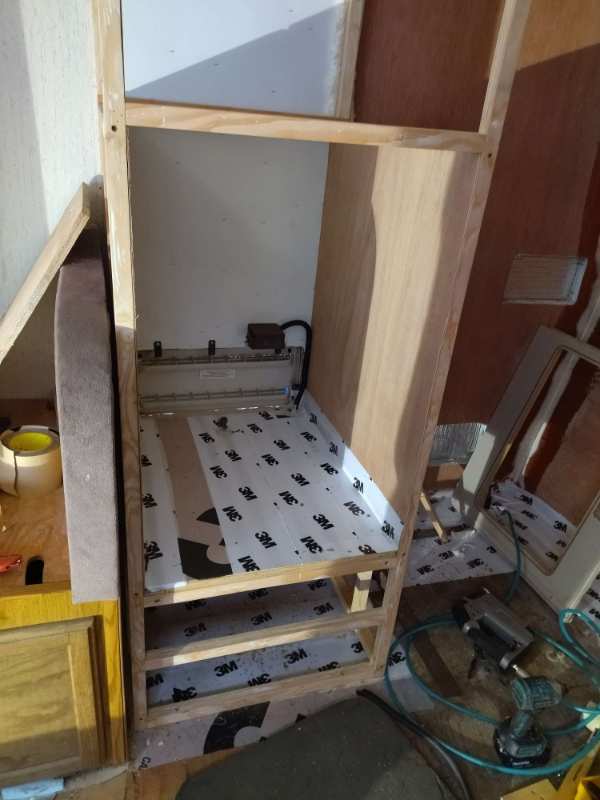
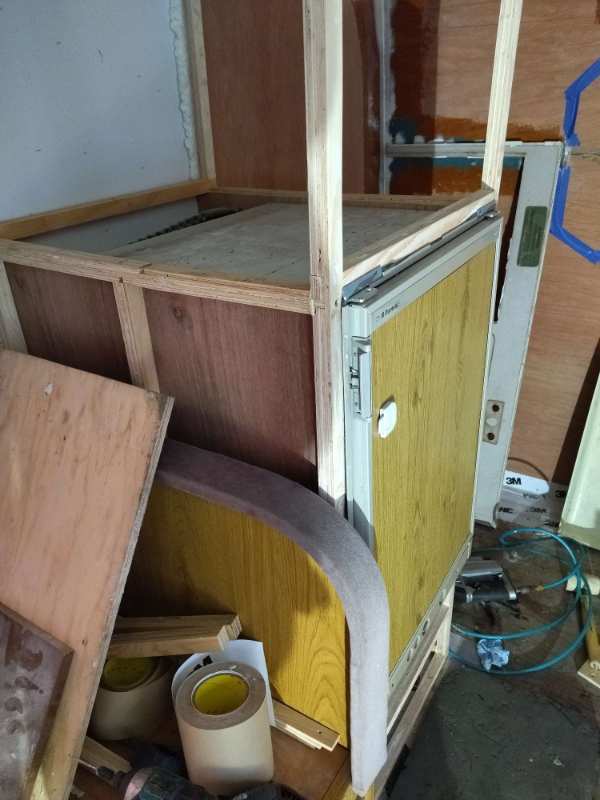
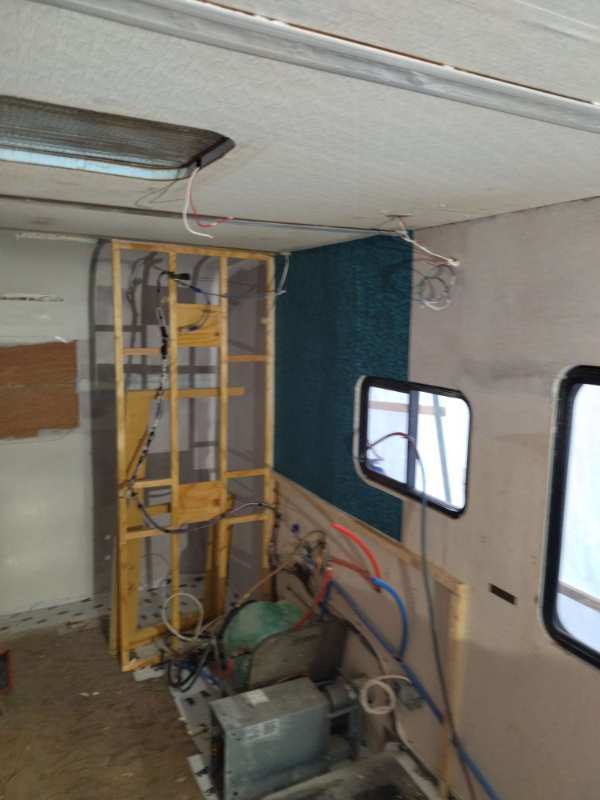
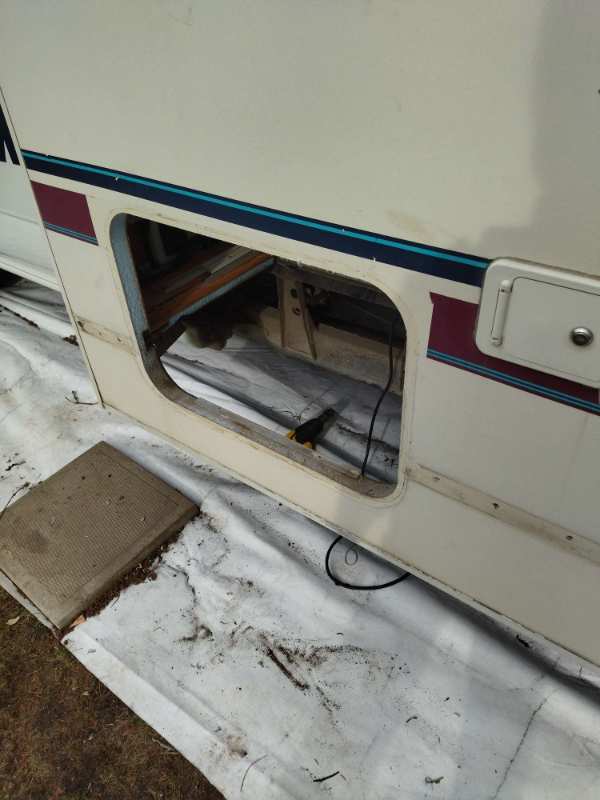
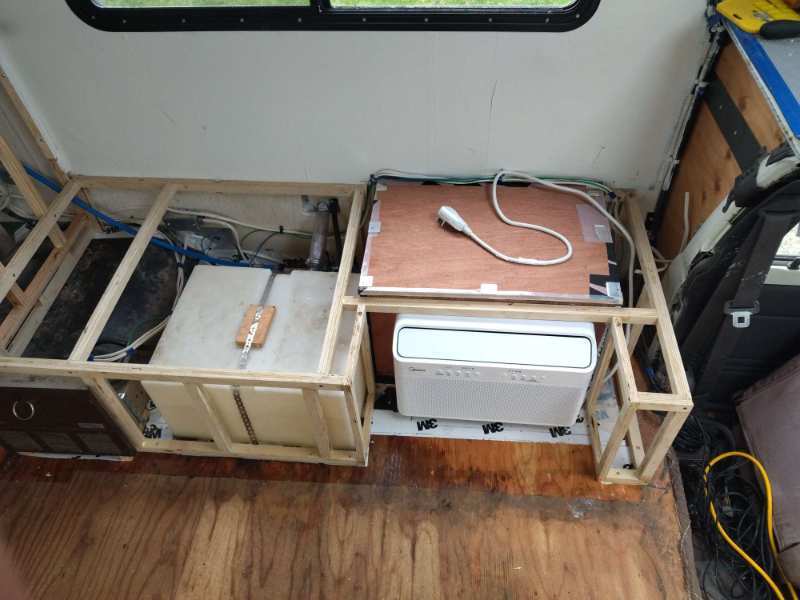
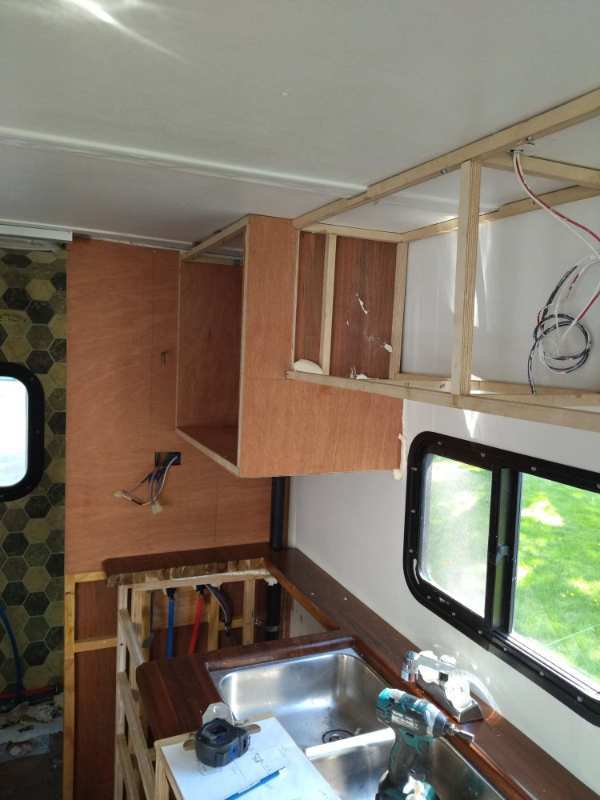
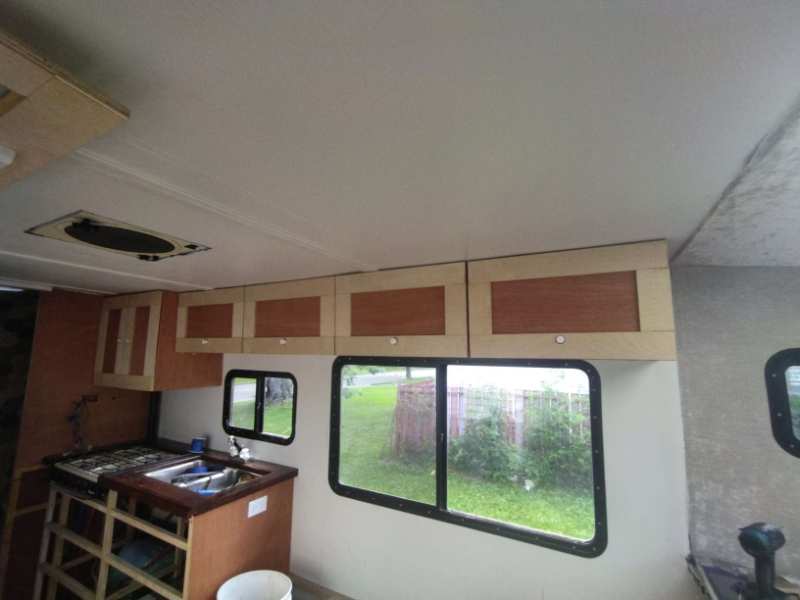
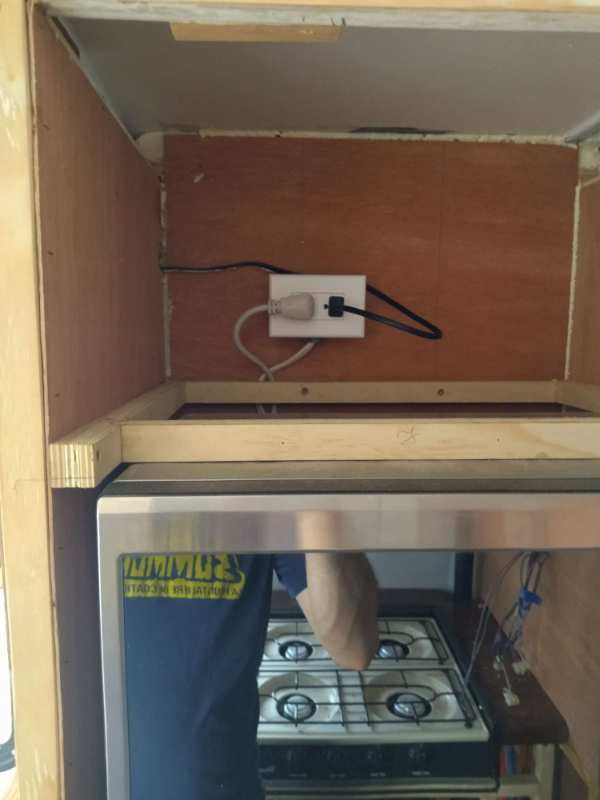
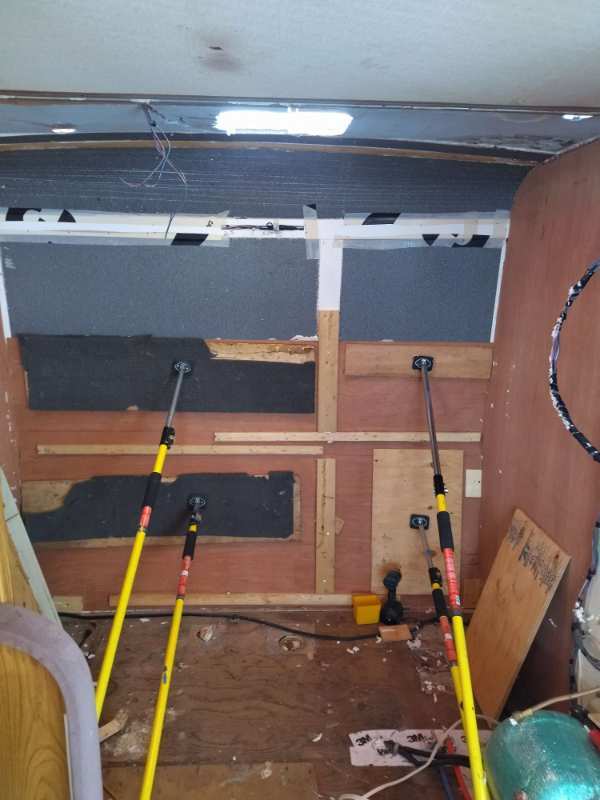
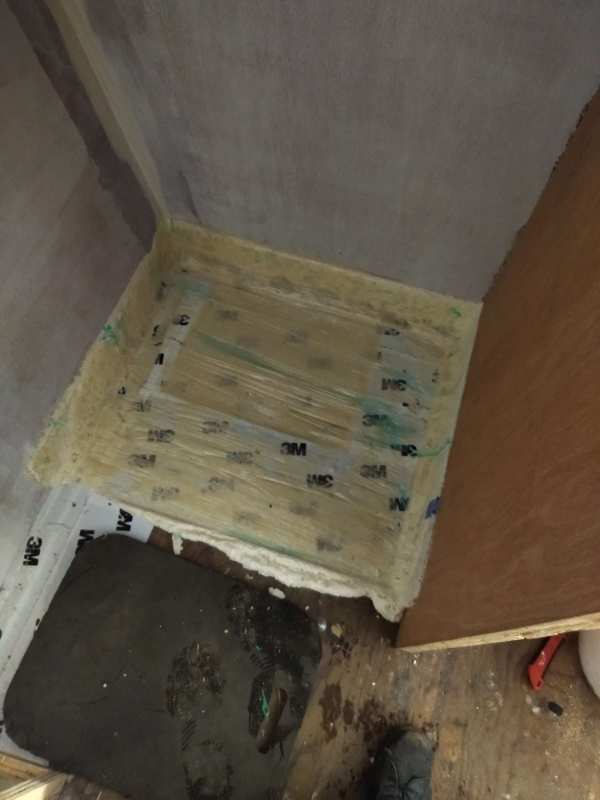
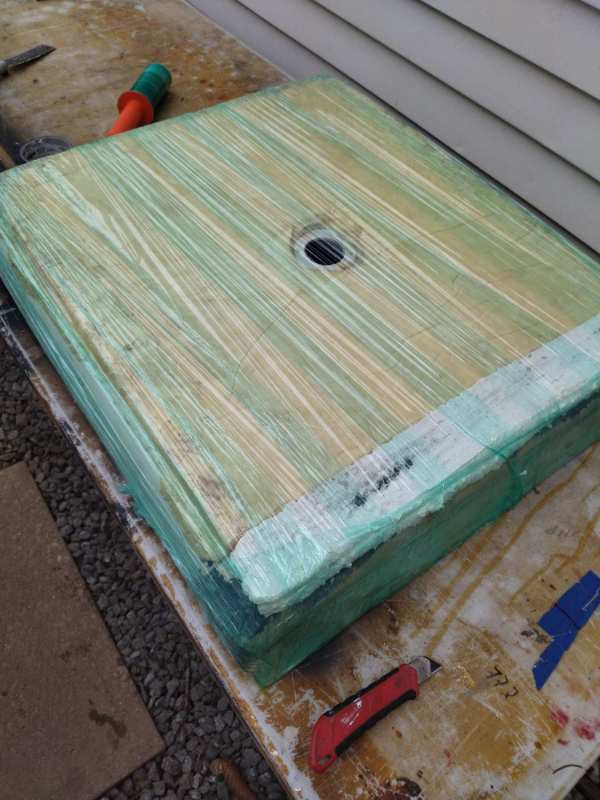
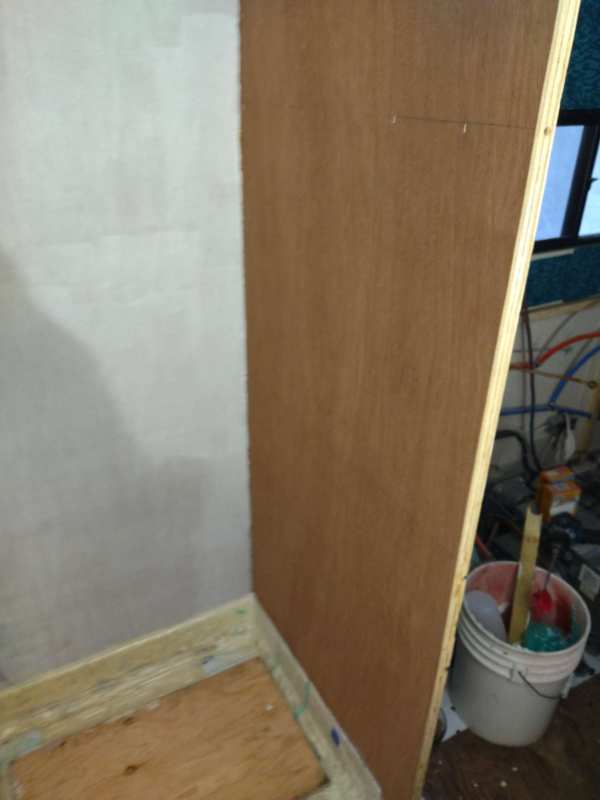
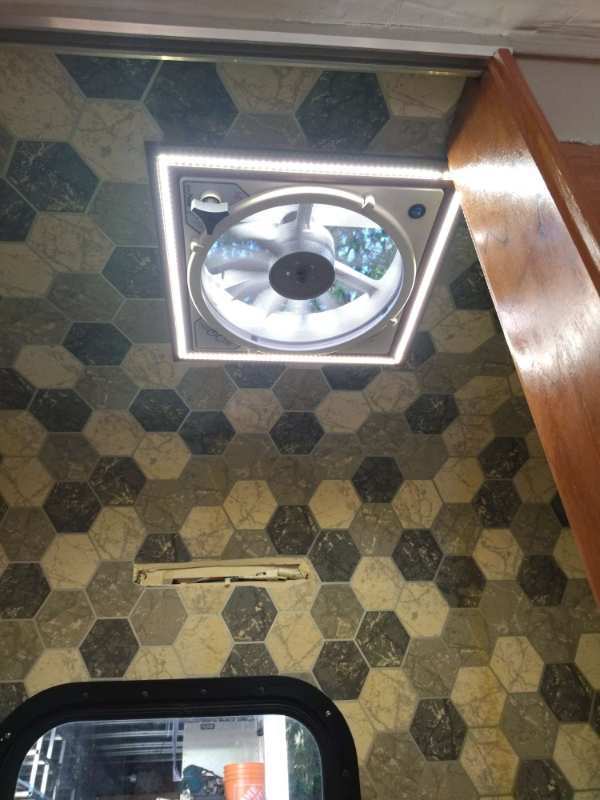
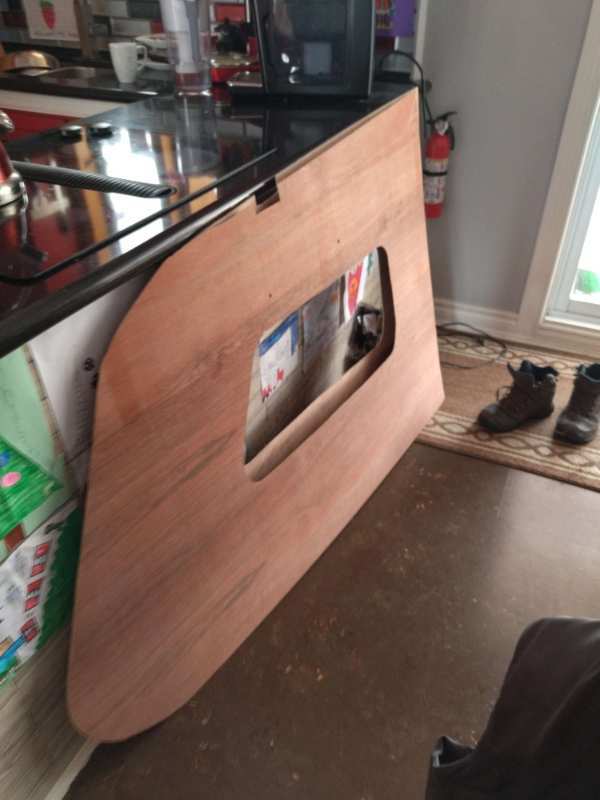
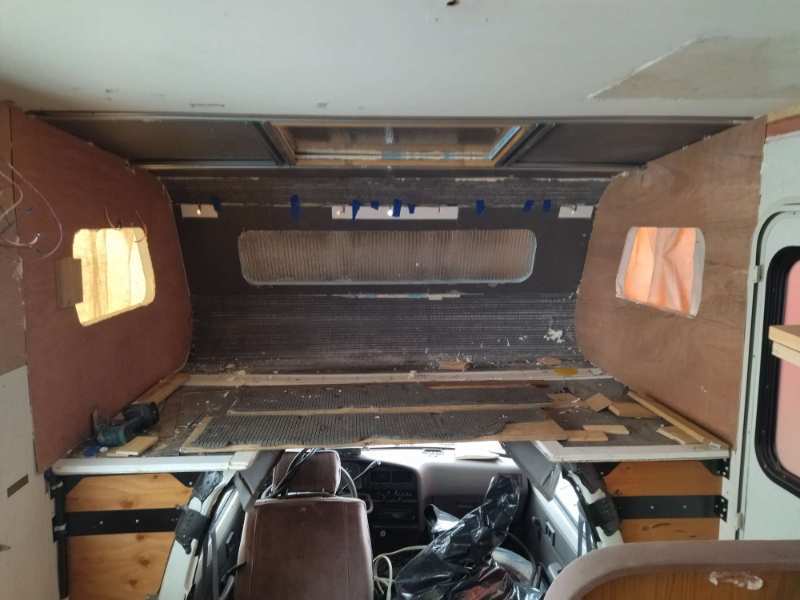
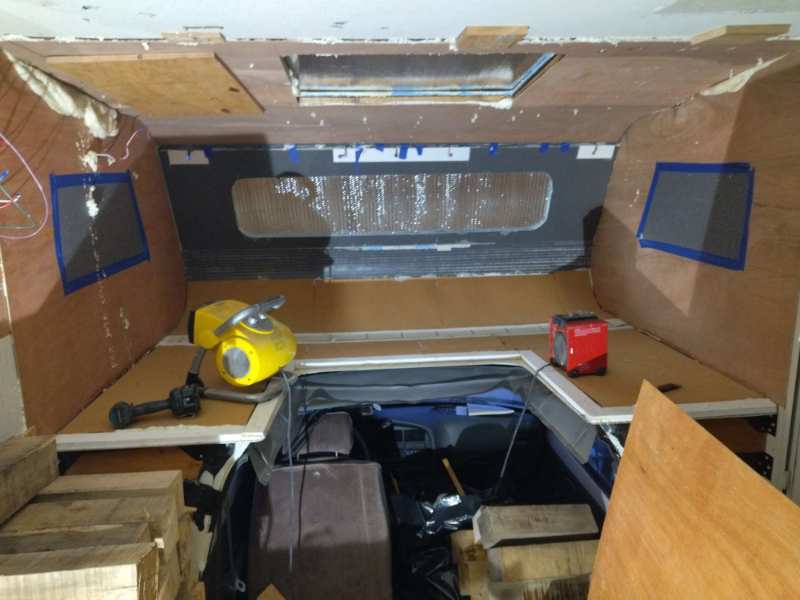
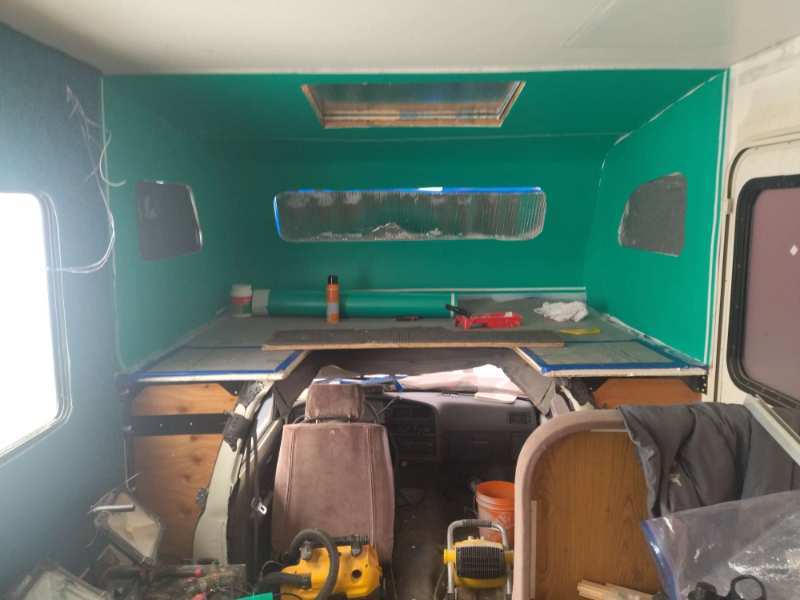
Oh yesss, there are no limits of improvement!!! The roof also needs love because of sink forming. So I make a hole for galvanized profile and I had reinforced the roof - now I can walk on the roof without be afraid, and the roof it's straight, no more sink... Because of the profile, I lifted up the roof with 1,5 inches, that was awesome - now I don't touch the roof with my head.🙂 I gutted the kitchen and all the rest of my camper... The electrical and plumbing was a mess so I changed it. I completely removed and changed 12v and 110v wiring, replaced electrical outlets with GFCI. I changed the old plumbing with brand new PEX, installed a new water pump which starts on demand. I tested on leaking the hot water tank and isolated it, I think it's a must to keep warm inside the tank 😀. When I repaired the roof I took off the old AC, and replaced it by a two way fun. The old AC was functional but to heavy, noise and energy consuming - get rid of it. I bought a nice 10.000 BTU Midea, which consume only 700w, it's quite and very effective. The Best place for the new AC was for me under the couch. Us you see all the space which is hidden under the couch or the kitchen it's covered by skin - to protect against water if by some how I will have a leakage (knock the wood to not to...). Yes I am a paranoid.🙂 For the frame of all that I before was wood I used 3 pieces of 1/4 plywood joined with a polyurethane glue. It's very strong structure and lightweight. I kept in my mind all the way that I need to carry about outcome weight - I will care it with me all the way. I covered the plywood frame with the same 1/8 nice to work plywood. Weight, weight and another time weight...
-
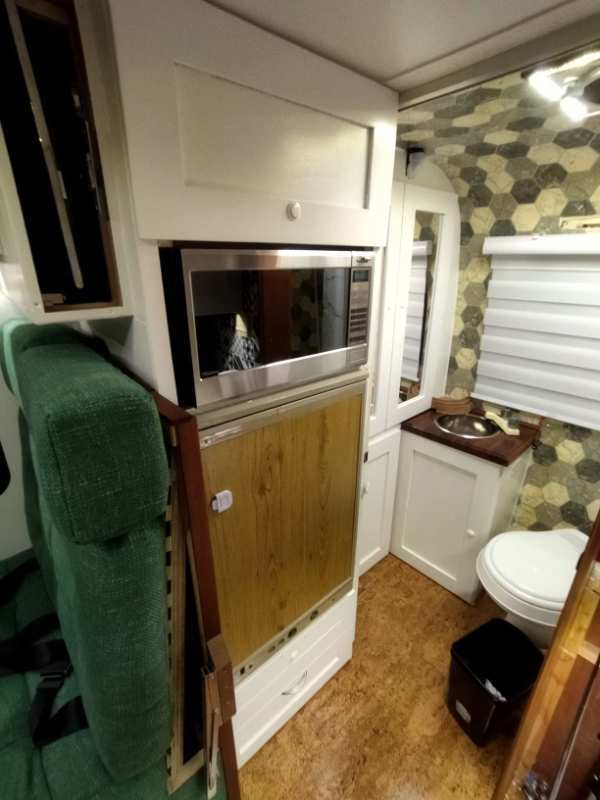
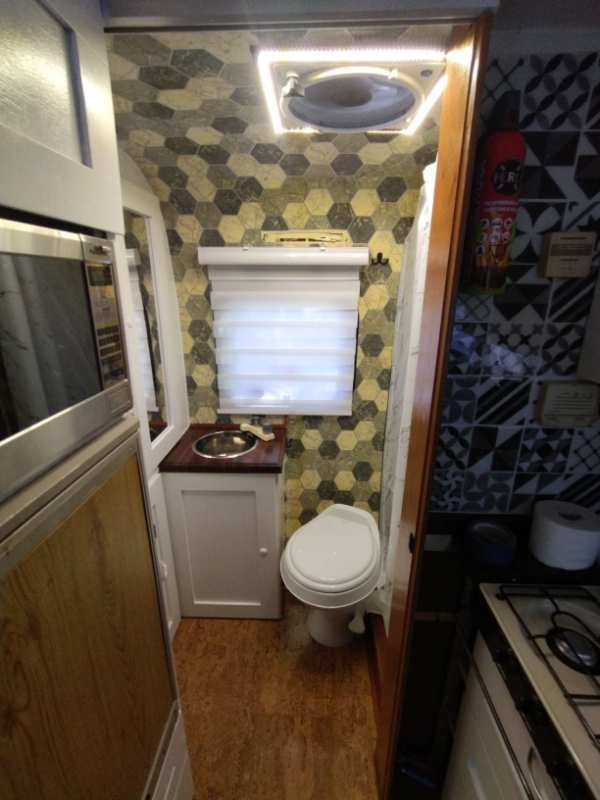
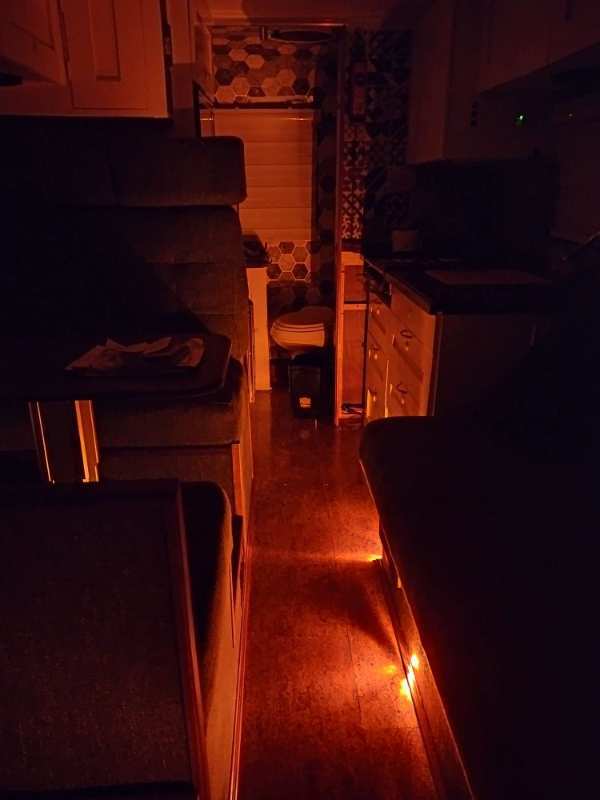
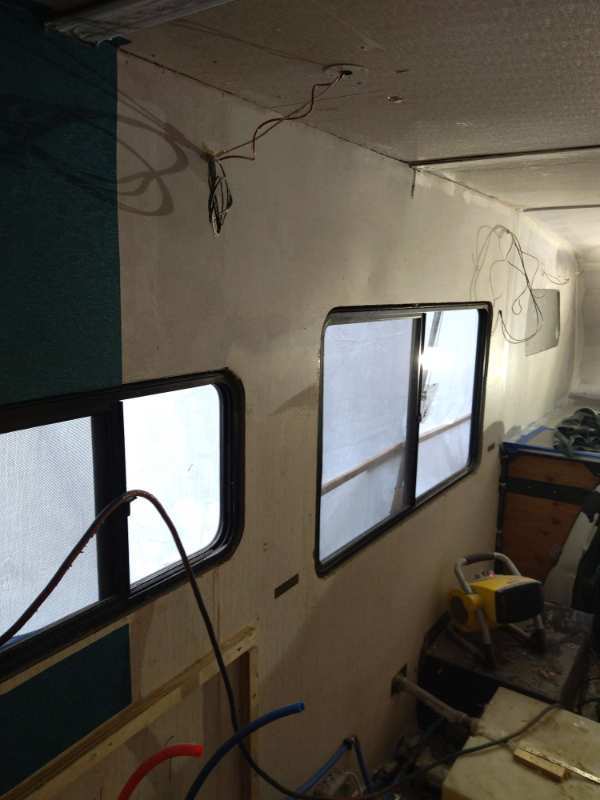
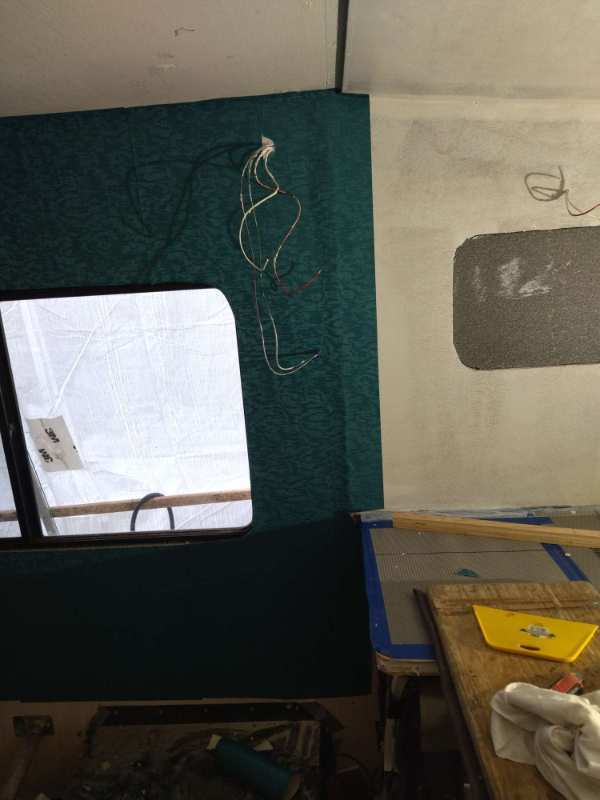
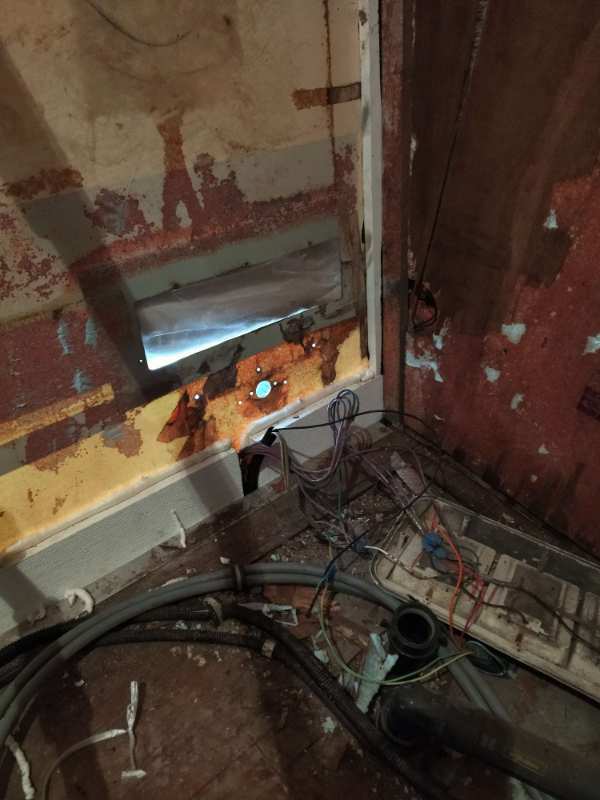
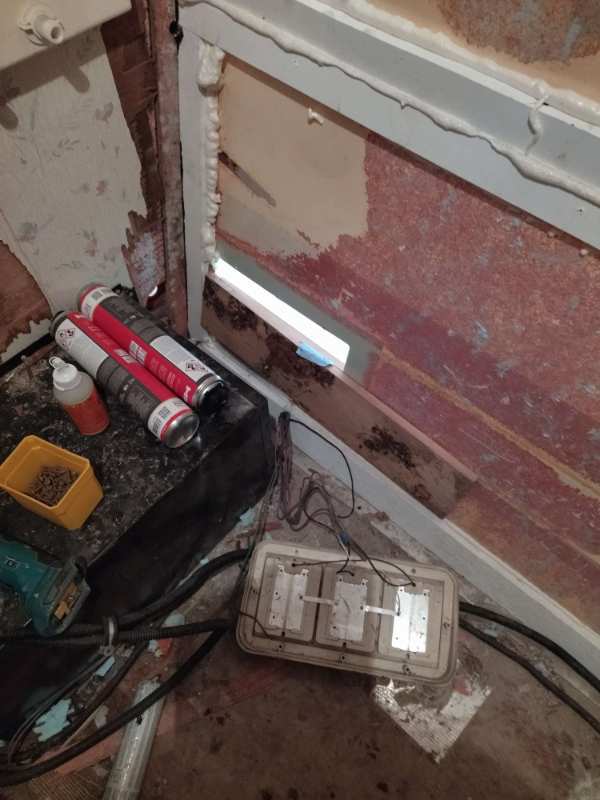
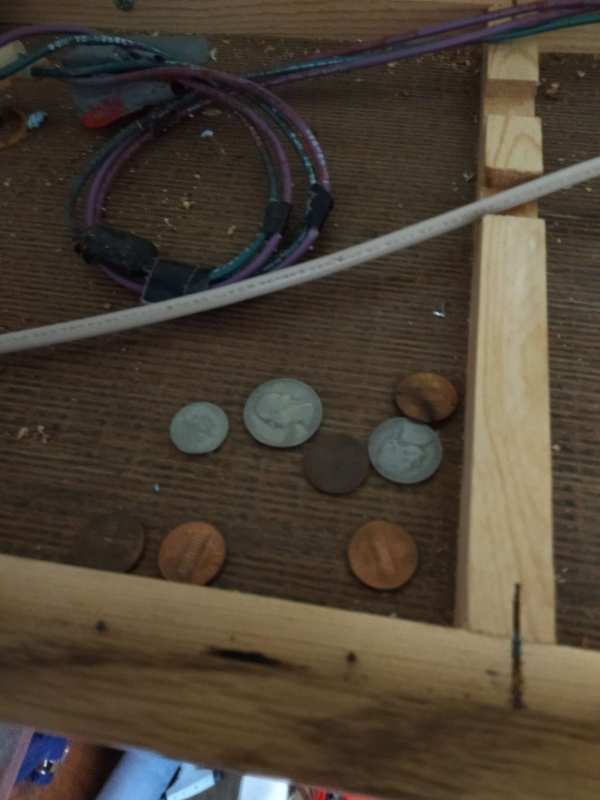
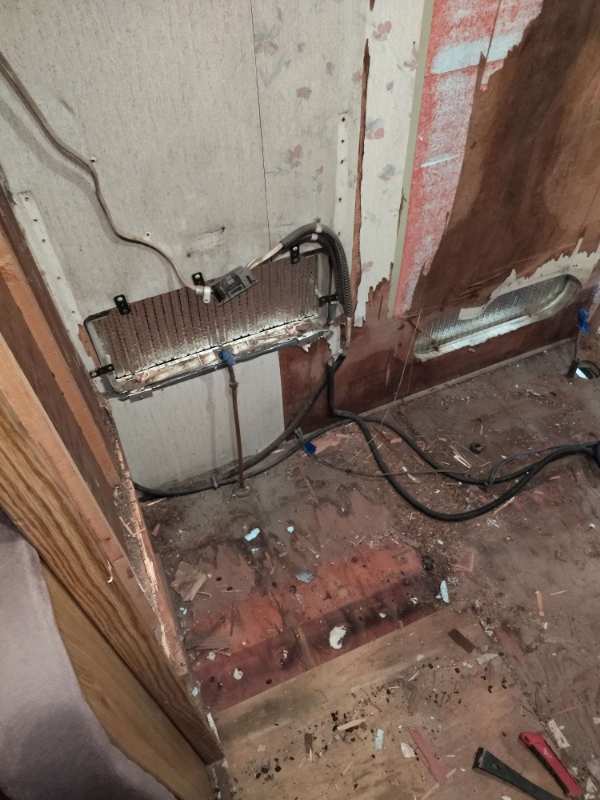
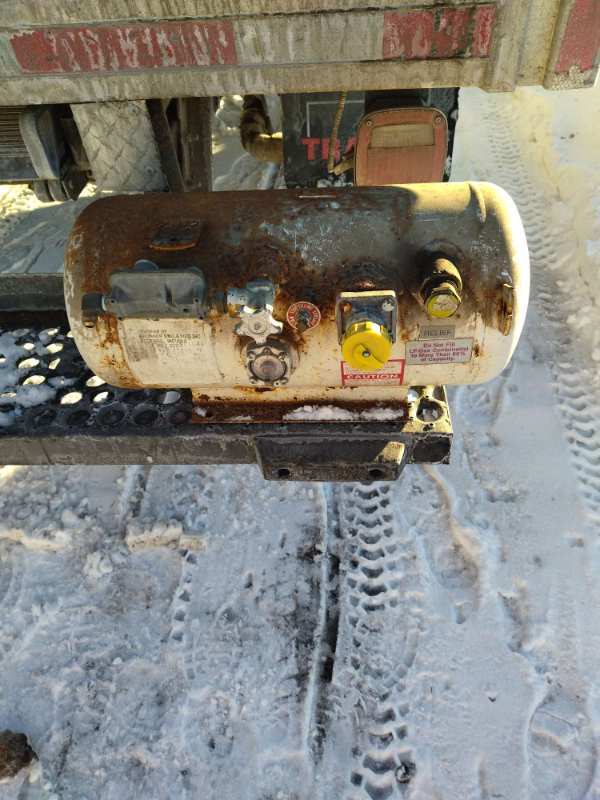
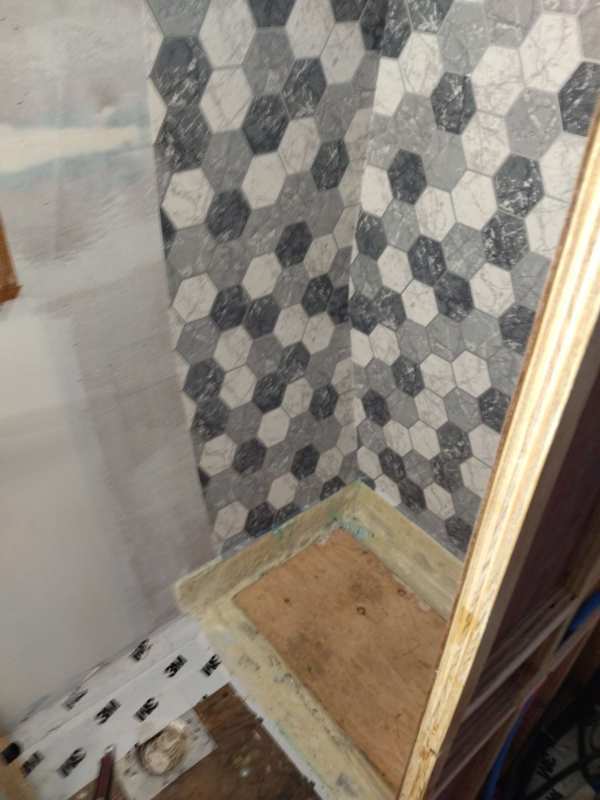
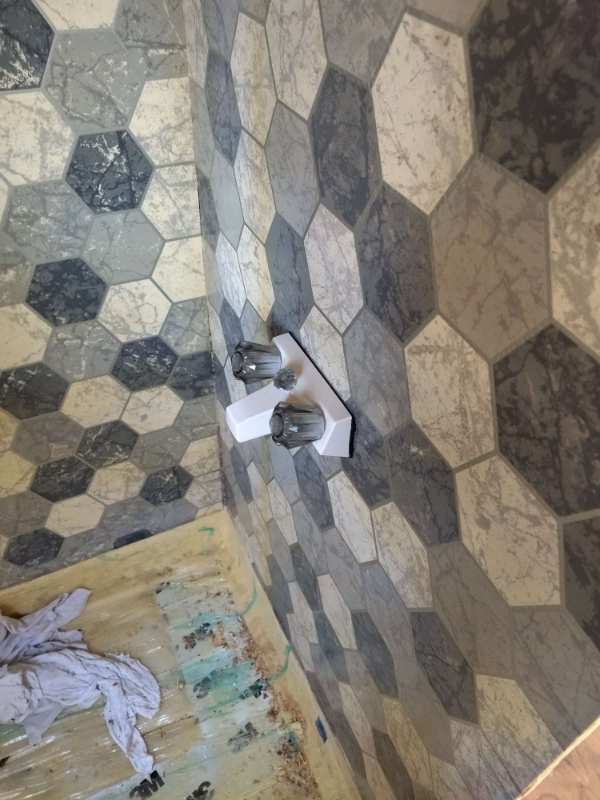
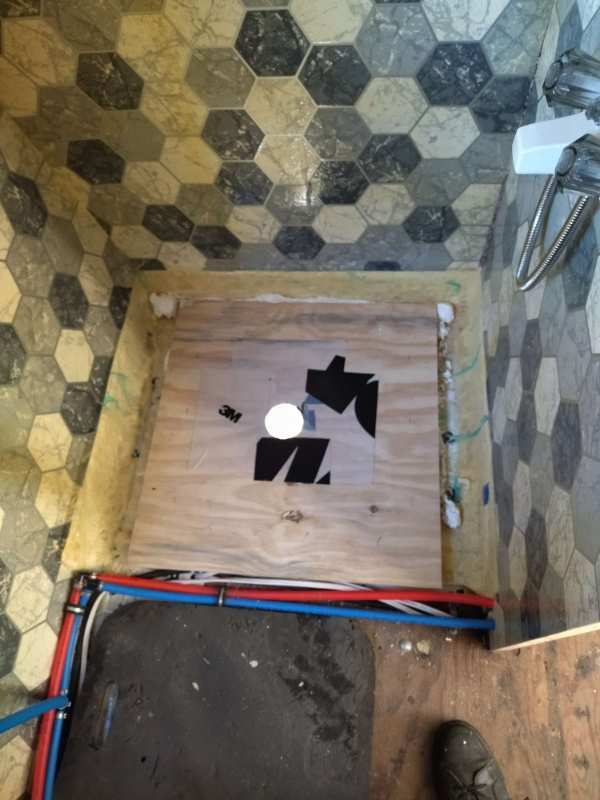
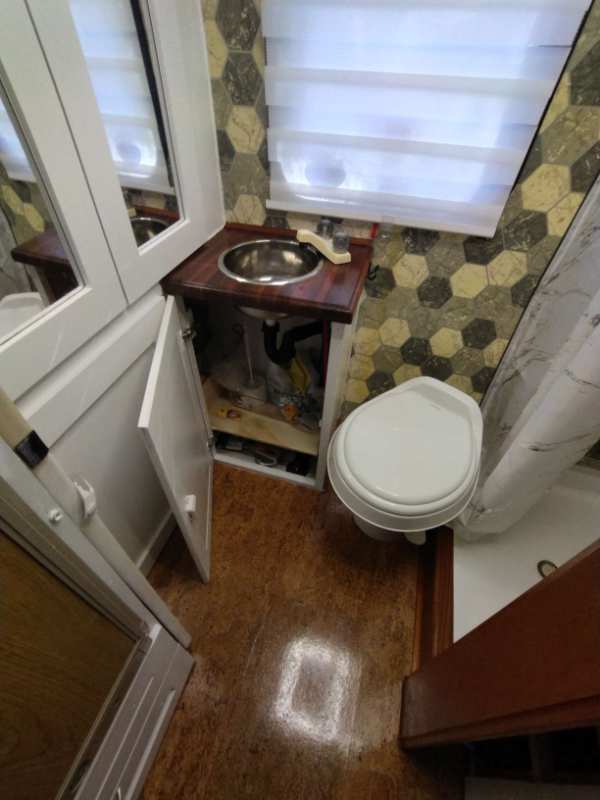
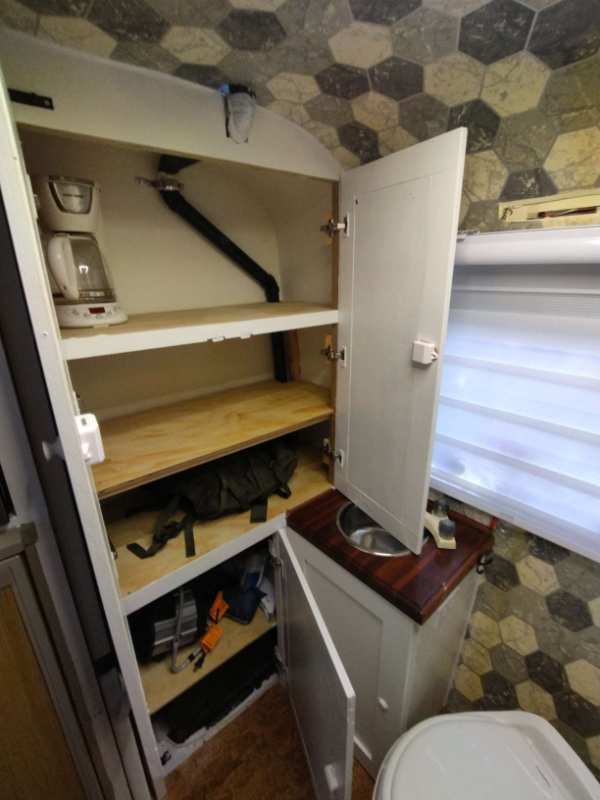
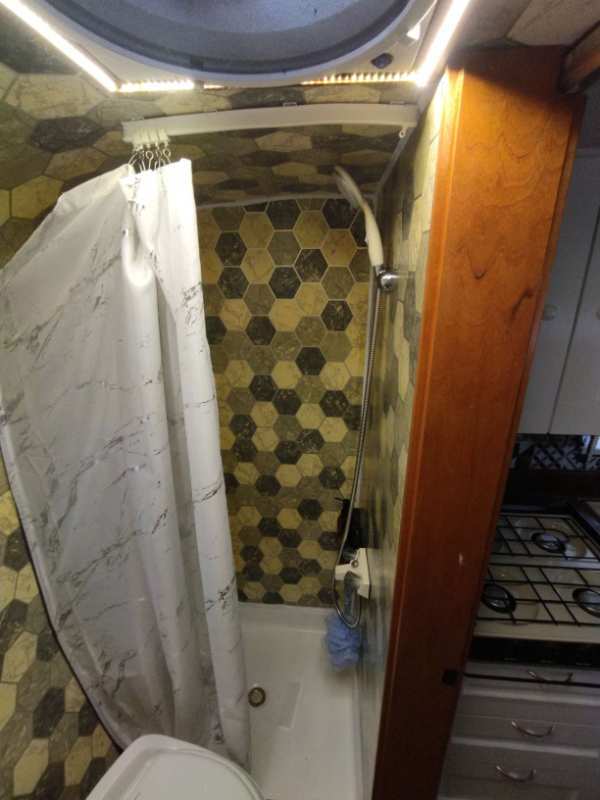
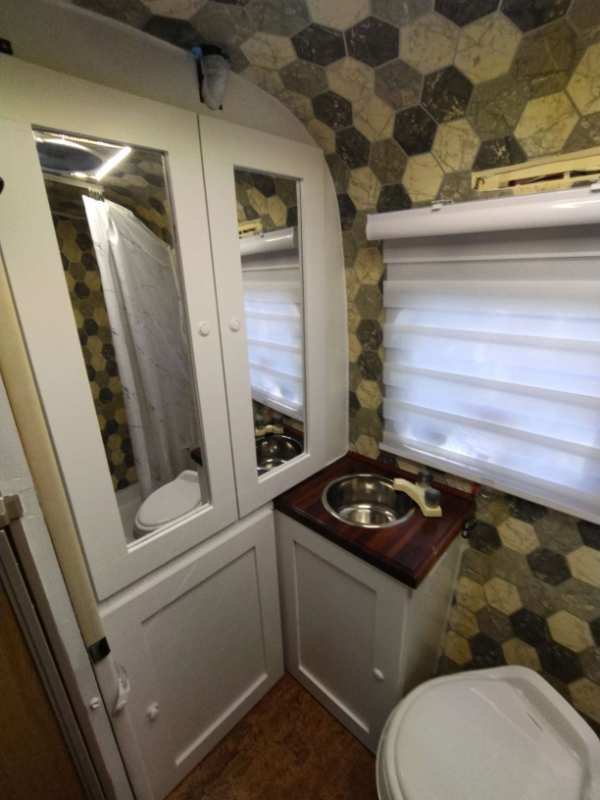
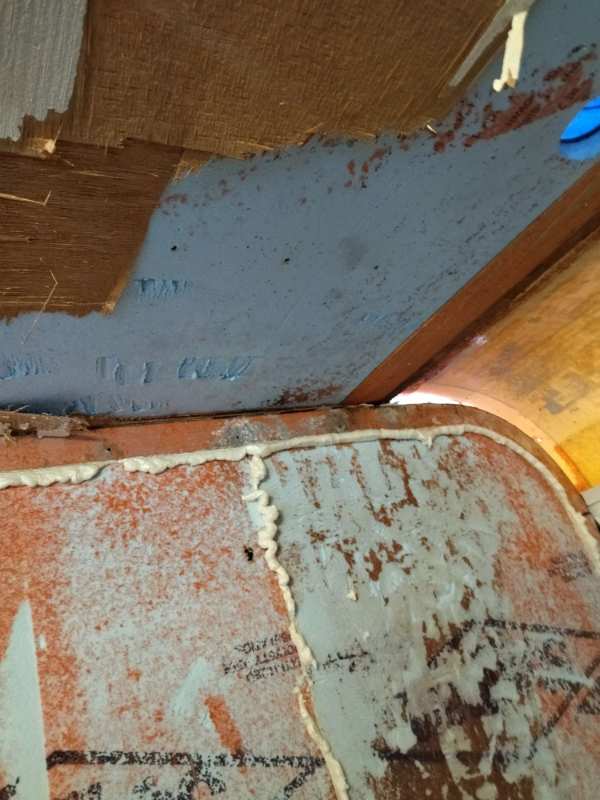
Hello, as was promised, I'm back with a tone of pictures., 😁 After my glue was dry I added the insulation, and also I added some plexiglass where the backlights will be installed. I didn't forget put back the coins, I didn't found why the guys from Winnebago put they there, but you never know... I took off also the propane tank, and send it to be updated by certified shop. Of course behind the tank I found more rotten plywood to fix. After that I covered the wall with the same 1/4 plywood - easy to bend and glue. For the shower sink I decided to put right on the floor. Originally Winnebago put it on the 4 inch platform. I eliminated the platform and mowed the plumbing under the floor. To cover the bathroom walls I choose wallpaper - a lot of moore work to do it water proof, but it's lighter than tails. To water proof it I cowered the wallpapers with 5 layers of expensive top coat clear. I changed the layout of the drawers for have more storage space. For the floor I used cork boards. And that's it for the bathroom. Easy - beasy, almost one month of work...
-
Thanks Linda, added to my wish list.
-
Great info, I know now what I'm doing this winter. Thanks.
-
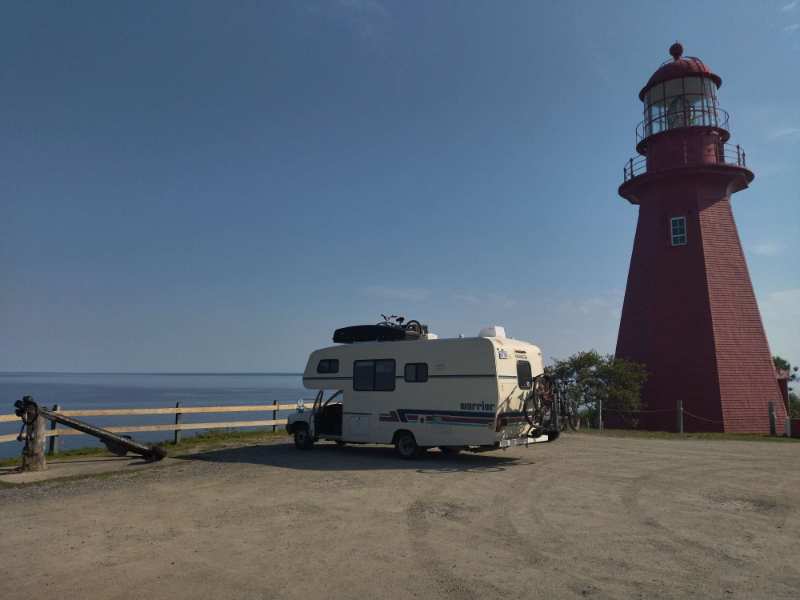
Hi everyone, I wonder if someone with V6 engine already changed his exhaust system for an cat back one. I'm on the long run trip vacation and I found out that 13mpg it's my Toy's maximum, and of course I miss just a bit of more HP. I found some great info on the topic below. Among others, nice things to improve, there are recommendation to change for cat back exhaust, seems that will give 20% (!!!!!!) improvement on the mpg and some more power. Of course I want that 😁. Linda has put this for 22re : https://www.ebay.com/itm/384315893190 Will this fit V6? Have someone already improved his rig's exhaust ? P.S I almost ended with my Toy's restoration, I have a ton of pictures, and I will add them in the winter ( need free time). There is some pictures of a nice rig 😜
-
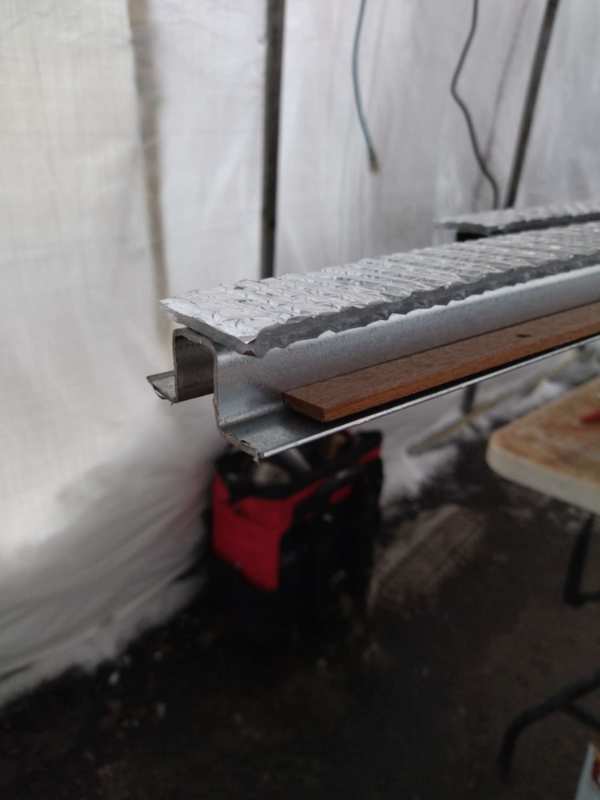
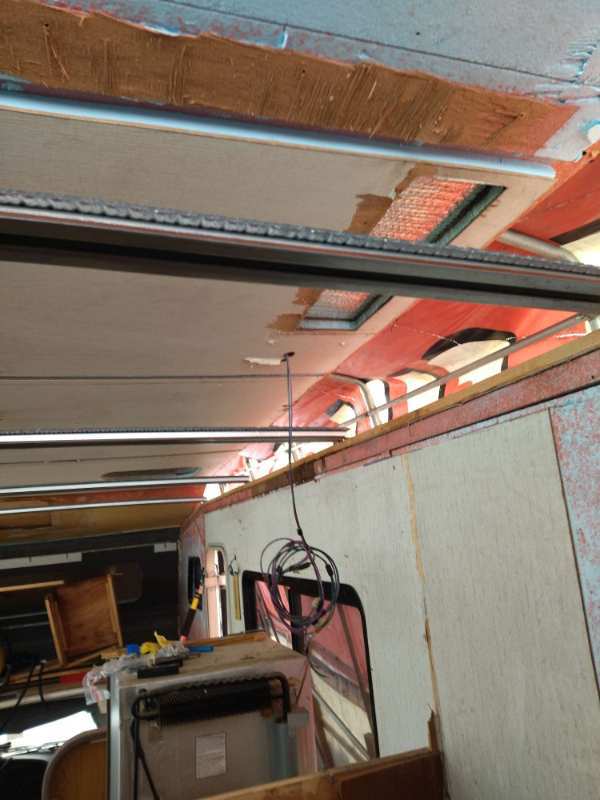
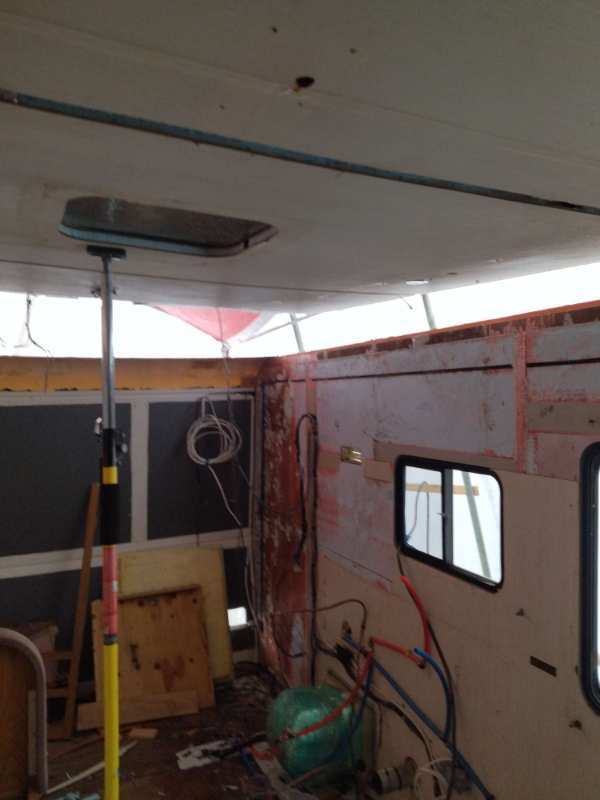
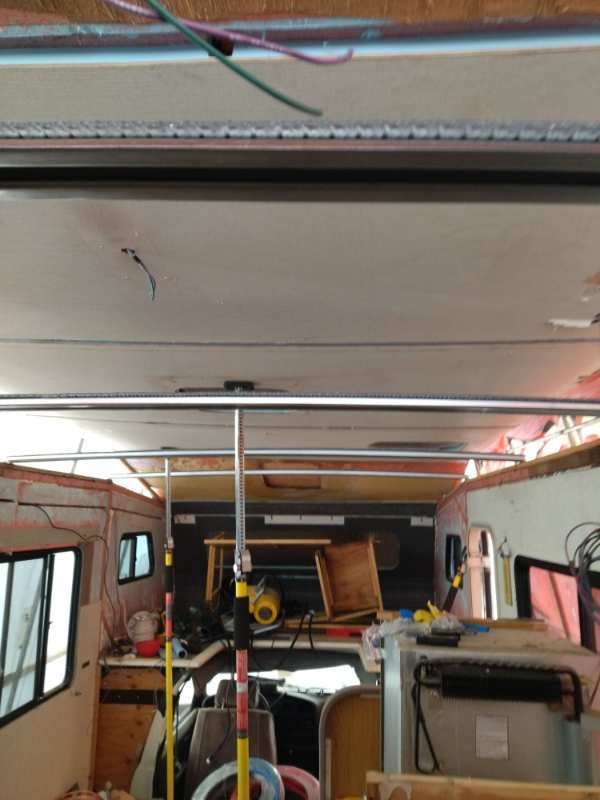
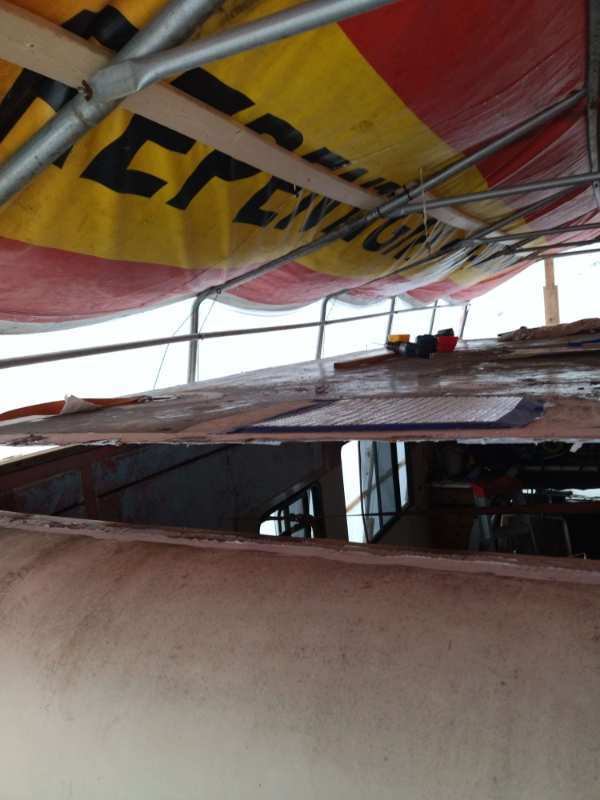
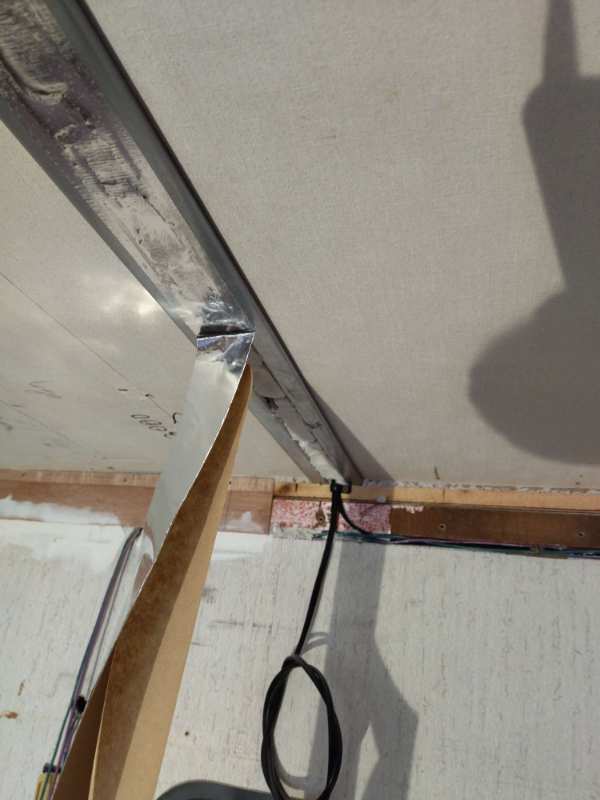
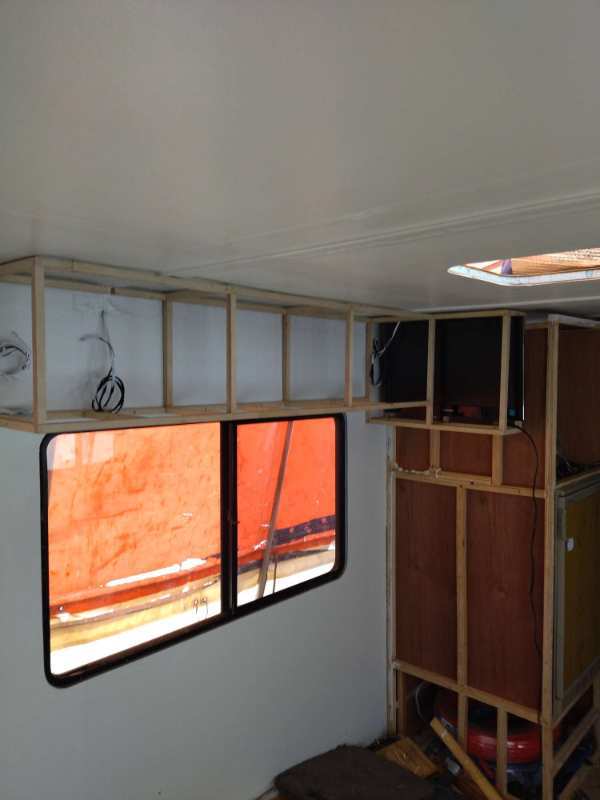
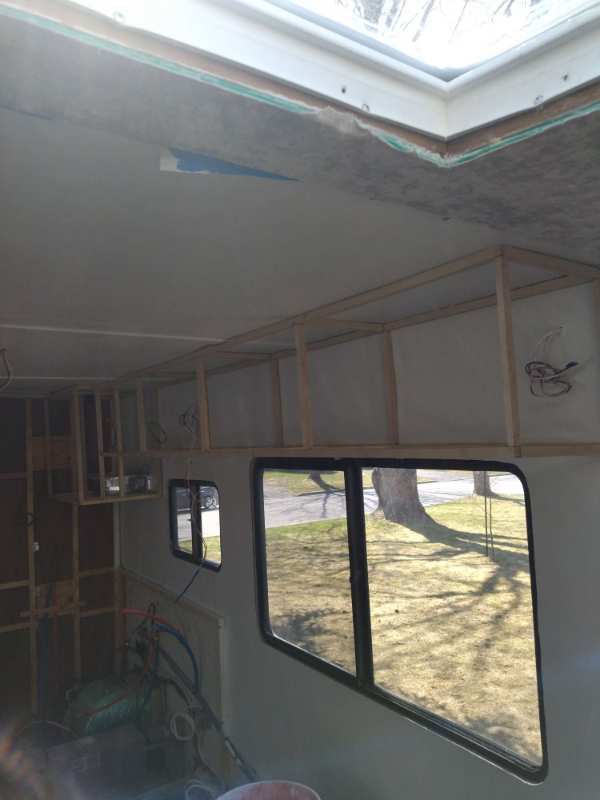
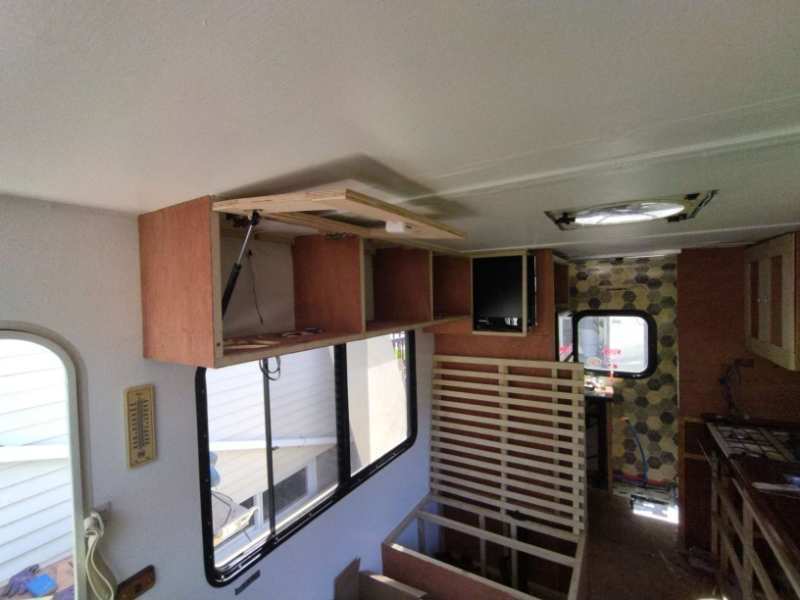
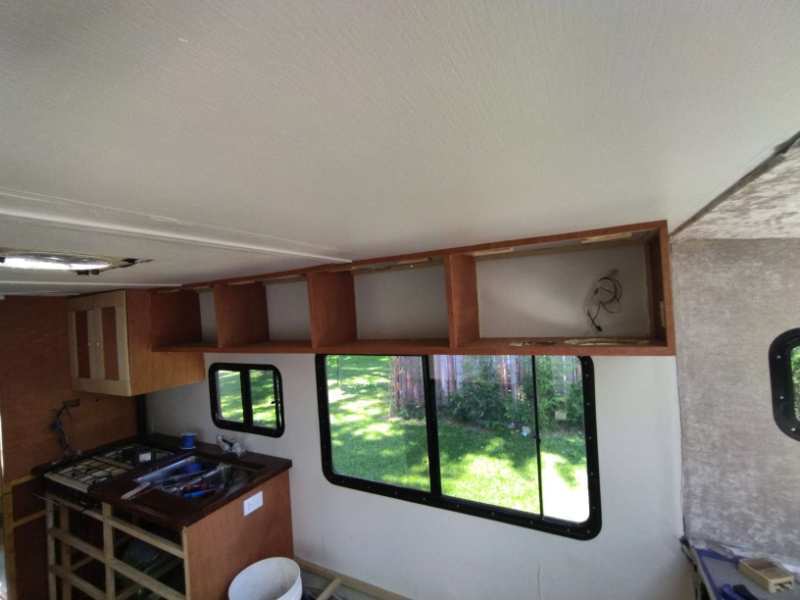
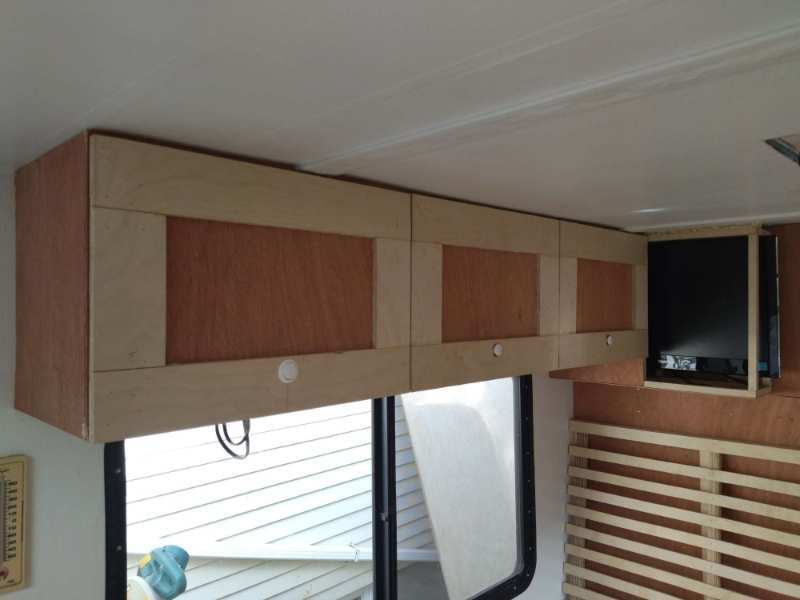
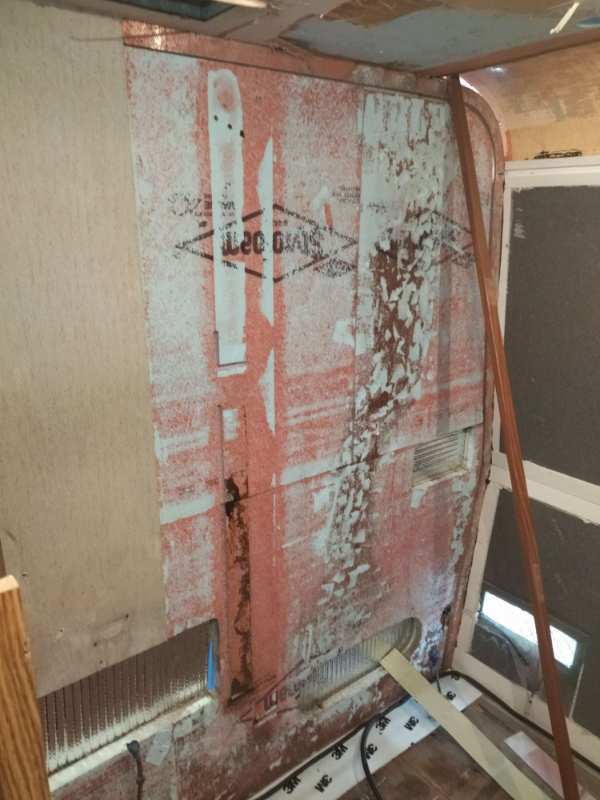
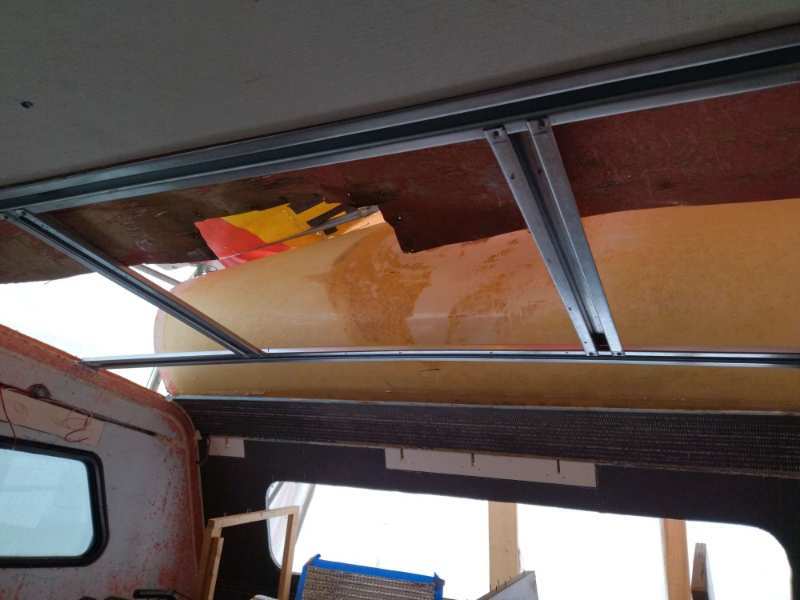
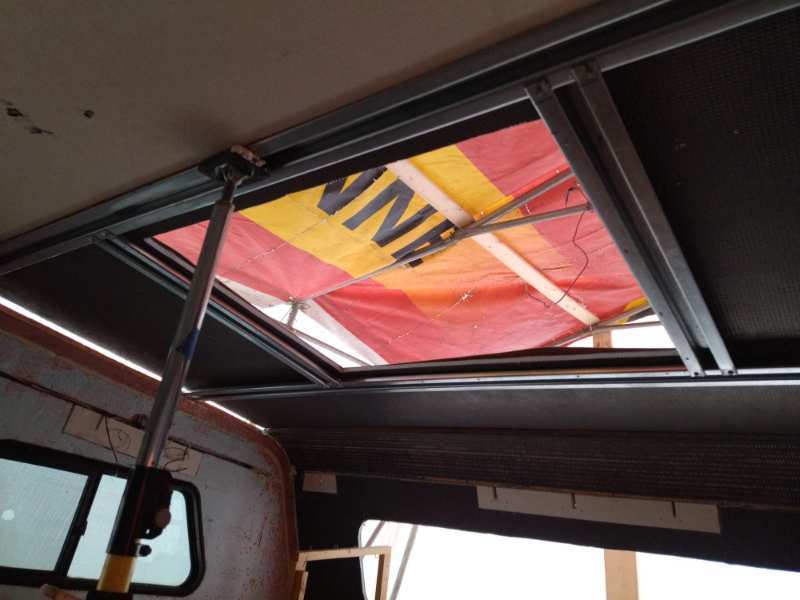
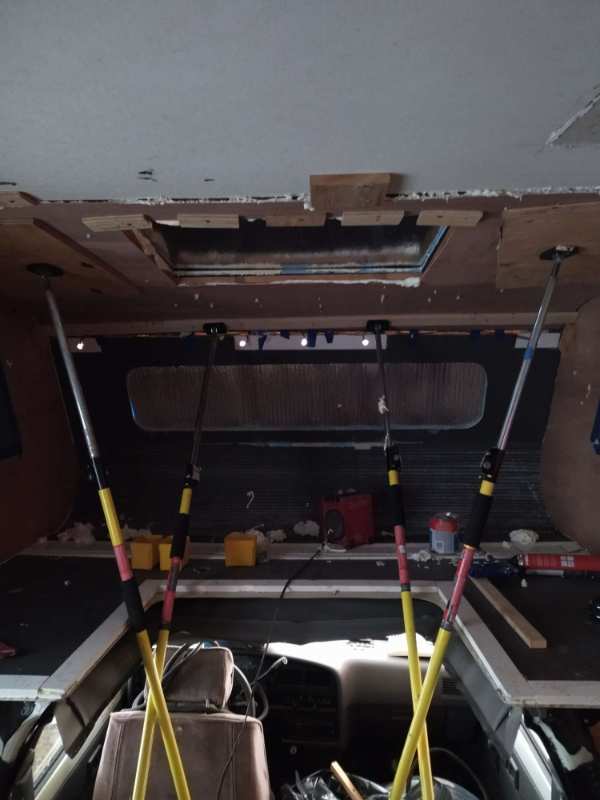
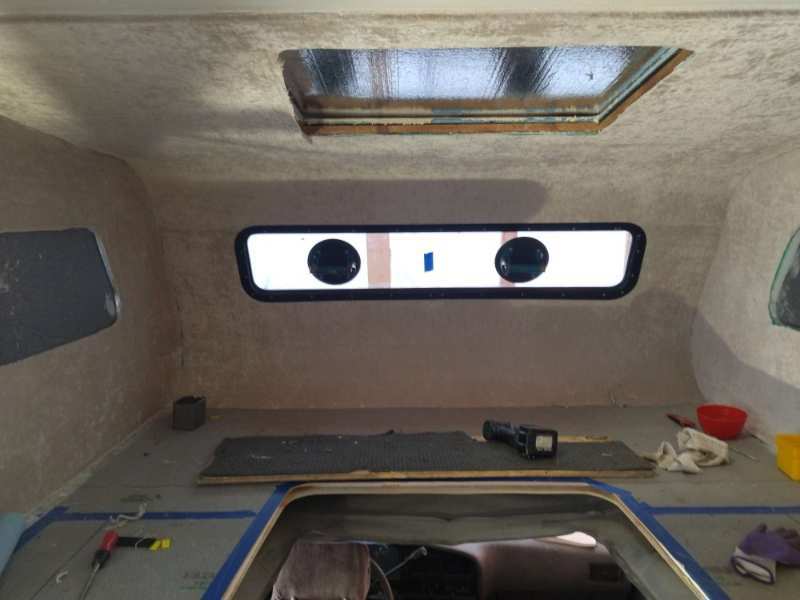
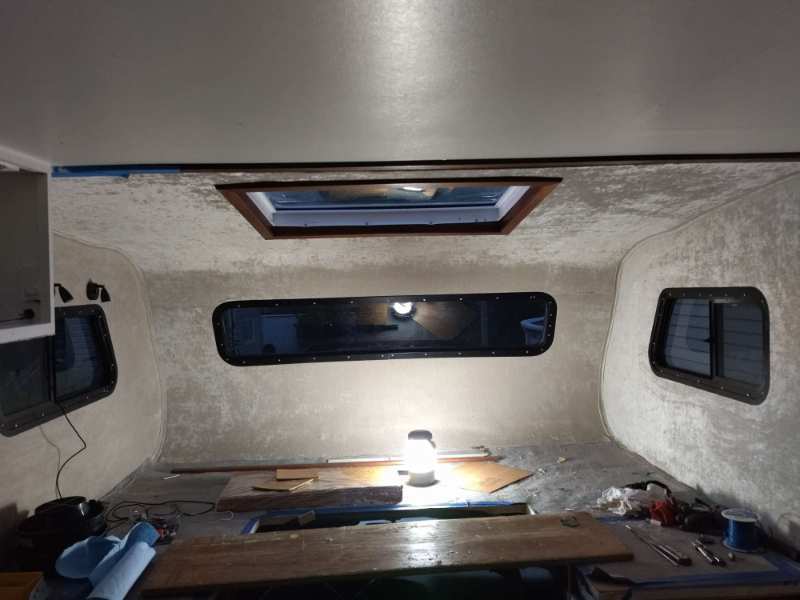
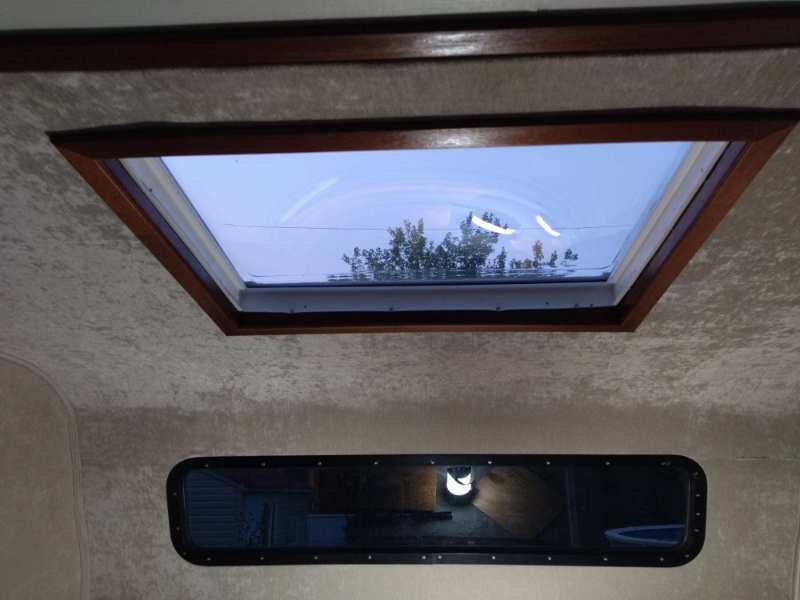
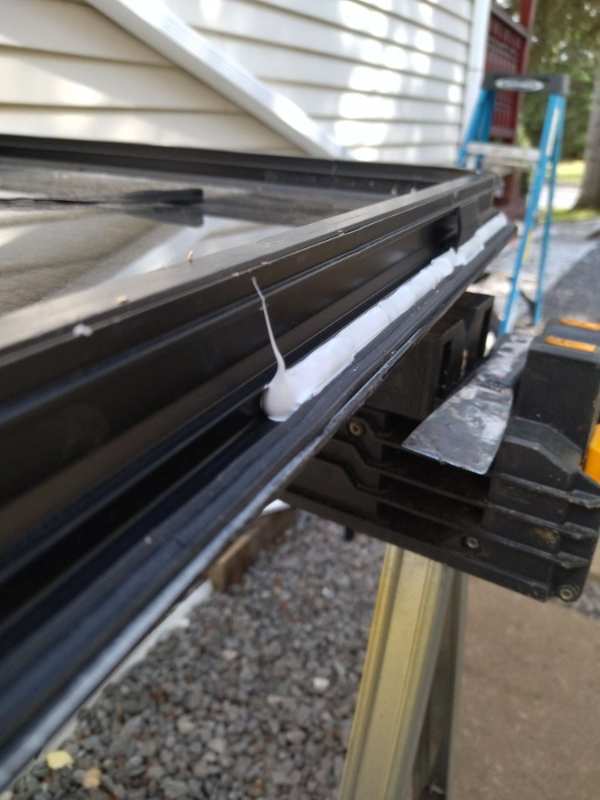
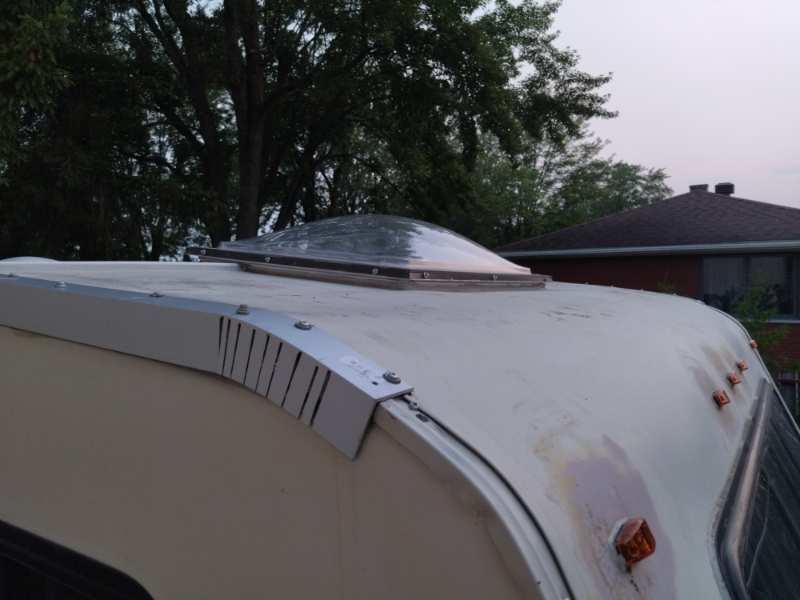
So I'm back, took me some time to add new pictures - isn't easy to find free time when you have old rig to repair. I decided to reinforce the overcab in perspective of use a large skylight to access the roof from inside. For that I used the galvanized profile ( found them at local cube builder). I used the fiberglass coated board between original fiberglass and the new added frame. To cover all from inside I used 1/8 playwood, very light and easy to bend/work. That's all covered by plywood: Initially I thought to cover the plywood with some white paint, but the boss have changed my plans. I ended to use under floor mat. The idea was to have some smooth, pleasant to touch surfaces in the overcab. The top layer it's a material, choose by the boss of course 😉. Us you can see on the pictures, I took off all the windows and reinstalled them on the industrial grade caulking (25 years warranty) and polypropylene gasket, no more butil for my beloved rig. For the skylight I was obliged to change my plan, to much $$$ for opening Dometic skylight. So, I ended by a nice double layer acrylic skylight, which I modified to fit my rig. We can't open this one, but It's cost 230$ 🤑 and it's very light. And that it's the final version of my Toy's overcab. All my free time goes there but the results it's worth it.
-
Thank-you for the link, my rig have a ribbed belt.
-
I understand. About 160 amps alternator, if I see right, that means more pressure on the timing belt. Can a Toy setup handle 160 amps alternator without any modifications?
-
Thanks WME. I have another question. In the topic which I put the link here above, you said that " The DC to DC charger does have limits and you need to understand them. But for small Toyota size setups it's easy and fast." Could you please explain what limits you mean?
-
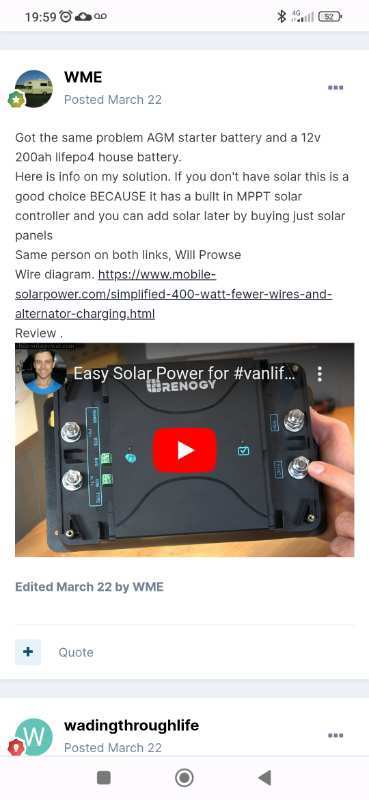
Sincerely, no one 🥴. As usual I will take time to study and understand everything I can find before I do something. I was thinking about this: I found that easy to follow, and seems that Renogy are well rated.
-
Now I understand why the wiper is slow, it was on my list to replace it because of speed. I will locate another ignition hot wire and keep the motor and $$$. Thanks 👍.
-
Sorry WME, but I will answer with the questions 🙂. How the white wire will control the DC 2 DC charger? Which battery you mean house or starter? Could you please explain more about rewiring. If I understand right the question then, for the beginning, I will use only alternator for 12v input.
-
Hi everyone, After reading a lot of topics about convertor/ battery upgrade I ended by change my PD 6300 "boiler" (WME did right too call it like that 🙂) for pd4135kw2b converter. This converter have a nice switch for Lithium battery so, now I'm looking to buy a 100 Ah smart renogy battery. Also,I found that I need to add DC DC charger ( WME added a nice link for this setup). I know I need to take off the old isolator but I found that my Toy's wipers motor is connected to isolator also. How to deal with that, should I keep the isolator and just add the DC DC charger? Or, It's a must to take it off, and I need to plug wipers motor somewhere else?
-
Hi wadingthroughlife, did you finely find an solution for your setup? I'm going thru the same situation right now so I wander if I can ask you some questions about your setup. Thanks.
-
Hi, be careful with heat gun near the insulation - to much heat will melt it. I used a thin small putty knife to get between layers and it's came off pretty vel, even from fiberglass.
-
Roof work: re-caulking, adding solar + a new vent
Andrewups replied to roadtriprachel's topic in General Discussion
Happy that Rachel started this topic 🙂. I found a lot of helpful information. Have a comfortable temperature in the rig it's one of my challenge. I found that some Toy's owner use a generator to run OEM roof A/C. I found that my A/C it's noise and 30 years old. So I taked off my roof A/C and decided to replace it with Midea 8000 btu. I decided to install it in generator compartment and run it with 2200 Inverter generator while I drive. After that I found this topic and now I am poisoned - I want solar (free) energy also.... Fortunately I haven't yet buyed the Midea or the generator, I still tear down my rig and replace roten wood. If I will go with Midea and after that install the solar panel, do I lose much on the DC to AC inverter? -
Good, that I will check if there are no leaks. Visual the tank are ok, but I think to plug an air compressor to it - to be sure.
-
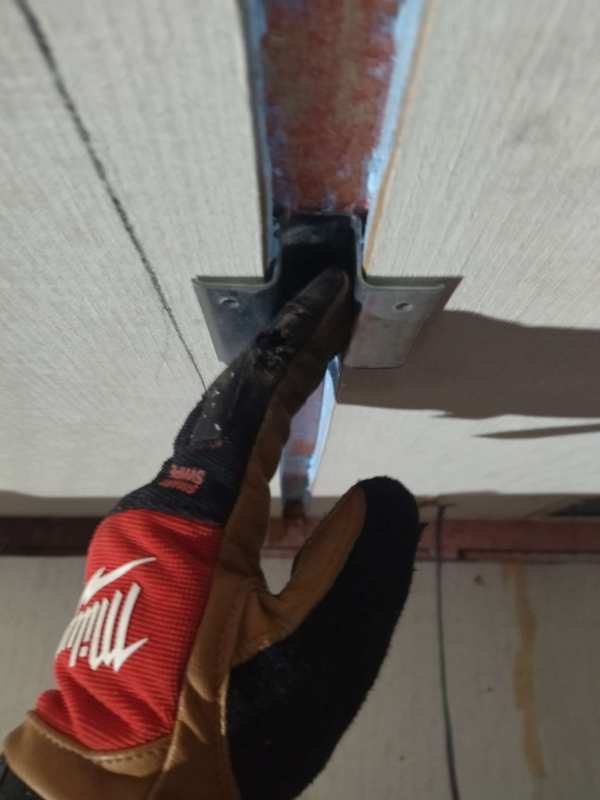
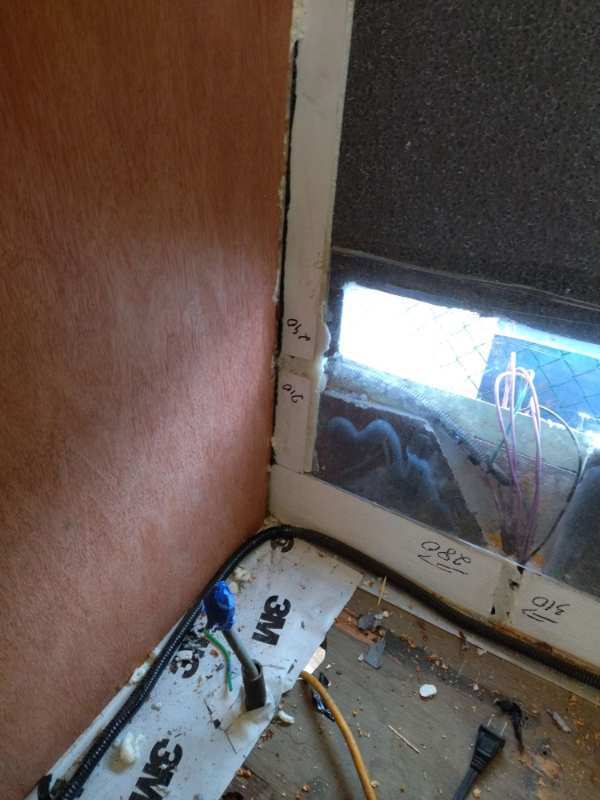
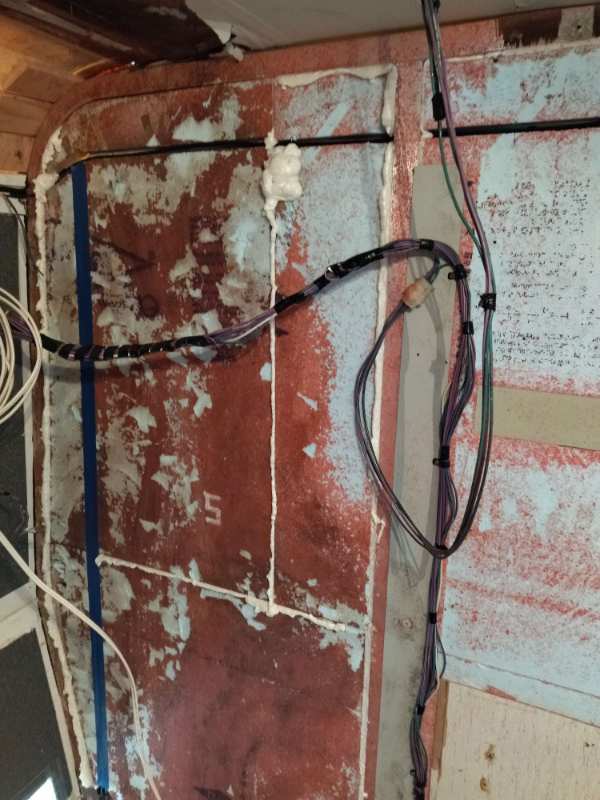
So, I made some drawings today ( I feel like Picasso🙂). There is only the driver side. Passenger side will follow in 3-4 weeks. So the frame follows yours rig shape. After that I have 3 vertical stud. #1 it's right where the overcab ends: Sorry for the mess, I'm working in my patented car shelter and outside is winter, so I'm obligated to keep all inside my rig. The coins are from the ring - I have filing that I will make a nice collection of them in the end... #2 it's between windows : #3 it's in the corner of bathroom: Also there are some little pieces of aluminum sheets around the windows ore behind the cabinets, they used the 0,23 aluminium sheet for that, so it's not very strong but helps to keep cabinets and bathroom wall. For front and back - I had nothing solid, it's only the polyestern laminated with thin plywood. I changed that - you can see it in my topics. For the roof it's nothing solid, they used wood. To tear down the roof it's part of my plan - so I will see. Now - if you don't need to tear down your walls, go carefully with the screws. Go with maximum 1/2 screws, you don't need longer than that. On the pictures you see a channel with wires, it's going from the front to back of the rig - it's marker lights. It's placed 5 to 6 inches from roof. You don't want to put a screw there 😜. The rest of the wires are on the rof and beside kitchen. Another thing to consider is that in your rig the studs can be placed differently than in mine. To be sure that behind the wall you have stud - go with standard screw(not self- screwing), if it's stop after 1/16 then you are in the right place. I was unpleasant surprised when on the passenger side didn't find vertical stud. There was only the aluminium sheet, so I made a channel to add the aluminium stud.
-
Hi Bill, Maybe it's too late but I can add somes pictures for you. I tired down almost all my rig (92 Warrior) so I can see where frame are located. Let me know if it's still actual.
-
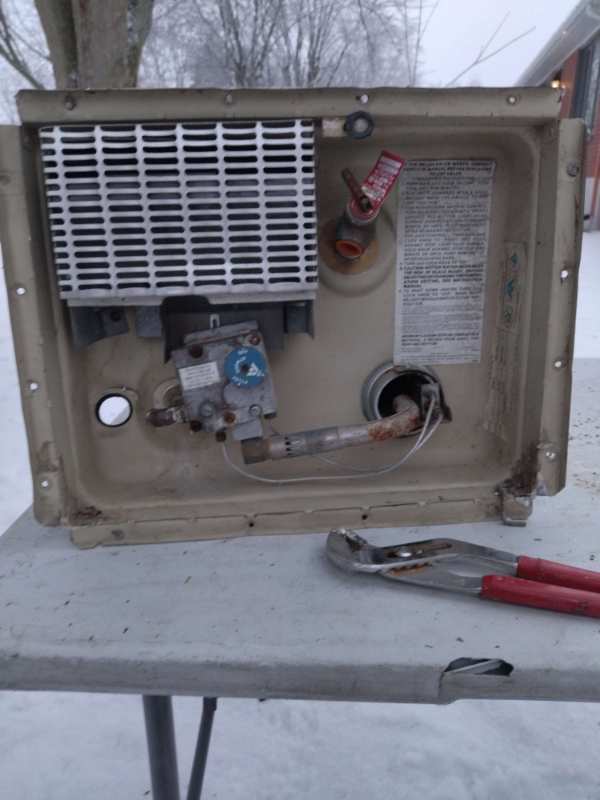
Thank you WME. What is the function of this little thing?: Also what it's your personal opinion about the viability of this old water heater? I found that some near me sell for 400$ a Dometic water heater electric and propane, 3 maybe 4 years old. But I found that it's have to much wires 😃, so moore chances that something will break. What do you think?
-
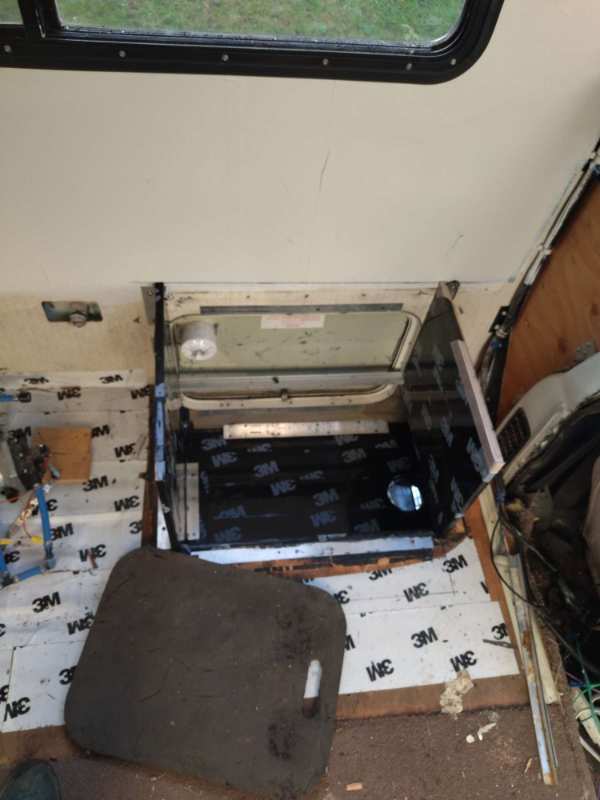
Hi everyone, Today I taked off my water heater - I needed to re-seal it and check for water leaking. So I discovered that I have no idea how it's working - sorry for my ignorance.🙂 I saw that control knob have 3 position, on, off and pilot. What for is pilot position? Also near knob I have some very helpful information that seems to be very useful for the people who understand what it's means 😉. How do I know "if circuit is open" and what " replace control" means? Thanks.