ToyoGuy
-
Posts
331 -
Joined
-
Last visited
Content Type
Events
Profiles
Forums
Gallery
Everything posted by ToyoGuy
-
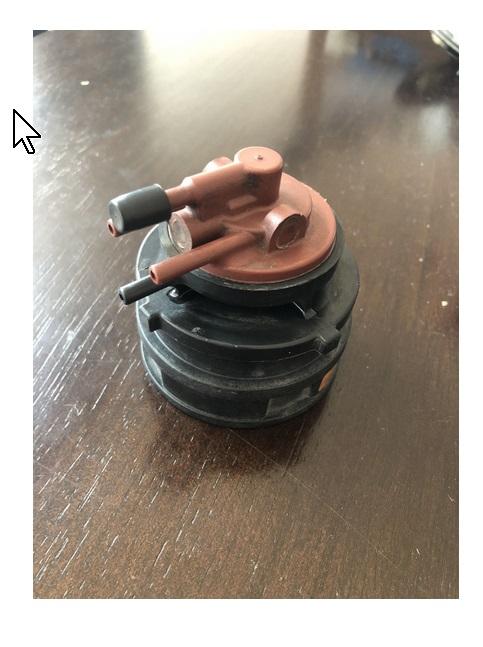
 Howdy All, Just returned from the shortest outing ever, a single over-nighter of about 150 miles just to gain 5,000 feet of altitude and check a Toyota "option only" (per factory manual) altitude compensation system I assembled out of used parts. (diagram below) Those who are as old as I, remember that carbs run richer at altitude because of lack of oxygen and this system is designed to,beginning at about about 4,000 feet, advance the distributor timing and lean out the carburetor fuel mixture to offset that. (For those who have a fuel injected motor, you can quit here, this is all handled by the computer). Anyway, I was foiled in my attempt by a bad / used HAC valve that seems to be stuck shut and didn't open to allow the carb to pull more air via 3 air-mixture ports at the top of the throat of the carburetor. (other below) BTW, a new HAC valve is about a hundered an fifteen weasle hides. I stopped at the nearest mountain town of Placerville, and talked to a mechanic who deals with this kind of thing much more than the sea-level mechanics I use. He was kind enough to inspect the part and concurred it was defective and said they cannot be reliably repaired. He also kind of inferred these systems can be a can of worms. Has anyone out there had any experience with this particular system, and can they speak to any change in performance at altitude? It seems to me reasonable that advancing the spark 7 degrees could help with horsepower loss at altitude and it sure doesn't make sense to me to run the motor richer than required for hours at a time. Just asking.... BR, TG
-
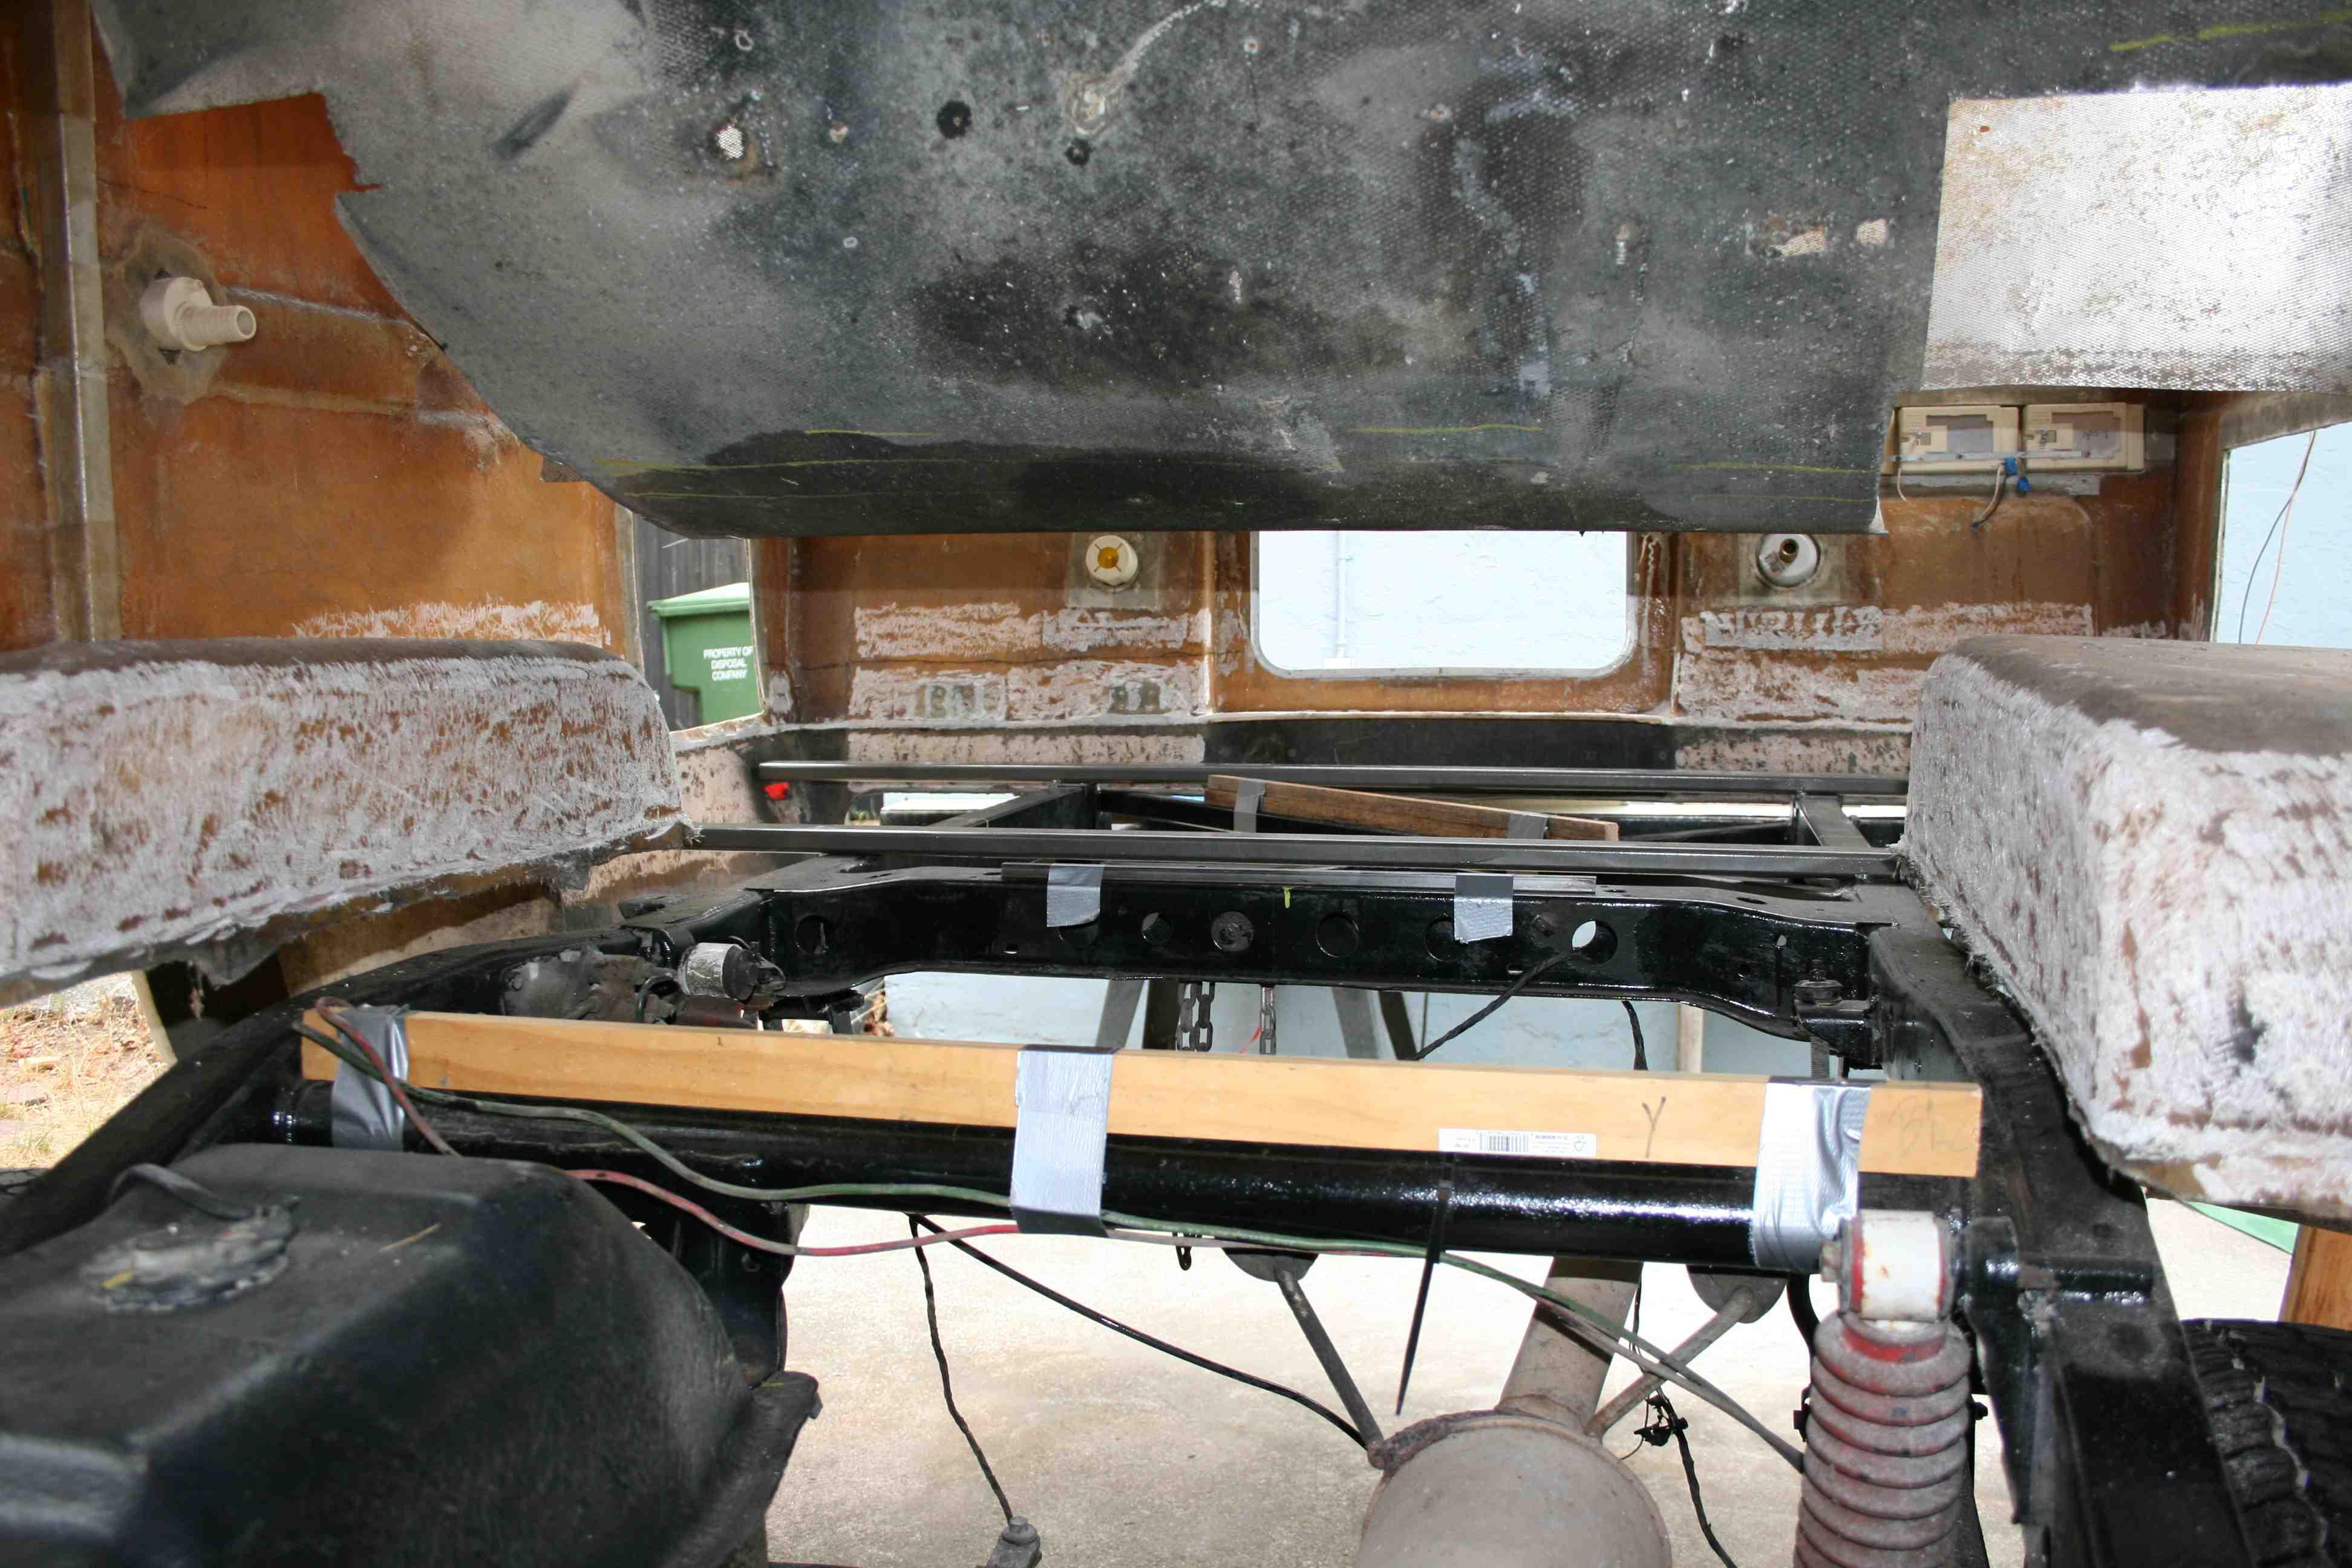
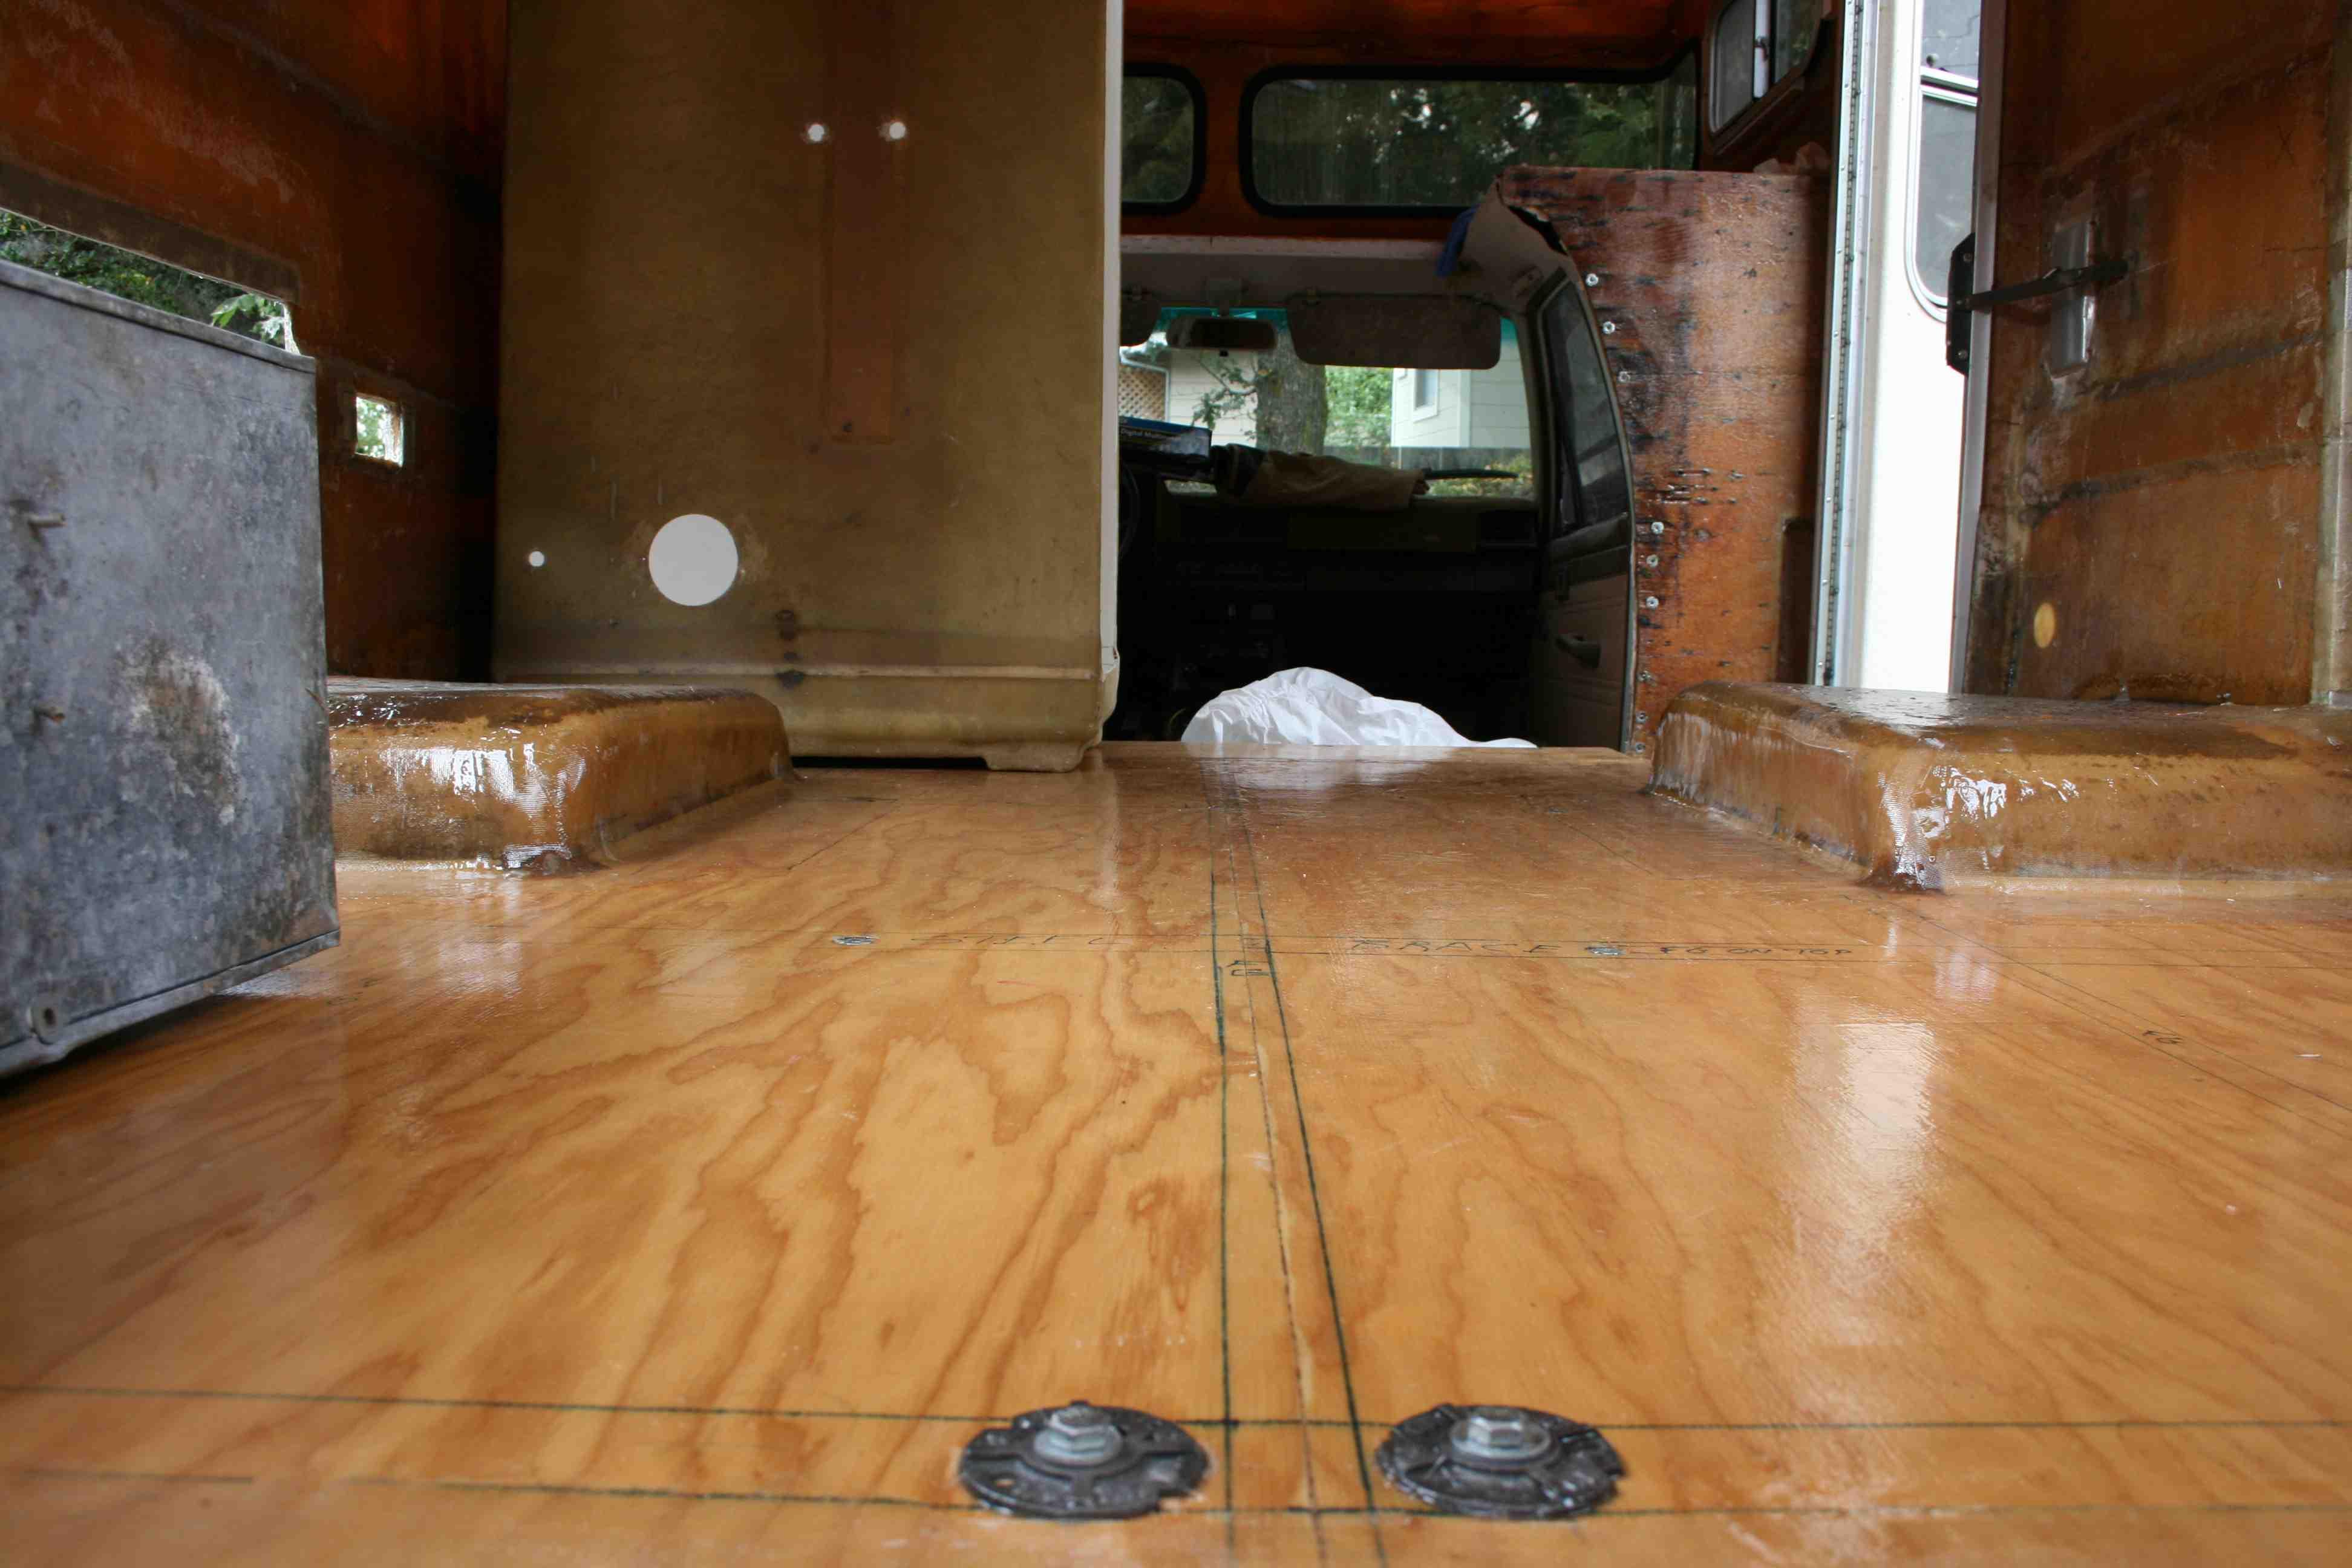
Hi All, Just got back from the truck scales with another '84 SunRader 4X4 owner, whose rig is essentially stock except for a cab seat upgrade, and finally got to find out what they weigh stock and how much I added to mine when I did a pretty much total rebuild. With identical amounts of fuel at 1/3 tank, his stocker came in at 5,200 lbs and mine at 5,400. I was actually gratified with the "only 200 lb over" figure , and felt that the 1-1/4" tubular steel for the rear frame reinforcement, the 1-1/4" tubing for the ceiling and addition of 5/8" marine-grade plywood floor contributed a lot to the total increase. Some of the other moves and changes were: I ditched the stock 4 burner stove w/oven at (60 lbs, as I recall?) for a 2 burner (with no regrets so far), removed the Dometic 3-way fridge in favor of an Edge Star 430 AC/DC fridge that slides under the counter when not in use, and I added a Dometic porcelain toilet, also with no regret and added 200 watts of solar. Yeah, .....and there's probably at least another gallon of resin in there somewhere too..... Cheers, TG
-
2013 4x4 Tacoma Custom Chinook build in progress
ToyoGuy replied to Jbird's topic in General Discussion
Welcome to the 1,300 hour club Jbird ! Can't remember when I stopped keeping track. That's one rockin' truck fo sho. What a great build thread, good, useful pictures. Wow. Beautiful combination of form and function and really well thought out. I only ended up about 600 lbs over you, but at about 100+/- hp, I'm also going to have to get a bumper sticker that says: "0 to 60mph, - Sometime Today" Don't loose momentum now and thanks for your contribution. BR, TG
-
Hi Jetalkington, Linda knows more than me about all things SunRader and I'm hoping she's correct on this one. If there are bad over-cuts, there's a way to remedy that. I had to fix the over-cuts on mine, but it takes some time and patience. (See below, hope I did the link right) Once fixed, it's never leaked again. BR, TG
-
Ah, I get it. Thanks Derek. California translation:- gnarly dude.
-
Hi LittleShack, I know next to nothing about Itaska RVs, or what surface you're mating up to, but the FRP I have used is VERY tenacious and flexible stuff in terms of shock resistance and other types of abuse. Check bajadulce's build blog. I'm pretty sure he used FRP to fill-in his Sunrader wrap-around windows on his project. I believe he used the flat side out, as one side is "stippled" with little bumps. Polyester resin will bond to it, don't know about epoxy... Figure on losing any cutting tool blade you use to shape or cut it. The fiberglass strands in it made short work of sawzall, jigsaw and oscillating tool blades I used. Use a mask, the cutting dust is nasty-bad stuff. One issue you would have is the difference in thickness of the existing skin and the FRP. Also, on the sheets I used, the flat side is roughed to prep for adhesion to walls, so you would have finish work there, if you want an overall smooth finish. BTW, what is skookum ? PS- Second on joe from dover's comment re-stove backing. Even if the stuff didn't actually ignite, the chemicals released from the heat would likely be quite noxious. (Just my 2 cents...) BR, TG
-
Ok, Totem, this looks like a great setup for a joke.... and if nobody else bites,... I will. WTH does milk of magnesia do for an exhaust system?? TG
-
12v Fridge-Daily run-time estimate in hrs??
ToyoGuy replied to ToyoGuy's topic in Coach ApplianceTech Issues
Thanks WME, that looks more omni-directional than mine. Wow, a year per battery change! Also, for anyone else trying to figure their present NON-deep cycle RV/Marine battery's amp-hour capability ( How many amp-hours it will support the amp-load of a certain appliance or group of devices) ......... I present .........Interstate's amp-hour formula below. I used the formula on my fridge using 5.4 amps and it came out just about right at about 20 hours of usage from 84 amp-hours of storage in the coach battery. The battery in question is an Interstate Marine/RV SRM-24 with 550 Cold Cranking Amps and Reserve Capacity rating of 140. This is a battery advertised as deep-cycle, but is not actually. I'm impressed that it makes that many amp hrs actually! Per Interstate's site: "To calculate the estimated amp hour rating for your automotive or deep-cycle battery, take the reserve capacity rating and multiply it by 0.6 to get an approximate Ah rating. The Ah rating describes the ability of the battery to provide power over a 20-hour period. If the rating is 100 Ah at the 20 hour rate, then the battery can supply 5 amps for 20 hours. (5x20=100)." (Don't forget to consider amperage loss due to wire-size and length) Anyway, If you're still with me, I hope this might help some confused jamook who's working through this stuff, like me. BR, TG -
12v Fridge-Daily run-time estimate in hrs??
ToyoGuy replied to ToyoGuy's topic in Coach ApplianceTech Issues
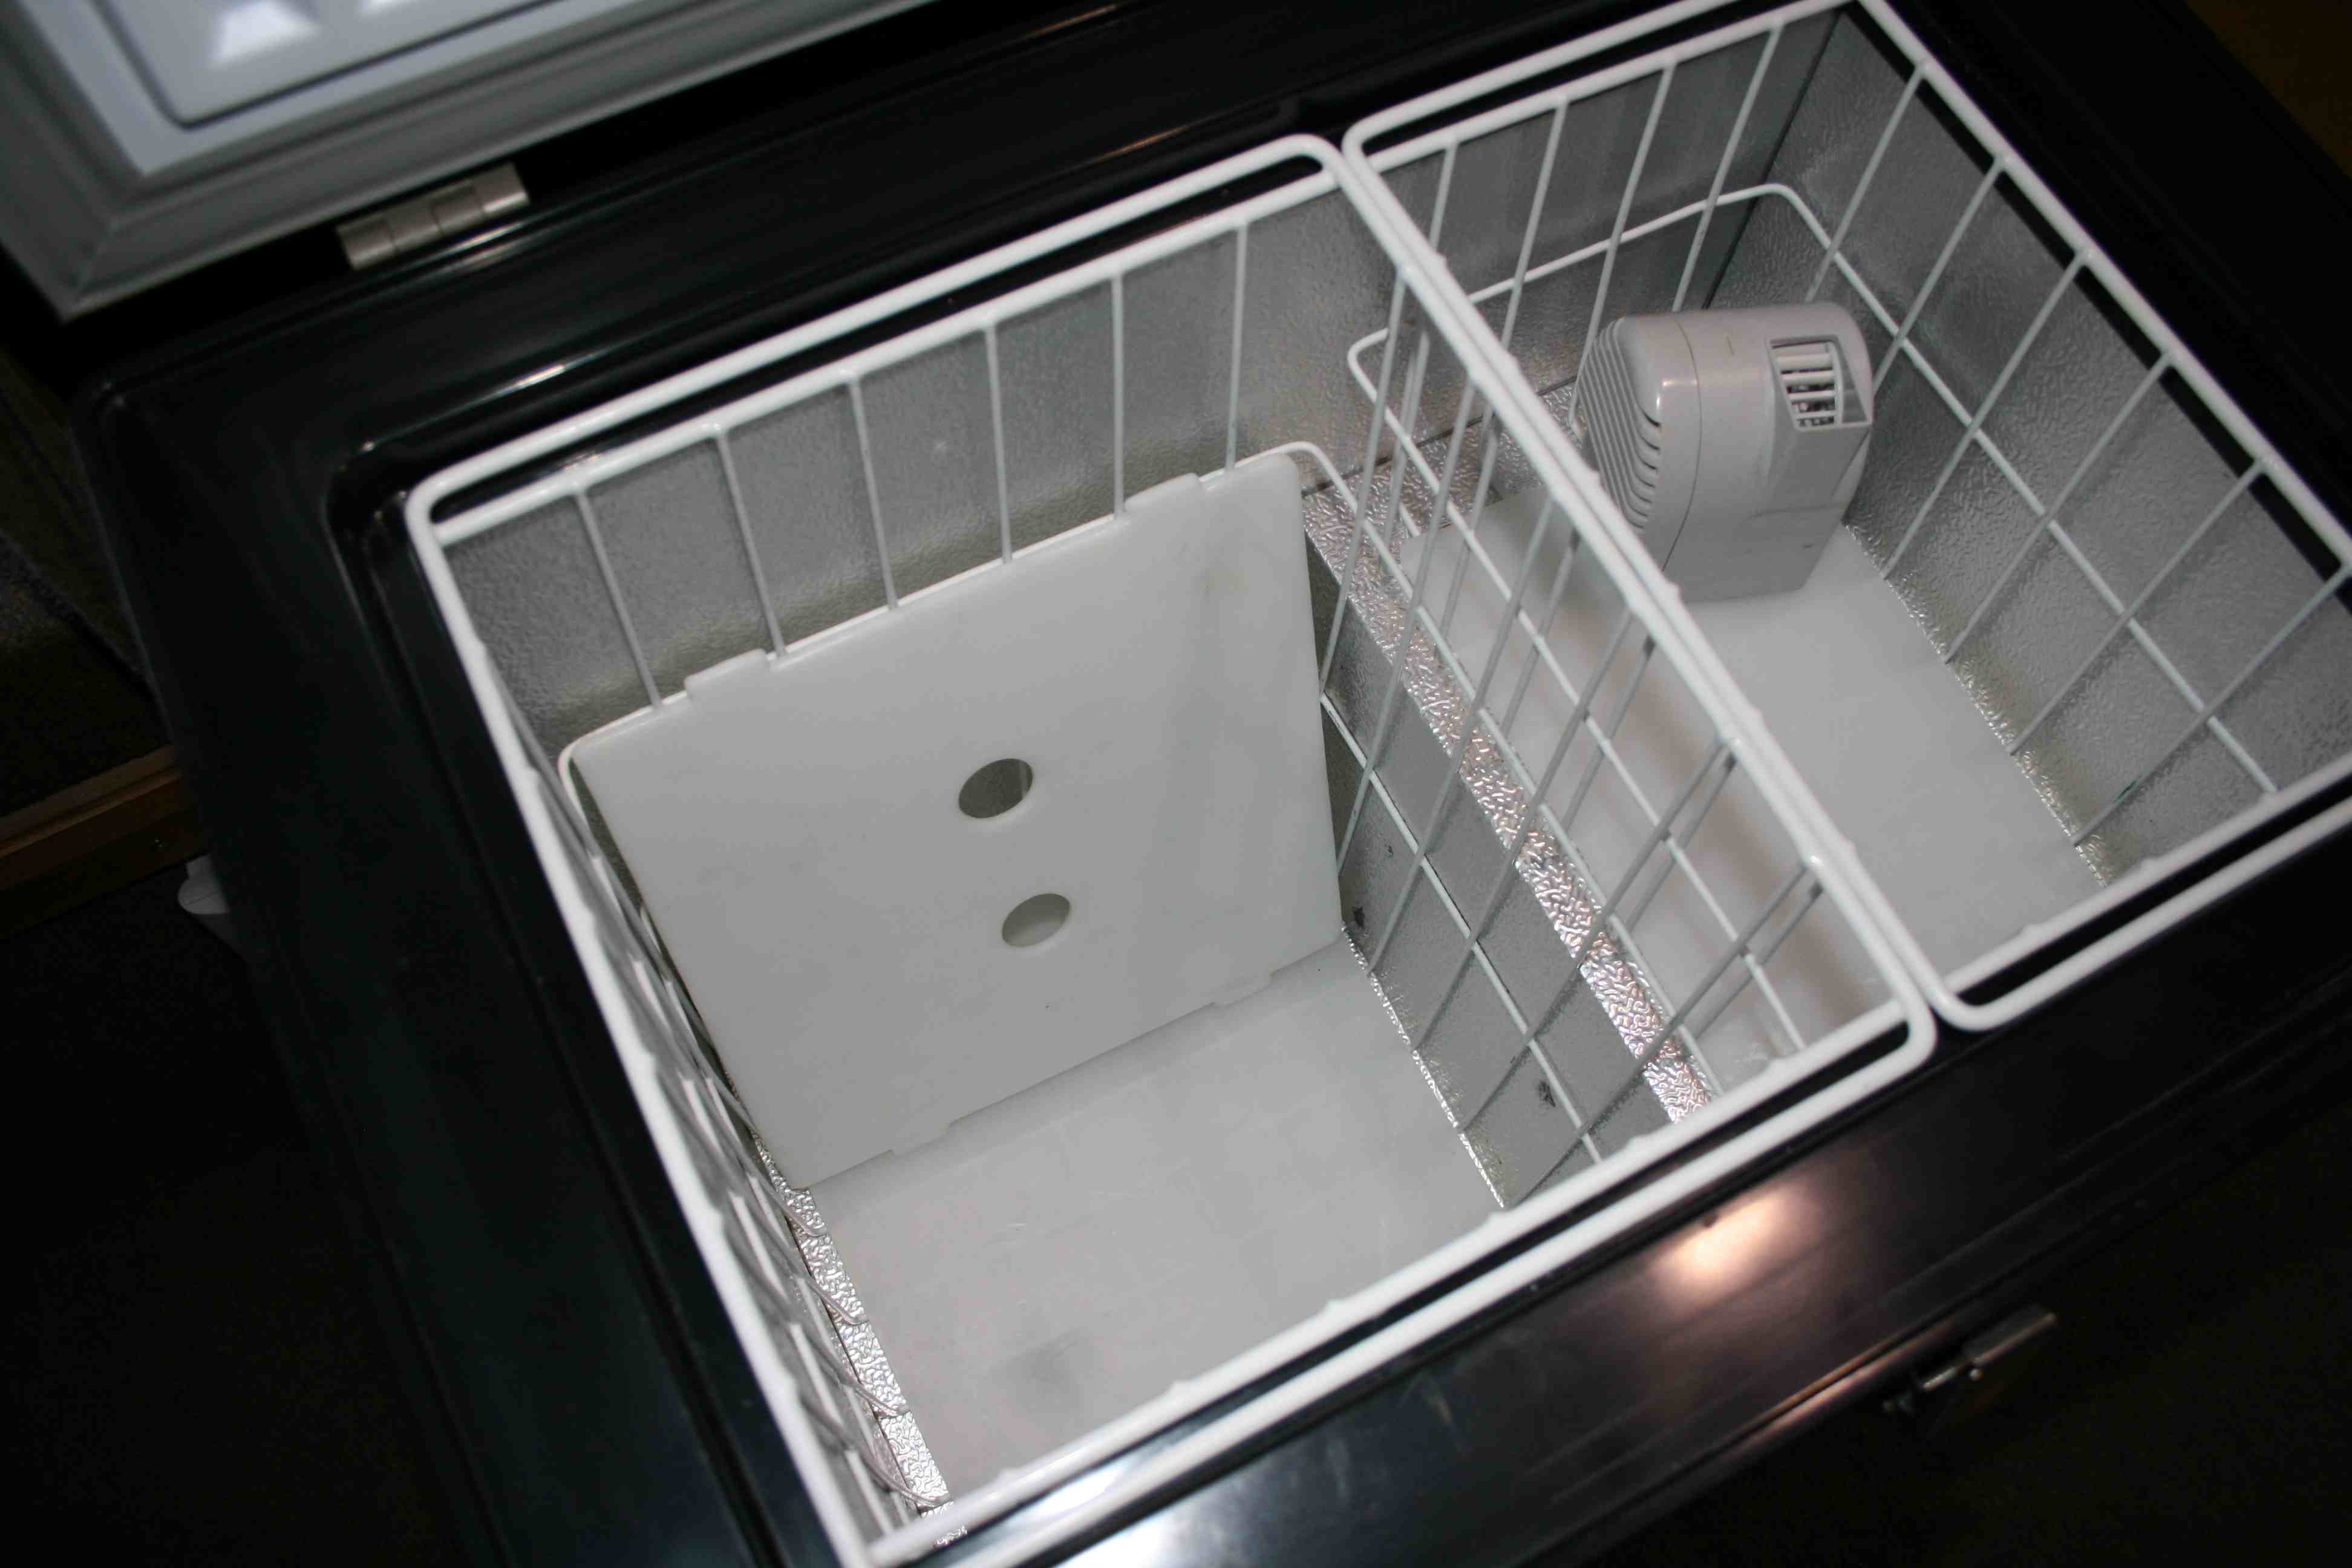
Right, WME, in series . There's a reason I use the clown emoticon more than anyone else on this forum....... Linda, thanks SO much for the link. That is exactly what I was looking for. Now I can copy some of those specs, and together with the rest of my notes, head to the battery store. Maineah, I have heard about those swing-compressor rigs, after I bought mine, of course. I am pretty happy with the performance of mine, for the price. The only thing I would do different now is buy the model with side by side freezer and fridge that are independently controllable for about $60 more, but that was not available when I did my build. (It's about 1 1/4" wider, side to side and won't fit in my cabinets as constructed, darn) One simple modification I have made for this fridge (below) that is SO worth the time and effort (in my humble opinion) is the fabrication of plastic shelves to separate the bottom area from the top and keep things cooler at the bottom and from getting crushed. I put meats and stuff on the bottom of the fridge and drop in the 1/8" plastic baffle, then I can stack stuff on top like lettuce and fruit etc.I do also use a little double-A battery powered fan with it, and It the difference from using the shelf is major. With the basket in the EdgeStar, you can set the plastic shelf/baffles to 2 heights. The holes for grabbing the shelves are about 1 1/2" and seem to promote just the right amount of circulation of air. I also cut out a plate for the bottom of each side so things would "set" on them better, like ketchup or soda cans etc. Anyway, like they say,..."It worked for me". Thanks again to you all, TG
-
12v Fridge-Daily run-time estimate in hrs??
ToyoGuy replied to ToyoGuy's topic in Coach ApplianceTech Issues
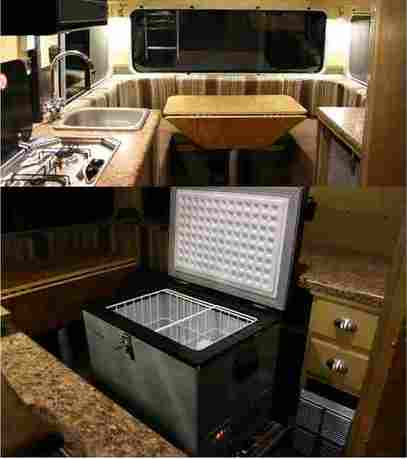
Hey thanks guys. Linda, you find more stuff online that I've never seen..... Jeeze. Thanks Maineah, mine is 12v like the one Linda included the link to the test for. Funny though, in the specs the guy shows on the side of the fridge, it shows 4.5 amps DC with 65 watts at 12 volts. They must be using the new math. With W = V x A, at 12 volts, I get 5.4 amps like you. The tester's claim is that once it's cooled down, to maintain approximately 35 degrees, at normal temperatures, the compressor runs about 10 mins per hour. That would be about 4 hrs per day, or 21 1/2 ah per day, I'm just not buying it. I think WME is closer to the truth at 30%-50% duty cycle, depending on contents , coach temp and how often you raid the icebox.My calculations will put me at about 65 ah per day to allow for heat and running the furnace when it's frosty outside. My fridge is mounted under a counter, on a pull-out shelf (below) and, while it's well vented with 3 vents, I think I'll install a small switchable computer-like fan to help vent the coils. All in all, I'm hoping that once I get a couple of 6v deep-cell batteries installed in parallel, with 200 watts in panels and a good controller, I'll be OK. I already learned about using the furnace and the fridge concurrently the hard way. Thanks again, TG
-
Howdy All, I am doing calculations of amp-hours on all appliances to determine what size batteries to buy for a solar project and I have an EdgeStar FP 430 12v/120v fridge that draws about 5.4 amps @ 65 watts, as near as I can figure. What I don't know, is about how many hours per day, on average and in "clement weather" (like 60's to 70's in the coach) the thing will be running to keep stuff cool. Has anyone with a 12v fridge studied this "Duty Time" problem before and come up with a SWAG or better guess that has worked out? The fridge and the furnace fan are the high-ticket items, so far, but the fridge will be the real deal-breaker, if I get it wrong. Thanks for the benefit of any of your collective experiences. BR, TG
-
Well, late to the party, as usual. But, here's your screw-on cap, I believe. Right out of the Toyota Motorhomes for sale section of this website Cheers, TG
-
Mines 8 gals, I measured that one. Thanks Linda TG
-
Can't find my notes on this and did a search to no avail. Model year is '84. Posting all tank capacities again would probably be helpful for search-function-challenged folks like me. At any rate it would be much appreciated, if they are handy. Thanks, TG
-
What is the square footage of the (seamless) area you need to cover/wrap?
-
Saw this up here in Nor Cal. https://sfbay.craigslist.org/nby/rvs/d/toyota-sunraider-rv-reduced/6398015339.html Wow, all it needs is a baby grand with a candelabra on it. TG
-
Thanks guys, I'm glad I bought the Progressive Dynamics converter with the conditioning cycles for charging the battery. BR, TG
-
Can anyone comment on how much loss (if any) there is running the coach shore plug into the generator output plug (and thus through the coach distribution panel) vs using the hardwired charging cables available from Honda that just plug into the generator output plug and clip straight to the battery posts? Someone told me there is some loss associated with plugging into the generator with the shore plug and going through the whole system. Thanks for any insight. BR, TG
-
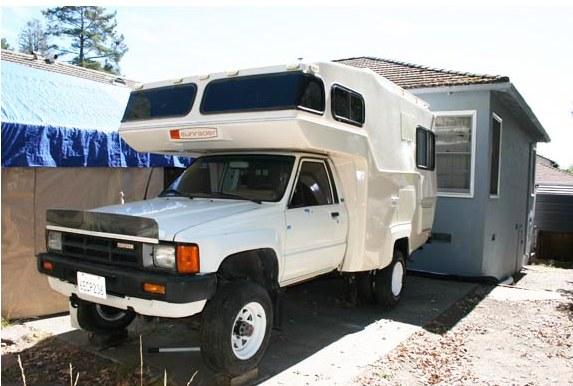
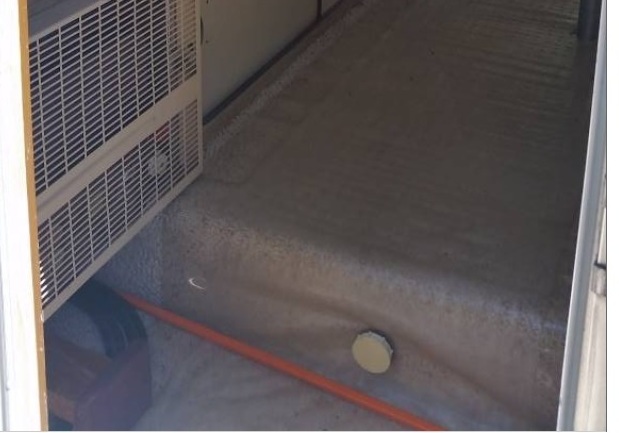
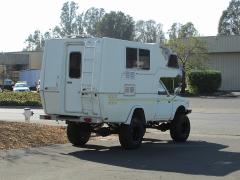
 Not a stock rig, conversion by Yodaman in N. Cal. Not mine, owner unknown. I offered to buy it 10 yrs ago. Previous owners couldn't part with it. It was parked for years w/roof-hatch open. Interior is currently pending total re-do. Totally hosed. TG
 -
 Conversion by Yodaman in N. Cal, owner unknown.
 -
 Conversion by Yodaman in N. Cal, owner unknown
 -
-
-
-
So my buddy paid homage to the staple god and finally removed all the carpeting from around the "lock receiver mounting board".See pix below. Because his '85 SunRader (18'er) has had the oven/stove removed, we could see that the board for the lock receiver is held in place by screws located inside inside of the panel wall to the left side of the oven. (In this inside shot, the bottom screw head is obscured by a plywood shelf the PO installed) Not having an oven in place, I couldn't swear it, but, it might be possible for a nimble person to remove the outside entry light fixture and reach through to access the screw heads instead of having to pull the oven. The screws are 2 1/2" long square socket-head configuration. Hope this helps someone who's working on a similar issue. BR, TG