FredNewell Posted May 19, 2017 Share Posted May 19, 2017 I considering selling my rig, but am seriously considering a diy wheel well repair job and keeping it for another few years. The wood behind the aluminum paneling, just before and after the wheel wells, is rotted. This repair probably is not too difficult, but I'd like to know just what I'm going to see when I start removing the existing siding, in terms of what the framing and wood structure looks like. This would be for the entire wall. By chance is there a photo of the bare "naked" exterior wall? This is a 1984 Dolphin, wood sticks and aluminum siding. Thanks Quote Link to comment Share on other sites More sharing options...
linda s Posted May 20, 2017 Share Posted May 20, 2017 Here scroll down to Dolphinite's pics linda S Quote Link to comment Share on other sites More sharing options...
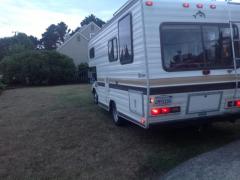
FredNewell Posted August 14, 2017 Author Share Posted August 14, 2017 (edited) Well, after a bit of procrastination (procrastination is a nasty nation) and my trademark analysis paralysis... I did the work on the driver's side. Dolphinite's photos show what I had to do. I did not go back with 3/4" plywood, but used 1/4" primed and painted with house paint to back 3/4" pressure treated (1x4 lumber) and some 1x2 not pressure treated. I pulled the water heater because the wood rot had affected the framing to which the WH is secured. All new and ok now. For tools, I needed the following... 1) a place to work - concrete pad 2) wheelie stool to sit on and scoot around - makes it easier https://www.amazon.com/gp/product/B000COC67E/ref=od_aui_detailpages02?ie=UTF8&psc=1 3) cheap tarp to cover up when away from the job 4) oscillating multi-tool from amazon (WEN brand 25 dollars) https://www.amazon.com/gp/product/B005UKGKYK/ref=oh_aui_detailpage_o00_s00?ie=UTF8&psc=1 5) tape measure and square 6) 2 cheap clamps from Walmart to hold pieces in place. like these...https://www.amazon.com/MegaDeal-Too-5230-Clamp-Spring-opening/dp/B00CPSJCB8/ref=sr_1_7?ie=UTF8&qid=1502738919&sr=8-7&keywords=clamp 7) Gorilla epoxy glue 8) https://www.amazon.com/gp/product/B01BD0B2FC/ref=od_aui_detailpages01?ie=UTF8&psc=1 staple gun to re-install siding. Shoots skinny nails which was handy. Trick and tips... when moving the long pieces of siding, they could flop and bend/crimp... therefore clamp it to a piece of 1x4 lumber to carry... keeps it safe. This was quite educational. Later I think I'll do the bottom edge of the back behind the bumper, then the other side, to include rebuilding the door. Then replace interior floors/subfloor where there is a soft spot.., now that I have the tools and greater confidence. Also had to remove the outer wheel to get working space. Edited August 15, 2017 by FredNewell add 1 sentence Quote Link to comment Share on other sites More sharing options...
Dolphinite no longer here Posted August 15, 2017 Share Posted August 15, 2017 Fred, that's nice work! John Quote Link to comment Share on other sites More sharing options...

Recommended Posts
Join the conversation
You can post now and register later. If you have an account, sign in now to post with your account.