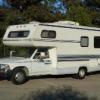
naganthunter Posted July 30, 2016 Share Posted July 30, 2016 Hey All, I've been really, really happy to have found this forum. I haven't asked a lot of questions here as the search feature seems to answer every one I've had! I wanted to share my progress... First of all, when I bought this, I didn't want another project. Unfortunately, it's become one. On it's face, the camper was in good condition when I bought it. I knew that I was going to want to resurface the cabinets and put in a new floor. The prior owner had only had it a couple of months. He'd bought it for the rear dinette setup - but really wanted a u-shape in the back. He ended up finding what he wanted and put this one up for sale. When I went to buy this one, he had two sitting side-by-side. I guess what I'm trying to get at is that the prior owner couldn't have known what lurked below - neither did I. When I got it home, the very first thing that happened was that the roof leaked - badly. It destroyed the ceiling inside of the camper. I had inspected the roof when I went to buy the camper. It had a lot of sealant on it, but I didn't see any water damage inside. I figured that I could get around to fixing that at my leisure. That ended up turning into a 2 month job where I replaced all of the roof components with the exception of the AC. I scraped, sanded, cleaned, and eternabonded the roof a la Back East Don's posts. What a pain in the neck. I still need to get the coolseal up there, but I have been busy on the inside since I rendered it watertight. When I started to pull up the flooring, I found that there had been a lot of other water intrusion. That required a whole lot of dryrot removal and rebuilding. I decided that since I needed to rip everything out of the rear of the camper to fix the problems that I'd just build in a u-shaped dinette as it would be a better fit for my family. So - here are the photos. I love looking at photos of people's work. My wife calls it my "porn." BEFORE: As you can see, it looks pretty nice. The cabinets however had been slopped with polyurethane and needed fixing. The floor was peel and stick parquet - and I am not a fan of parquet. WORK IN PROGRESS: I didn't take any photos of the roof work. But, since I had all of the roof vents off it provided easy access for me to be able to run wires for updated electrical, lighting and AV stuff. You can see the wires hanging out of the ceiling. Then I found the rest of the problems on the floor. I found that the battery door on the driver's side and the propane door on the passenger side were the culprits of the leaking in addition to a roof leak that had run down the rear corner on the driver's side. Both of the side doors were poorly installed at the factory. An undetectable leak waiting to happen - and had been happening probably since the mid 90's. Upon discovery, the language may not have been safe for a sailor. Tearing the inside out was not what I had planned to do: After the dryrot removal I had to put in a new floor and built the bottom for the u-shape dinette. I gained a lot of extra storage here. I installed some outdoor speakers and motion sensing porch light: I also installed a microwave over the stove. The camper was wired for one over the sink, but that cabinet is very large and my wife wanted to keep it for kitchen stuff. Happy wife, happy life. The microwave was rewired and installed on the other side: I refinished the cabinets using Rustoleum's Cabinet Transformation product. It was A LOT of work. I am only marginally happy with the results. They look better than they did, but not as good as they should have with the amount of work that went into them. If I had it to do over again, I'd have just used my sprayer with a good paint. I'm also a little concerned with the durability of the product for RV use. I've also installed a headliner on the ceiling after repairing the damage from the leak. I've still got a lot of work to do, but I see the light at the end of the tunnel. I quit counting how much money I've spent as I think it would make me ill. My wife and I are dying to get it back out on the road. All of the help I've found here has gone a long way toward getting it finished, so thank you all!! Quote Link to comment Share on other sites More sharing options...
jjrbus Posted July 30, 2016 Share Posted July 30, 2016 Welcome and thanks for the porn. When I brought my toy home I knew it needed lots of work. There was almost no rot and no rust, but it was still in need of too much. I should have dropped it off at the junk yard on the way home. 3 out of 4 jobs turn into a nightmare. I just spent probably 10 hours between internet and trying to track down a 120 electrical issue that was a simple bad adapter, that tested good. Every part that I have touched has broken. There were a few good part's but I have managed to break one of them I could sit around and watch soap operas all day or maybe hang around a bar. Golf? No I dislike golf and am not a fisherman. The Toy keeps me busy and out of trouble, keeps the mind occupied and working, keep's me moving (at my age if you stop moving they bury you) Taking into consideration that a new class C is minimum $60,000 and the first couple years depreciation is 25%, I will have far less than the first years depreciation in my Toy. At this point I am looking for the most expensive redo of a Toy ever award. Good luck Jim Quote Link to comment Share on other sites More sharing options...
naganthunter Posted July 30, 2016 Author Share Posted July 30, 2016 18 minutes ago, jjrbus said: Taking into consideration that a new class C is minimum $60,000 and the first couple years depreciation is 25%, I will have far less than the first years depreciation in my Toy. At this point I am looking for the most expensive redo of a Toy ever award Perspective. Quote Link to comment Share on other sites More sharing options...
linda s Posted July 30, 2016 Share Posted July 30, 2016 Looks like your doing a beautiful job and I like the cabinets. I didn't know Dolphin made that floor plan. I have been in a Winnebago with the same floor plan and I liked it a lot. Seemed bigger inside Linda S Quote Link to comment Share on other sites More sharing options...
naganthunter Posted July 30, 2016 Author Share Posted July 30, 2016 2 hours ago, linda s said: Looks like your doing a beautiful job and I like the cabinets. I didn't know Dolphin made that floor plan. I have been in a Winnebago with the same floor plan and I liked it a lot. Seemed bigger inside Linda S Thanks so much! Like I said, I don't know that I would use that product for the cabinets if I had it to do over again. We'll see how well the product holds up to the rigors of camping. We really like the floor plan. The u-shape that I've put in will be much more comfortable for the kids while we're driving down the road, and it will make for more comfortable sleeping as well. Quote Link to comment Share on other sites More sharing options...

Recommended Posts
Join the conversation
You can post now and register later. If you have an account, sign in now to post with your account.