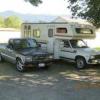
Wapiti Posted May 6, 2014 Share Posted May 6, 2014 Renovating my 82 Dolphin this summer and could use some advice on how to repair the rot in the cab over portion. ive rebuild the entry step and re welded the aluminum door frame. took out black water tank for new straps and all new fittings/ grommets. It all looks like really simple to repair but leme know what to look out for ! and what to replace wile your tearing it apart and have things exposed. mods or upgrades ! Quote Link to comment Share on other sites More sharing options...
FredNewell Posted May 6, 2014 Share Posted May 6, 2014 Someone with the experience will chime in pretty soon... If I may ask, what symptom prompted you to "dig in"? Quote Link to comment Share on other sites More sharing options...
telluride36 Posted May 11, 2014 Share Posted May 11, 2014 Wow, that brings back some bad memories. I did this last year. had to replace all of the 1 x 2s and cover with new paneling. I don't remember where, but there is detailed instructions on this forum. It was a lot of work but now the RV is awesome. Keep working and you will love it. Quote Link to comment Share on other sites More sharing options...
chefdave Posted May 16, 2014 Share Posted May 16, 2014 Hi i have this joyous job. replacing my frame work with waterproofed 2x1 then painted with a thinned out marine varnish to seal wood. then painted with a non thinned varnish. going to do the same with plywood sheeting or go extra expense and get marine ply. still using mine as a dd. Its not a scary job as i have built stud walls in houses. Quote Link to comment Share on other sites More sharing options...
Derek up North Posted May 16, 2014 Share Posted May 16, 2014 What's 'waterproofed' 1x2? Could it be what we call 'pressure treated' wood? Quote Link to comment Share on other sites More sharing options...
zero Posted May 16, 2014 Share Posted May 16, 2014 Renovating my 82 Dolphin this summer and could use some advice on how to repair the rot in the cab over portion. ive rebuild the entry step and re welded the aluminum door frame. took out black water tank for new straps and all new fittings/ grommets. It all looks like really simple to repair but leme know what to look out for ! and what to replace wile your tearing it apart and have things exposed. mods or upgrades ! I have the exact same problem with my 1988 Mini-Cruiser. I'm taking a trip next week and soon after will be tearing the front apart (before the cab-over bed falls through). I suspect the main problem will be deciding where to stop. All these RVs have unvented walls so when any moisture gets in - any wood present rots. Not built like the framed structure in a house. Very different. It looks to me like most of the water got into the cab via the front marker lights - but who knows? All that matters now is it's rotted and sagging. I know the MInicruiser has at least one metal bar coming across so I have something solid to attach to. I'm not sure about the Dolphin. You've got to find something solid somewhere to start attaching new wood. When it comes to choice of wood - I'd never use anything from places like Home Depot. Marine-grade plywood is MUCH stronger and some versions are much more rot resistant -especially the treated Doug Fir plywood. For wood stips - I'd only use pressure-treated southern yellow pine - or - white oak that is naturally rot resistant. One problem with pressure treated though. If you use - find out what version it is Much of stuff is ACQ, MCA or Copper Azole treated and it cannot be allowed to contact aluminum or plain steel hardware. The older CCA stuff is much safer to use but hard to find in some areas. White Oak is the safest IF you can find it. NOT Red Oak though. Quote Link to comment Share on other sites More sharing options...
zero Posted May 16, 2014 Share Posted May 16, 2014 Here's is one person's pictorial where they worked on Dolphin cab rot. I know for sure he picked the wrong wood to do it. Poplar is one of the fastest rotting and weakest woods around a real bad choice. Quote Link to comment Share on other sites More sharing options...
chefdave Posted May 16, 2014 Share Posted May 16, 2014 Hi derek yes thats correct. wood has a green tint after treatment. Quote Link to comment Share on other sites More sharing options...
Wapiti Posted May 18, 2014 Author Share Posted May 18, 2014 here are some project pics. on the cabover so far. pic of the step and filler hose too that originally got me started on all this. 2 miles down the road right after i bought it Im filling the tank and gas is leaking everywhere under the home ! old pitted rubber filler neck was the source of the leak, had to rip open some plywood to get at it, simple repair. cabover is a little more involved tho. putting the black water tank together today to re mount it w/ new straps & fittings ! Quote Link to comment Share on other sites More sharing options...
Wapiti Posted May 18, 2014 Author Share Posted May 18, 2014 more pic Quote Link to comment Share on other sites More sharing options...
jerlwe Posted May 26, 2014 Share Posted May 26, 2014 Thank you for posting your progress pictures! It looks like you are getting everything done and doing it the right way. It looks like I'll be doing a similar project to mine as well, but seeing your work gives me confidence to just jump in and get after it. Quote Link to comment Share on other sites More sharing options...
Wapiti Posted June 29, 2014 Author Share Posted June 29, 2014 gorilla glue and pocket screws i think gives you the best hold when scabbin into older wood sections. next i got to sheet it and rebuild the cabover bed floor, windows etc. Quote Link to comment Share on other sites More sharing options...
Wapiti Posted November 17, 2014 Author Share Posted November 17, 2014 Here are some progress pictures from the weekend. 500 series - Cab over floor replaced - demo out bathroom & black water tank, cap lines to bathroom fixtures - demo upper cabinets & closet that sits over the water heater - removed celling and insulation - installed 3 roof supports 3 x 1 1/2 aluminum channel thick gauge ($10 a foot !) ow - one new wood support to replace cracked saggy 1 x 2 - blocking throughout for rigidity and to take the dips out of the roof that hold water - relocate electrical out of closet wall into smaller chase roof has improved drastically after I installed the aluminum supports. Credit goes to Bunneys and his 89 Dolphin Saggy Roof Repair. Thank you for that posting ! helped me figure out how to get it done Going to relocated shower for outdoor use at some point & leaving toilet out for this dolphin, i like the idea of no black water tank stank still trying to deiced what to do with extra room inside, going to do more storage and enlarge countertop space. maybe a little desk area to sit at. What would u do with more room ? Quote Link to comment Share on other sites More sharing options...
Wapiti Posted November 17, 2014 Author Share Posted November 17, 2014 here are some pics from the day http://s1379.photobucket.com/user/Andrew_Jahnke/library/ Quote Link to comment Share on other sites More sharing options...
jdfrost64 Posted November 18, 2014 Share Posted November 18, 2014 I was lucky my toy was mostly framed aluminum. Quote Link to comment Share on other sites More sharing options...
Wapiti Posted December 22, 2014 Author Share Posted December 22, 2014 Here are some photos of the progress with the dolphin. ceiling and recessed lights are in and the first wall panel! with the bunk light lights are led and will be wired to in wall dimmer, 3 for front & 3 for rear http://s1379.photobucket.com/user/Andrew_Jahnke/slideshow/ Quote Link to comment Share on other sites More sharing options...
kayakthecoast Posted December 27, 2014 Share Posted December 27, 2014 Why not epoxy over all your wood, that would give it a nice water proof finish before you put your interior panels in. Just an idea. Quote Link to comment Share on other sites More sharing options...
Wapiti Posted December 28, 2014 Author Share Posted December 28, 2014 i have not worked much with epoxy on wood, so i guess it never crossed my mind. Im down with the concept for longevity of use in materials. wall panels will be painted for interior sealant / protection. The ceiling was pre finished clear birch. trying to make it functional and finish it soon, so the family can enjoy it. Quote Link to comment Share on other sites More sharing options...
Wapiti Posted March 19, 2015 Author Share Posted March 19, 2015 here are some pic update on the project. the interior is all skinned up and countertop cut out. I have the desk and closet framed out. I got tired of carpentry so i went into the engine bay. Removed all the smog equipment on the 22r and got the LCE block off plate kit on there. pulled out the carb and replaced it with a weber while cleaning everything in the process. Removed electric choke and put a manual one in. pulled the valve cover and found an amazingly fresh cam and rocker assembly all within spec. Re torqued head bolts according to the FSM. I discovered that my engine is a true 1982 !!!! Last year toyota put on the double timing sprocket and chain with the metal guides !!! YAYA here are all the pics !!! http://s1379.photobucket.com/user/Andrew_Jahnke/library/ Quote Link to comment Share on other sites More sharing options...
shibs Posted May 10, 2015 Share Posted May 10, 2015 Why not epoxy over all your wood, that would give it a nice water proof finish before you put your interior panels in. Just an idea. Not to critic the ops build, but I have no experience in laying glass, I was researching how boat builders protect the wood. putting on epoxy as suggested above does the job. I also read that you can apply water based water proofing to the wood first on all sides to protect it. Any staples/screws etc will cause the wood to rot that much faster as it will wick in moisture. just FYI... Quote Link to comment Share on other sites More sharing options...

Recommended Posts
Join the conversation
You can post now and register later. If you have an account, sign in now to post with your account.