bajadulce Posted February 15, 2011 Author Share Posted February 15, 2011 That's a fun idea. The hatch doesn't really pop straight up, that was a bit misleading. Instead it will hinge from the front and lift in the rear. The canvas is this neat fabric that has a perforation pattern (screen). The rear of the hatch will probably only lift a foot or two and so the only view out the "back" would be of the sloped front portion of the roof. Unless the hatch is removed completely or hinges from the back (suicide door!!!), there's still no "forward" looking views other than the window in the pass through area. Quote Link to comment Share on other sites More sharing options...
flatspin Posted February 19, 2011 Share Posted February 19, 2011 That's a fun idea. The hatch doesn't really pop straight up, that was a bit misleading. Instead it will hinge from the front and lift in the rear. The canvas is this neat fabric that has a perforation pattern (screen). The rear of the hatch will probably only lift a foot or two and so the only view out the "back" would be of the sloped front portion of the roof. Unless the hatch is removed completely or hinges from the back (suicide door!!!), there's still no "forward" looking views other than the window in the pass through area. Baja, that front pop-top is an awesome upgrade. We have a traditional crank-vent up there, which is certainly nice for light and air, but adding space above the bunk is brilliant. If I can figure out how to spend less time on 757s I think it is time to start a more aggressive effort on our rig . Thanks for the continuing updates. I love what you're doing, as well as the photos and descriptions. Inspirational and educational. Keep em coming! andrew Quote Link to comment Share on other sites More sharing options...
bajadulce Posted March 3, 2011 Author Share Posted March 3, 2011 Thnx Andy. You have a bit more artistic talent than I do and wish I had some of your flair. Me, I just grab whatever material jumps out at me or is laying around. If I can figure out how to spend less time on 757s I think it is time to start a more aggressive effort on our rig??? Commercial Jets?Good luck w/ your project. This one has been time consuming only because somehow other projects have stolen my time. I've missed out on a lot of good camping, but hopefully it will be all worth it in the end. This brings up a really good point tho. It can be hard sometimes to refrain from spending too much time on any particular stage of the fabrication. The end goal is a camper. This is never meant to be a show car. It's intended purpose is to get somewhere, get scratched, banged up, and fully used and abused. UP NEXT: Interior Cabinetry design/layout! I've only had 2 years to think about it! Quote Link to comment Share on other sites More sharing options...
Galvanized Knight Posted March 3, 2011 Share Posted March 3, 2011 UP NEXT: Interior Cabinetry design/layout! I've only had 2 years to think about it! Looks like we are at the same stage. What kind of designs have you come up with? Last sunday I banged up a quick mock up out of 2x2 and osb to get a real feel of the space. I am hoping on going camping for 1 night this weekend with my girlfriend to see how it is and get her input. What are you using for materials? Do you have any drawing of the design you can post. Your super modded sunraider is looking sweet ! Thanks Lance Quote Link to comment Share on other sites More sharing options...
flatspin Posted March 4, 2011 Share Posted March 4, 2011 Artistic talent is definitely subjective. I really love the construction and restoration process, and waking up someplace spectacular in my own bed ain't half bad either! Flair, maybe. But I'm not quite ready to start gluing star wars action figures to the front fenders. at least not yet! i'm on 757s almost every week so far this year courtesy of Delta... job in Florida, house in Ca... and after all the primping and painting i'm done, now i'm thinking hard about redoing most of the interior cabinetry. do i really want a full standup shower? or could i reclaim that upper space and hide the toilet under a bench seat... the mind wanders. before that, an April drive up to Yosemite is in the cards. After I get the refer fixed. Maybe I'll have some freshly baked scones on that trip myself. Thanks for leading the way! -andrew Quote Link to comment Share on other sites More sharing options...
bajadulce Posted March 6, 2011 Author Share Posted March 6, 2011 What are you using for materials (cabinetry)? Do you have any drawing of the design you can post.Saw your OSB mock up and drawings and that's a good idea (looks like a winning layout plan too btw). I might do some drawings as well, but this is the 2nd go around with the interior and pretty much know what worked last time. As for materials, obviously the lighter the weight the better, but it has to hold up too. Costs are a big factor as well. The benches will be made of 1/2" standard birch cabinetry plywood. Probably 2 sheets square footage estimate all together. The upper cabinetry is probably where some creative use of lightweight materials would benefit the most but prob will use a combination of 1/4" and 1/2" plywood. Might experiment with some different ideas. ..I'm thinking hard about redoing most of the interior cabinetry. do i really want a full standup shower? or could i reclaim that upper space and hide the toilet under a bench seat... the mind wanders.before that, an April drive up to Yosemite is in the cards. After I get the refer fixed.Well your camper is 21 ft right? I do like the idea of reclaiming your shower closet regardless. What's wrong with taking a shower outside?I read about your fridge leaking and you might look into replacing it with a 12v marine one. (you'll probably need about 75-100 watts of solar for it to be 100% standalone tho). Well gluck w/ remodeling your interior. I enjoy reading your blog a lot. Quote Link to comment Share on other sites More sharing options...
flatspin Posted March 7, 2011 Share Posted March 7, 2011 Hey, I've used my furnace before. I was ready to tear it out when I first started, but boy that came in handy on the CA coast during a storm. It stays . I was thinking of keeping a shower pan under the toilet, and just using some ingenuity to hang a wrap around curtain to form a standup shower in the same spot. Something that could get hidden other times. An outside shower is AOK for me. I'd have to convince some other family members The idea of a cooler-style fridge is really compelling. Even though it would require me developing some significant cabinetry skills, I could probably work-in a bigger fridge and get back more seating space and hip room. And i totally agree on the stove. My stove sits over the biggest open space on that side of the rig. Beneath it is an impossible-to-access hatch that is a passthrough to the utility box where I keep all my basics for fresh water, tools, etc. As i pull things together, that utility box will get a slide-out and I think I could put in a really nice bank of drawers above it. It is a huge space. It is time for the sketchpad. I may have to go with a new cooling unit on the dometic for now, since we have summer vacation plans in the rig... but I have a 30 year old Delta table saw in the workshop that is looking for a project. Thanks Baja. -andrew Quote Link to comment Share on other sites More sharing options...
bajadulce Posted March 7, 2011 Author Share Posted March 7, 2011 I was thinking of keeping a shower pan under the toilet, and just using some ingenuity to hang a wrap around curtain to form a standup shower in the same spot. Something that could get hidden other times.There's a private builder in the area who has something similar in the XP Camper. The XP is a great project and he has some very good ideas. The camper is a bit pricey, but that's how it goes when dealing with this type of customization and quality. One thing he uses is a shower curtain/toilet similar to what you describe. Here is a link: xp camper interior slideshow Might be of some inspiration to you.It is time for the sketchpad (in reference to stove space redesign etc)Sounds like fun. gl Quote Link to comment Share on other sites More sharing options...
flatspin Posted March 8, 2011 Share Posted March 8, 2011 There's a private builder in the area who has something similar in the XP Camper. The XP is a great project and he has some very good ideas. The camper is a bit pricey, but that's how it goes when dealing with this type of customization and quality. One thing he uses is a shower curtain/toilet similar to what you describe. Here is a link: xp camper interior slideshow Might be of some inspiration to you. I really like the clean lines of this interior. A lot. Lots of open space inside. My Fall 2011 plans are starting to fall into place! andrew Quote Link to comment Share on other sites More sharing options...
bajadulce Posted March 28, 2011 Author Share Posted March 28, 2011 My wheel fenders didn't last a year! Kinda knew this would happen and watched them get progressively worse. They were intended to be templates for some eventual dplate aluminum, but I guess that will happen sooner now. @ camper progress: Finished sanding/prepping/painting the interior walls. Looking to weigh the rig sometime this month before starting cabinetry just to have a log to keep track of the different component weights. Before I can take the rig on the road, I need to add some mirrors. Was thinking of adding them to the camper (overhead cab) rather than the truck? Possibly even recycling the old sunrader ones. Would be nice if the mirrors could swing in/fold up when not in use. Thoughts? Quote Link to comment Share on other sites More sharing options...
Derek up North Posted March 28, 2011 Share Posted March 28, 2011 Some mirrors like these? http://s818.photobucket.com/albums/zz101/moterhed1/1938%20Ford%20Street%20Rod%20MH%20Custom/?action=view¤t=008.jpg Quote Link to comment Share on other sites More sharing options...
bajadulce Posted March 28, 2011 Author Share Posted March 28, 2011 Ya that is how I envisioned mounting it. How do you find this stuff? My only concern is that the mirror might not be very steady and end up being very blurry from vibration? Guess the only way to find out is to actually do it and experiment. Would be nice if the mirror could be folded or removed out of the way while not in use. Quote Link to comment Share on other sites More sharing options...
Derek up North Posted March 28, 2011 Share Posted March 28, 2011 Too much time surfing. And a bit of luck thrown in too. Check out the rest of the pictures! http://cgi.ebay.com/ebaymotors/ws/eBayISAPI.dll?ViewItem&item=120686578049&viewitem=&sspagename=STRK%3AMEWAX%3AIT#ht_16861wt_1165 Quote Link to comment Share on other sites More sharing options...
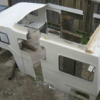
bajadulce Posted October 21, 2011 Author Share Posted October 21, 2011 Progress report/update for my internet social network of family and friends I went ahead and mounted the mirrors on the shell in a similar fashion using some leftover abs lol. Was able to use the old sunrader mirrors and so this cost about 2 bucks. Haven't really tried them out yet so not sure how much vibrating they do. They easily come off by just removing the pin/bolt. Went a little crazy with the leftover abs and fabricated a gutter for above my door... Got the interior built over the summer. Pretty much same floorplan as first go around minus the 2' of course. This time around tho did a better job keeping the weight down by using 1/4" for all the cabinet doors and other areas and 1/2" for tabletops + benches and drawers. Used about 1 full sheet of both sizes for cabinetry. table comes apart if extra space is needed. 3" ABS leg with an ABS toilet flange screwed to underside. Gel battery stored on the floor in the step cabinets to the bunk area (old pass through) thnx to the extra room resulting from moving the door. Same dowel to run down the 3 drawer handles to keep the drawers locked in place while in transit. Hey it's cheap and it worked on last camper over miles and miles of bumpy dirt roads without any issues. Countertop is some light vinyl floor tiles that I added some grout to. Looks like fake tile. Was cheapest thing that jumped out at me. turned out nice. got around to building the aluminum dplate wheel wells from the plywood mockups Would like to implement a way to compress the rear leaf springs so that I can backup the truck without having to jack up the camper so high. As it is, the flatbed of the truck without any cargo nor metal bed is as you can imagine very high in the rear. Here's a picture of how high camper has to be jacked up in order to slip the truck underneath it. Quote Link to comment Share on other sites More sharing options...
WME Posted October 21, 2011 Share Posted October 21, 2011 Easy level. Remove a bunch of the leafs in the spring and install HD airbags. Remove enough leafs so that it sits level with the camper off the truck and the truck empty. As you add load just add air to the bags. There 5000lb capacity airbags available. If your feeling rich and lazy, add an onboard air compressor set up. That would let you play with tire pressure in soft sand too. Quote Link to comment Share on other sites More sharing options...
bajadulce Posted October 21, 2011 Author Share Posted October 21, 2011 Thnx. The airbags seem like a reasonable solution. I don't think I could remove any spring plates tho as this still has the stock ones (maybe 4 total) not like the RV. And how reliable are airbags? Would hate to have my camper be stuck bottomed out somewhere cause an airbag burst. Any ideas on how to safely rig up something that can winch the axle closer to the frame maybe? Even 4-6" would be a big help. Or is this just not feasible? Quote Link to comment Share on other sites More sharing options...
krj Posted October 22, 2011 Share Posted October 22, 2011 Good to see someone is making progress! My project is still in the sad state of 2 pieces and gathering dust. If only someone would pay me to work on my own projects... Air bags are not that expensive. I put Air Lift brand bags on my Tundra for about $260ish? Got them at http://www.suspensionconnection.com/. They've worked great; month and a half in Baja and only had to add air once. I'd recommend them whether you use them for lowering purposes or not. As far as your lowering conundrum goes; you live in Cali, the home of the low-rider, someone in your hood must know how to do it! I'd imagine a good suspension shop could help you out. Look forward to seeing more progress. Baja trip this winter? Kevin Quote Link to comment Share on other sites More sharing options...
WME Posted October 23, 2011 Share Posted October 23, 2011 OK so winch it up then. Its sorta barnyard, but I seen a setup where there was a welded bracket on the diff with a short cable with a loop on it. Ran the cable over a frame mounted pulley. Mounted a electric winch on the back bumper. When things need lowering the dude just hooked the winch hook to the loop and pulled the frame down to the axle. WME Quote Link to comment Share on other sites More sharing options...
bajadulce Posted October 31, 2011 Author Share Posted October 31, 2011 gotta love those barnyard mechanics/engineers. I found a turnbuckle laying around the house and for fun rigged something to see how it might work out. I was only able to lower the bed of the truck by about 4" (which is actually quite substantial in terms of jacking up camper). Guess will have to live with jacking up the camper the extra 1/2 foot for now till further investigation. The vehicle passed its smog test Took it for a little spin up the mountain for a test. Truck definitely drives differently with the camper shell on ha ha. Need to concentrate on beefing up the stock suspension of vehicle now before doing any kind of trip. a forum member sent a pm describing how all the pictures on this thread weren't displaying (site they were hosted on went belly up) So spent some time and uploaded all of them to Greg's site. Quote Link to comment Share on other sites More sharing options...
Dolphinite no longer here Posted October 31, 2011 Share Posted October 31, 2011 Bajadulce- Those rear windows in the camper look very nice! They look like there's no frame around them. Is that so? How did you do that? John Quote Link to comment Share on other sites More sharing options...
bajadulce Posted November 1, 2011 Author Share Posted November 1, 2011 John, the interior FRP walls are fused flush to the window frames with fiberglass tape then sanded, patched, painted etc. There are some images of the tape/walls before painting in an earlier post you can reference. Rigid insulation + FRP just happen to match the thickness of the sunrader's window frames in my instance. The interior wall to window assembly is thus pretty permanent so: The window frames themselves are actually glassed to the camper shell - Both on the inside and out. I'm sure there a lot of readers shaking their heads at this idea, but it has worked before on other older campers in years past and I didn't want to deal with maintaining seals. The manufacturer didn't do such a great job cutting out windows very precisely either and so permanently glassing in the frames probably helps in this regard too. In theory the frames should be 100% waterproof. However, YES, the rubber "seals" between the glass and frames are thus under some stress/movement due to the fact the frames don't have anywhere to go for the nominal contraction and expansion from heat/cold such as they would with butyl tape. The nightmare of course would be if a window should happen to get shattered. The bodywork needed to get a nice clean radius of fiberglass/bondo to the exterior frames without a bunch of unsightly waves is a challenge in itself but is acceptable with a little work. Anywho, I admit it's a bit different and borders on being called a "hack job" and wouldn't recommend doing this without considering the consequences, but these motorhomes aren't made of gold like some ppl seem to think and its ok to take a grinder to an aluminum window frame so that fiberglass can stick to it if that's your urge. Just hope the antique motorhome conservatory doesn't come after you! Quote Link to comment Share on other sites More sharing options...
bajadulce Posted November 3, 2011 Author Share Posted November 3, 2011 I drove the camper to Watsonville to a commercial scale today and then about 70 miles after that on bumpy back streets, hills, and back home on the freeway cruising @ 60mph in 5th gear. The camper is for the most part fully loaded with all the pots, pans, and misc camp gear. It weighed in at an alarming 4750# including myself @ 185# +/- 15# . Probably about 400-800 more pounds of food, passenger, and additional misc gear to go into the rig bringing it close to 6000# for any extended travel. Which is about 2,000 more pounds than I was hoping for (dream on - reality check). The spring plates don't look that stressed out, but they are definitely under a load compared to the bare flatbed. The 4 plates aren't "flat" but they certainly don't have that springy arch look to them. I suppose this is normal for trucks with and without loads? The lines of the camper look pretty level and am very content with the current elevations (see attached image). Beefing up the stock 4x4 spring plates seems like the right thing to do (add a leaf), but I am not keen on the idea of the empty flatbed being that much higher than it already is and requiring me to lift my camper higher off the ground. So I bought a set of those firestone airbags online today and will try those out. I'm not trying to raise the car, just want to relieve a little stress on the springs for those bumps and ruts at higher speeds. Is this the right approach? Quote Link to comment Share on other sites More sharing options...
WME Posted November 3, 2011 Share Posted November 3, 2011 Dude ya done good. Gregs 4x4 18ft Sunrader weighed in at 7000lb ready to go. As far as the airbags go, if you "relieve the stress" on the springs you will raise the rear of the MH. Look at some stock Toy trucks and see how the springs arch and how much of a stink bug attitude they have when empty. Level is level so unless you want to do a redesign of the spring mounts you are stuck with what ever arch is in the springs when the truck sits level. The air bags will let you remove some springs for a softer ride empty, then stiffen things up when the camper is on. Quote Link to comment Share on other sites More sharing options...
Dolphinite no longer here Posted November 3, 2011 Share Posted November 3, 2011 Baja- Thanks for the info on the window frames. Your work looks pro and well thought out. So far I haven't been bothered by the antique motorhome collective... John Quote Link to comment Share on other sites More sharing options...
bajadulce Posted November 12, 2011 Author Share Posted November 12, 2011 WME, wow, 7,000 lbs seems like a lot for a mini mhome. I'm literally a ton lighter, but I'm sure we could find 2K#'s worth of camping gear to jam into the rig so I'll have to be extra mindful (especially with the current single wheels). Thnx John. I don't know about professional, but for sure the best I can do on the "cheap". Loaded the truck up the other day with probably a ton of bricks from a fireplace we dismantled. The truck was slammed way more than with the camper haha. Wish I would have took some pics. A friend who lives atop Highway 17 wanted the bricks, so this was a chance to put the truck to an extreme test well loaded beyond anything I would have with the camper on. The V6 did pretty well, but when I tried to push it a little, I could definitely hear some valves banging around and promptly let off. We've been using the truck around the house as a work truck for about a year and a half and have put about 8K more miles on it. It's pretty solid... but ... ??? The last step in this camper project has always been to go through the motor and replace/check anything that could help keep the beast alive without doing a complete rebuild. Unfortunately the truck has 180K miles on it, leaks oil, and is probably a lost cause at this stage in terms of trying to nurse another 50K out of it. Been doing a bit of research on some different engine swaps for the 3.0 for kicks rather than rebuild it (never really wanted a V6) and sounds like I'm pretty stuck with this without a crap load of work and not worth the hassles involved (the 3.4L swap being about the "easiest" swap). Quote Link to comment Share on other sites More sharing options...
WME Posted November 12, 2011 Share Posted November 12, 2011 Have you been following ByronB thread about the Lexus 4.0 L V-8 conversions?? There is some thing to be said for big slow turning engines Quote Link to comment Share on other sites More sharing options...
bajadulce Posted November 14, 2011 Author Share Posted November 14, 2011 Ya, I did read a bit about it, and sounds like the company Bryan works for fabricates some professional adapters for a clean swap. Cool Beans. Looks great and those cars are pretty easy to find too. Sounds like a good swap for those with bigger motorhomes for sure. Myself, I'm really not looking for more power and my V6 is pushing around my custom 4,500 lb 16' Rv just fine from the test drives. The lexus swap however seems like a lot more reliable engine and that would be worth all the effort. Probably would get a little better gas mileage too. One obstacle I've read about the Lexus swap, is that ppl have had to lift their 4x4 platforms a few inches? Which would be the last thing I would want to do in my rig. If anything I feel I need to lower it! I will just have to live with this 3.0 for now and stick to local camping till I can figure what I want to do. To be honest, I'd just as well build a 2nd truck before doing an engine swap. I got airbags installed this weekend and had to do a little modification by cutting some slots in my aluminum fender boxes. Other than that was pretty easy considering there was no camper and the bed of the flatbed could be taken off for its annual coat of paint. They're nice. ~ peace out fellow toyota gypsies and motorheads! Steve Quote Link to comment Share on other sites More sharing options...
WME Posted November 15, 2011 Share Posted November 15, 2011 Sounds like you need to invest in a few gaskets and do a compression check, before you plan the funeral. Quote Link to comment Share on other sites More sharing options...
bajadulce Posted November 15, 2011 Author Share Posted November 15, 2011 You're right W. I need to stop bitchin and just bite the bullet and tighten this up for now. I've just never been a motorhead. Ya, I've done a lot of work on cars, but mostly because I financially had to not because I wanted to. Building campers is fun. Working on cars is not. I bought some plugs, an oilpan gasket, and a filter about 3 months ago. Figured I'd clean it up a bit before showing up to the California Smog Inspection. For whatever reason tho, whenever I open the hood to dive into even this simple project, my enthusiasm lasts about 30 seconds ... and then I promptly close the hood to do this little dance again a week or so later. If this was a 22re, I'd yank it in a heartbeat and rebuild the lower end + heads, clutch, timing chain etc, but just don't have the desire to do such with this 6cyl... guess I'm just whining a bit much here now and will just shut up. *takes a deep breath ... All this 3vze crap can just wait till next year. Quote Link to comment Share on other sites More sharing options...
WME Posted November 16, 2011 Share Posted November 16, 2011 Remember its only 45 days to "next year;. Better get your tools ready Quote Link to comment Share on other sites More sharing options...
bajadulce Posted November 24, 2011 Author Share Posted November 24, 2011 My neighbor says I'll need clearance lights due to the height of camper? I thought clearance lights were needed based off of width? I'm not putting them on regardless until the Highway Patrol makes me if that's the case. @45 days left till 2012: Wow this year flew by. tick tock tick tock Looks like another year goes by without a maiden camping trip in the camper. Oh well... Hasta en 2012! ~ Stay warm Steve Quote Link to comment Share on other sites More sharing options...
Derek up North Posted November 24, 2011 Share Posted November 24, 2011 From a quick Google search, it appears that Clearance Lights are required once the width hits 80". I'm guessing that US and Canadian requirements are the same. http://www.tc.gc.ca/...ailer_e-414.htm I wonder if stick on reflectors in the 'correct' locations might be enough to keep the local constabulary off your case? Not legal, but no extra holes in your shell! Quote Link to comment Share on other sites More sharing options...
bajadulce Posted November 28, 2011 Author Share Posted November 28, 2011 Thnx Derek. Well sounds like I'm illegal if I drive at night only? ... Maybe I'll give it a little thought while on vacation. My camper has 1 single hole (the solar feed). There aren't any vents, trim, front windows, and not a single screw anywhere on the shell. It has sat through 2 winters without even a thought about a potential leak. I sure as heck am not going to drill some holes for some stupid lights... Any suggestions on the rear brake valve? Its designed to work with the load of the camper on/off truck, but now I have airbags? EDIT: there's a new pinned topic in the engine/drivetrain forums regarding the rear brake valve started by twoblocked here: Brakes: Load Sensing Propotional Valve Might be a better place to discuss this question. Quote Link to comment Share on other sites More sharing options...
WME Posted November 28, 2011 Share Posted November 28, 2011 The use of airbags almost completely defeats the load brake valve. I.E. the truck is always level (empty) to the load valve. About all you can do is come up with a two position mount, all the way up when the camper is on and in the normal spot when empty. If your hauling a ton of bricks then it goes up like the camper is on the truck. For the wire put the hole under the cab over. Maybe you can use flat wire inside and bring it out through the solar box to the outside and use more flat wire to go to the lights. www.taperwire.com Quote Link to comment Share on other sites More sharing options...
bajadulce Posted December 1, 2011 Author Share Posted December 1, 2011 Thnx for the taperwire.com link. Interesting stuff and was fun to check out. Passing the wire through the overhead is a good idea too in terms of gaining a little protection from water. Anyone ever own an older ford tuck? I know of a 1966 F250 that's in pristine shape for cheap. I did some investigating and they are about 3.5K #'s w/o the bed... about 500#'s less than my brother-in-laws Mercedes turbo 300SD... just sayin. << Would be fun to build another truck (i.e. backup lol). Funny tho, a 1994 toyota has a larger GVWR. Looks like a flatbed could be made without wheelwells due to the 47" cab to frame height as opposed to my 37" from flatbed deck to cab in my toyota. ~Peace out Toyota hippies and motorheads. Steve Quote Link to comment Share on other sites More sharing options...

Recommended Posts
Join the conversation
You can post now and register later. If you have an account, sign in now to post with your account.