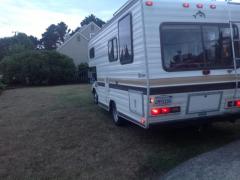
FredNewell Posted June 26, 2017 Share Posted June 26, 2017 I am currently doing an R&R on the rotted wood behind the aluminum skin that is near the wheel wells. In order to my best work, I think I'll have to drop the black water and the grey water tanks. Anybody done this? Any words of wisdom? Thanks. Quote Link to comment Share on other sites More sharing options...
linda s Posted June 26, 2017 Share Posted June 26, 2017 Toilet has to come out and possibly vent pipes to both might need to be cut and then fused back together with a coupling. Not an easy job by any means. Don't know exactly how Dolphin tanks are hung but you might need new metal strapping too. Linda S Quote Link to comment Share on other sites More sharing options...
FredNewell Posted June 26, 2017 Author Share Posted June 26, 2017 That's what I figured. Maybe I will try without dropping thanks. Thanks. Quote Link to comment Share on other sites More sharing options...
FredNewell Posted June 27, 2017 Author Share Posted June 27, 2017 Changed my mind and decided to drop the tanks, if not too difficult. Turns out the straps are fastened at a point that is not accessible from beneath, unless I'm missing something. Looks like they attached the tanks to the chassis, then added the sidewalls later. I'm taking a break to cool off from the frustration, then will take a fresh look later. Quote Link to comment Share on other sites More sharing options...
jjrbus Posted June 27, 2017 Share Posted June 27, 2017 Not an RV expert, but looks like my tanks were installed and then the walls were added. Quote Link to comment Share on other sites More sharing options...
jdfrost64 Posted June 28, 2017 Share Posted June 28, 2017 (edited) all the under floor work is done before the walls are hung.along with plumbing, carpete and bathroom walls .they get as much work done on the inside as they can before the walls are put on Edited June 28, 2017 by jdfrost64 spelling Quote Link to comment Share on other sites More sharing options...
Dolphinite no longer here Posted June 28, 2017 Share Posted June 28, 2017 I did the same job you're doing on my '85 Dolphin a few years back. I didn't have to remove the tanks to fix the rotted wood in the wheel wells. I removed the outside aluminum skin from the side to expose the rot and then was able to repair the wood from the outside. If you go this route (and I think its the best way) you'll be able to see how the tanks are attached and maybe just replace the old strapping one at a time to make sure you don't lose a tank somewhere down the line. The photos show the tanks and strapping but not very close up. The wood wasn't rotten all the way up so I was able to join new wood to the old with epoxy and a 45 degree bevel cut on both pieces. The lattice looking thing is 1/8" door skin that I used to make a template for the new wood. I made the new wood out of solid 3/4" plywood and painted it with epoxy and then grey paint to try and keep water out of the wood. So far so good-no water has gotten at the new wood. When you remove the aluminum siding, handle it very carefully because the longer pieces are flimsy and will bend and kink when you take it off. John Quote Link to comment Share on other sites More sharing options...
FredNewell Posted June 29, 2017 Author Share Posted June 29, 2017 Wow! Thanks Dolphinite. I'll copy your process. FWIW, my straps are welded to the frame. Fred Quote Link to comment Share on other sites More sharing options...

Recommended Posts
Join the conversation
You can post now and register later. If you have an account, sign in now to post with your account.