


256bit
-
Posts
70 -
Joined
-
Last visited
About 256bit

256bit's Achievements
")
Newbie (1/14)
-
Hey Linda! The cabinets are gone. Because of the mold, I stripped the interior down to the fiberglass with the exception of the ceiling. I'll see what I can get done arch wise.
-
Alrighty so, I have read lots and lots of threads here and I'm familiar with the almighty SIP and it's fabled structural integrity. However, my ceiling is far beyond repair. It's mostly delaminated, COVERED in mold (after sitting in washington for only 3 months), and rotting through. Is there an ideal way to replace it? I've already got the rest of the interior stripped down to the fiberglass, if that helps. I would prefer not to add much in the way of thickness, as I already can't stand up in it (6')
-
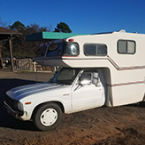
I have an '83 sunrader, rear dinette model. The ceiling is delaminating and the cabinets are falling apart. I want to rebuild the interior, however I don't have the space or time to strip it down to the fiberglass because I live in it full time. As I understand it, the plywood walls and ceiling are glued to the fiberglass. How is it best removed? And what did you replace your walls with? I don't have any skills in carpentry and I'm wondering how long it will take as well. I'm a bit overwhelmed by it all and don't really know where to begin, any suggestions?
-
 On #1 you should check the basics first.. if there's any restriction in the radiator, or if there's any coolant coming out of the weep hole on the water pump On #2, grades can be very deceptive. Get an inclinometer and it may just answer your question. I was having similar concerns until I discovered that I'm just "incline challenged" (sometimes I can't even tell if we're going uphill or downhill) On #3, start with new shocks and an air lift/bags. Shocks are simple and inexpensive. The air kit should be no more than $350ish plus labour if you're not DIYing it.
 -
1/2" rotational play, should have specified. Side to side maybe 1/16. I haven't properly checked front to back by jacking the transmission but otherwise none. Yeah I figure the pinion is too far forward or the ring gear is too far to the side, but I definitely don't know what the hell I'm doing and can't reshim the bearings. The differential is frightening since it's the only part of the driveline that can't be DIY'd and I'm too broke for a gear shop Mostly just needing to know (hoping) the diff isn't going to grenade itself anytime soon. Picking up that slack can't be good for the gears.
-
Because I have the 1 ton axle I'm not sure if the FSM 1/2 ton info is relevant. When I was checking the ujoints due to clunking when shifting, I discovered that I have half an inch of play in my propeller shaft. Anyone know what the maximum spec on the play is? That's probably where all my annoying driveline slack is. I'm thinking the clunking while shifting delio is a worn out rear transmission mount because the shifter pulls really hard to one side if I dump the clutch in first.
-
Shocks are a very universal item and you don't need oem. Just grab a pair of KYB gas-a-just KG5434s or Bilsteins if you're feeling spendy. I run gas-a-justs on mine and it's a very smooth ride.
-
So my previous owner caulked the water heater in, on the backside of the rim with the screws. He caulked it directly to the fiberglass Since it's under the rim, how do I loosen the caulk? By shoving a razor blade in there? I don't want to damage the fiberglass. I thought about coming in from behind it, inside the rv, and hitting it with something like a dead blow hammer, but there isn't enough room.
-
Wow I got shafted. I purchased the front and rear shocks separately, it requires them to be on the same invoice. Nothing a little Photoshop can't fix.
-
The terms and conditions for the rebate say " Submissions postmarked after May 31, 2016 will not be honored"
-
This is what's wrong I bought the tall 84s (with each reflector being 'taller' than wider), that was my problem. I just found the horizontal 84s that you linked to a long time ago, and picked up a pair: http://www.ebay.com/itm/Bargman-Reflect-O-Light-Motorhome-Triple-Tail-Light-RV-Camper-Trailer-30-84-103/322594725139?ssPageName=STRK%3AMEBIDX%3AIT&_trksid=p2057872.m2749.l2649 The ones with the vertical reflectors would require significant material to be cut. The others one should fit with only a quarter inch or so.
-
I've searched the forum and only come up with custom fab stuff. I would go that route but I don't have the time right now. I picked up some bargman 84s but the cutout size is too large. They would require cutting a significant amount of fiberglass off the shell. I don't want to do that. Does anyone know of some tail lights that will fit and don't look terrible, even if I have to make a backplate?
-
What the... How did you clean it?
-
Yeah you really need to be careful with PO info. My PO had rebuilt the head 60,000mi before I bought it, but he trashed it. Milled way too far under minimum spec, no coolant pressure for a long, long time, ran only water in the rad for at least a decade, thought replacing an exhaust stud with RTV was good enough, chowdered oil pump threads with imperial bolts nearly resulting in catastrophic engine failure when all the oil leaked out in a couple of miles.. used rtv on the oil pan gasket.. thought it was a good idea to put a double roller in by milling the drive spline for the oil pump down on the geared end.. totally fucked all of the wiring.. epoxied the front main seal into the oil pump.. I could go on forever. Don't trust a PO. It has taken us thousands of dollars to undo all of the POs mistakes. That doesn't even include the engine. We're only just now starting the process of actually RESTORING the sunrader. Take it as a cautionary tale. Be very careful when dealing with rigs this old and don't believe anything a seller says. But yeah, I'm with @WME (who is 1,000,000x more experienced than I am, for the record) on this one. If the crank hasn't been turned or replaced, the block punched over (necessitating new pistons), new rods, bearings etc at the *very least*, consider it trash. A head can always be rebuilt on the cheap, but once you get into the block dollar signs will flash before your eyes like lightning bolts. And that's before you pay anyone to remove and install the engine if you don't have the hoist, space, and know-how.
-
I could have this totally wrong but I'm just going by what I remember from when we rewired the engine, but there's 3 connections on the starter. Two are 0-4awg wire for pos/neg on the battery, and are secured with nuts. then there's a clip connector for the switch, which gets power when you turn the key to start, which opens the circuit on the starter. If there was anything wrong with the ignition switch itself or the wiring, you would know by bypassing the switch and supplying it with power directly, using a piece of wire and a spade connector. You would want to disconnect the ignition coil to prevent it from turning over. Replacing the starter is a pain (there's one bolt that you can't really get to, need to jack it up waaaay high) so if it was me I'd want to rule that out first. But again, I could be wrong. Someone that's more knowledgeable (like @WME ) can chime in.